Chapter 1. Installation
5
5607;8#6HWXS#+2SWLRQDO,
READ THIS FIRST
The “RS-232/485” connector (also referred to as “COM2”) is factory-configured for
RS-232 communication; this makes it compatible with an RP240 remote operator panel. If
you are not using RS-485 communication, skip this section and proceed to Mounting.
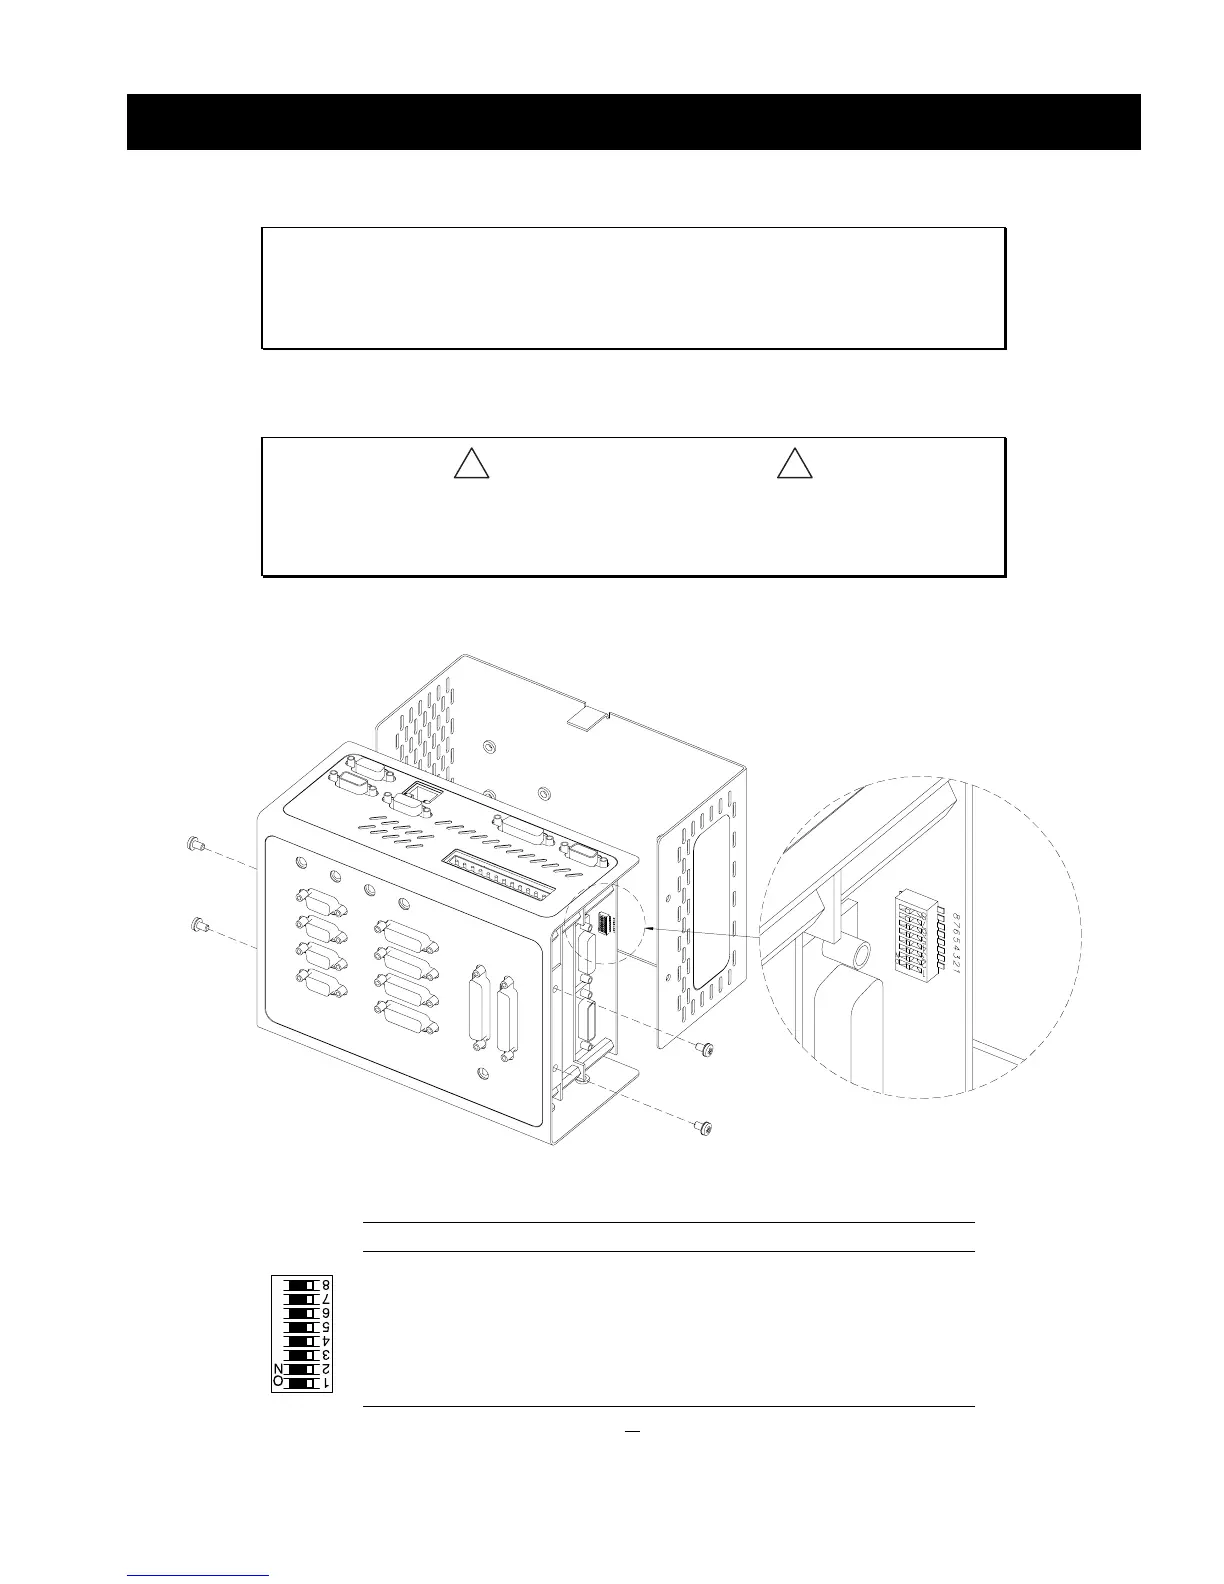
!
CAUTIONS
!
• REMOVE POWER
before removing the 6K’s enclosure.
•
While handling the 6K’s printed circuit assemblies, be sure to observe
proper grounding techniques to prevent electrostatic discharge (ESD).
DIP Switch RS-485 2-Wire RS-485 4-Wire RS-232
8......... 2-wire RS-485
7......... 4-wire RS-485
6.........
reserved
5......... Enable RS-485
4......... 120
Ω
Rx termination resistor
3......... 120
Ω
Tx termination resistor
2......... 681
Ω
Tx+ bias resistor
1......... 681
Ω
Tx- bias resistor
ON
OFF
OFF
ON
ON *
ON *
ON
ON
OFF
ON
OFF
ON
ON
ON
ON
ON
OFF
OFF
OFF
OFF
OFF
OFF
OFF
OFF
* For 2-wire RS-485, use switch #3 or switch #4 for 120
Ω
termination (not both).