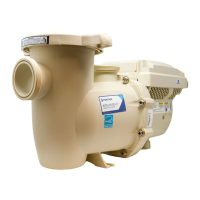
INTELLIPRO
®
Variable Speed Pump Installation and User’s Guide
22
INTELLIPRO
®
Variable Speed Pump Installation and User’s Guide
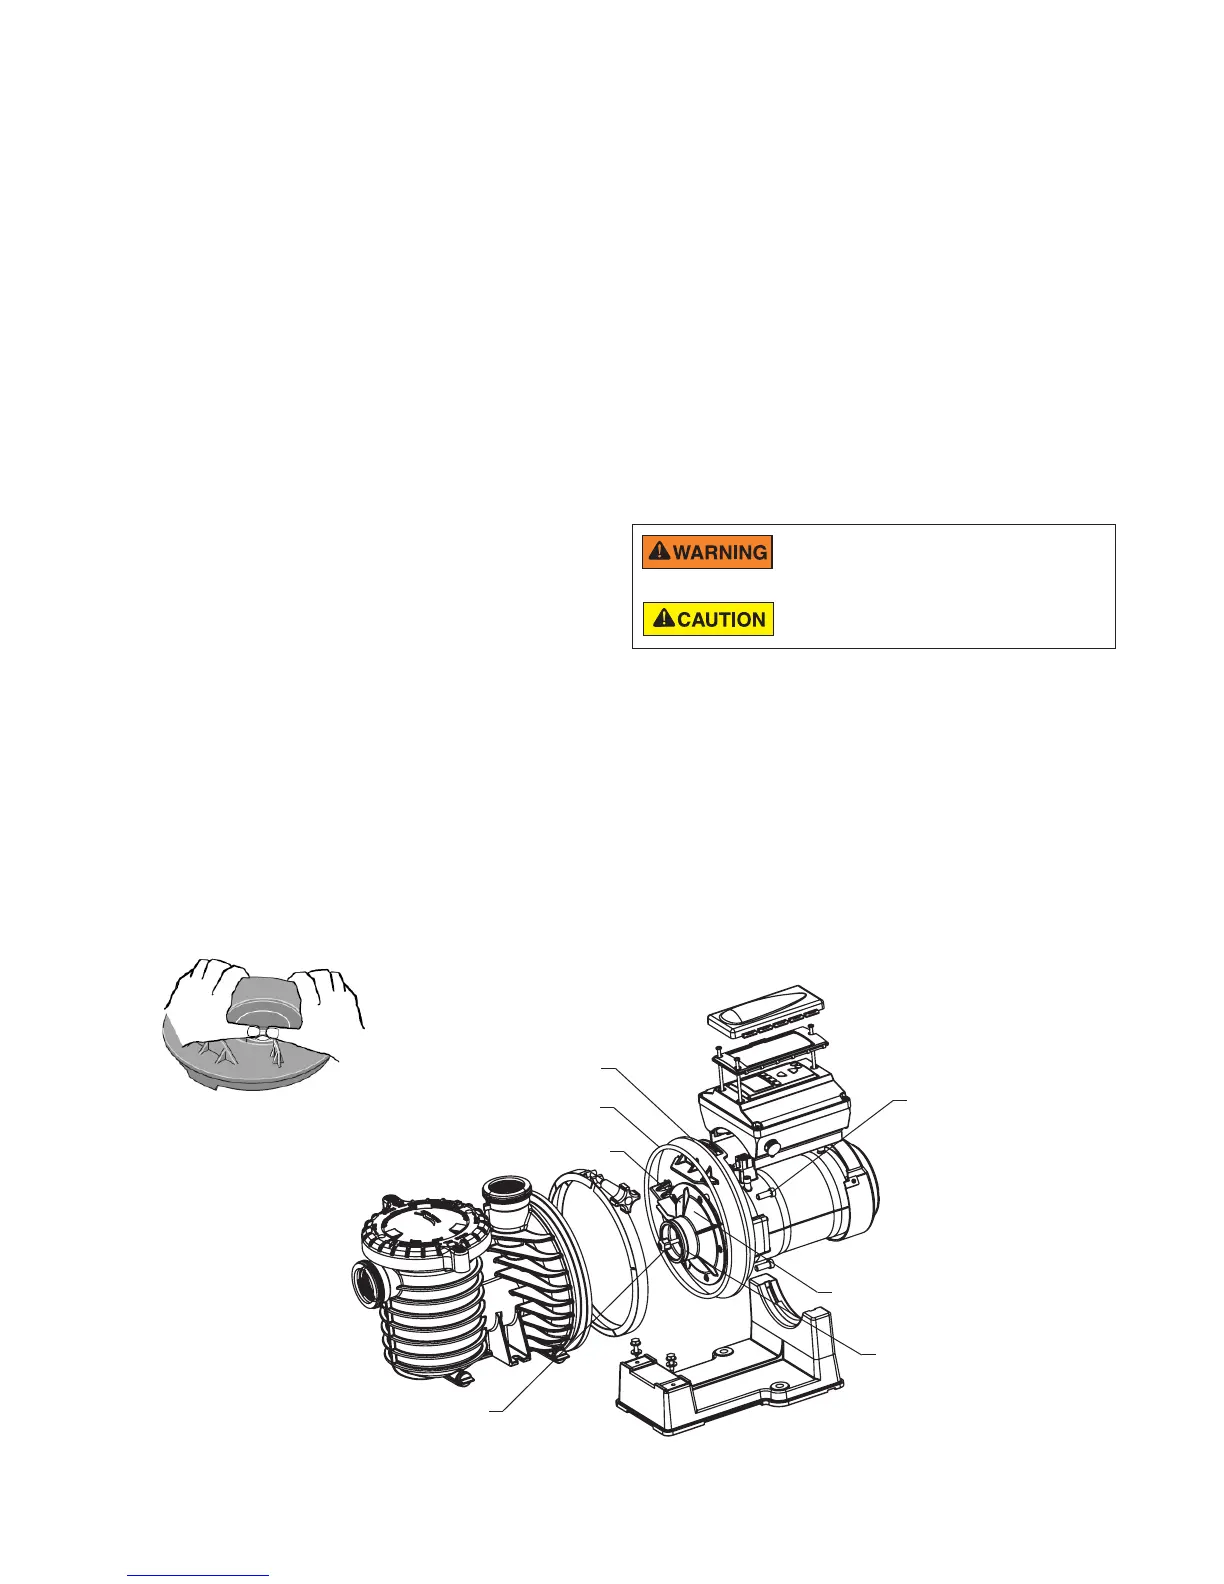
Drive Assembly Removal and Installation
To remove the drive assembly and control panel from
the pump’s motor assembly:
1. DisconnecttheRS-485communicationcablefrom
the pump.
2. Openthecontrolpanelcover.
3. RemovethethreePhillipsheadscrewssecuringthe
drive to the motor assembly as shown.
4. Liftupthedriveassemblyandremoveitfromthe
motor adapter located on top of the motor assembly.
To avoid electrical hazard, do not remove the four
tamper proof screws from the motor assembly.
To avoid dangerous or fatal electrical shock
hazard, switch OFF power to motor before working
on pump or motor.
Continue onto next page
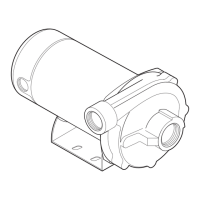
Pump Reassembly/Installing New Seal
1. Cleantheceramicseatofdirt,grease,dust,etc.
Wet the outer edge of the rubber cup on the ceramic
seat with water. Press the ceramic seat into the seal
plate firmly and squarely with finger pressure. See
seal image below.
2. Placeceramicseatfaceuponbenchandreclean
thecavityifseatdoesnotlockproperly.
3. If the seat still does not lock properly, place a
cardboard washer over the polished face and use
apieceof3/4”(19mm)standardpipeforpressing
purposes.
4. Remountsealplateonthemotor.Tightenthebolts
to60-80inch-lbs.(69-92kg/cm)torque.
5. Apply a small amount of liquid detergent to the
inside diameter of rotating half of seal.
6. Slidetherotatingsealmember,polishedfacelast,
over impeller sleeve until the rubber drive ring
contacts the shoulder. Note: Besurenottonickor
scratchthepolishedsealface.Thesealwillleakif
the face is damaged.
7. Screwtheimpellerontotheshaft(clockwise);this
will automatically lock the seal in the seal plate.
Note: Onmodelswithanimpellerscrew:Installthe
impellergasketandlockscrew(left-handthread-
turncounter-clockwise).Torquelockscrewto50-55
inch-lbs.(57.6-63kg/cm).
8. Mountthediffuseronthesealplate.Tightenscrews
to10-14inch-lbs.(11.2-16.1kg/cm)torque.
9. Assemblethemotorandsealplatetothevolute.
Be sure the clamp is properly seated
Note: Clampknobcanbelocatedinanyposition
aroundvolute;ifitismovedafterassembly,tighten
knobwhiletappingaroundclamptoassistsealing.
Donotmoveclampwhilepumpisfullofwater.
10. ReconnecttheRS-485communicationcabletothe
pump.
11. Fillthepumpwithwater.
12. Reinstallthepumplidandplasticclamp.See“Pump
StrainerBasket”onpage20fordetails.
13. Primethepump.See“PrimingthePump,”onpage
4formoreinformation.
Illustrated Parts View
Seal Plate
O-Ring
Diffuser
Impeller Screw
MotorBolts(4x)
Impeller(notshown)
O-Ring
Press Seal into plate firmly
 Loading...