SEBU8603-01 101
Maintenance Section
Fuel System Secondary Filter - Replace
3. Install a suita
ble tube onto drain (3). Open
the drain valve (2). Rotate the drain valve
counterclockwise. Two full turns are required.
Loosen vent sc
rew (1 ).
Note: Two complete rotations of the valve will release
the valve fro
mthefilter element.
4. Allow the fl uid to drain into the container.
5. Engage the threads of the valve into the filter
element and tighten the drain valve by hand
pressure on
ly. Remove the tube and remove the
container.
6. Tighten ve
nt screw securely.
i04380994
Fuel System Secondary Filter -
Replace
Fuel leak ed or spilled onto hot surfaces or elec-
trical components can cause a fire. To help pre-
vent possible injury, turn the start switch off when
changing fuel filters or water separator elements.
Clean up fuel spills immediately.
NOTIC
E
Ensure that the engine is stopped before any servicing
or repair is performed.
Refer to Systems Operation, Testing, and
Adjusting, “Cleanliness of Fuel System
Components” for detailed information on the
standards of cleanliness that must be observed
during ALL work on the fuel system.
Remove the Element
1. Turn the fuel supply valve (if equipped) to the OFF
position before performing this maintenance.
2. Place a suitable container under the fuel filter in
order to catch any fuel that might spill. Clean up
any spilled fuel. Clean the outside body of the filter
assembly.
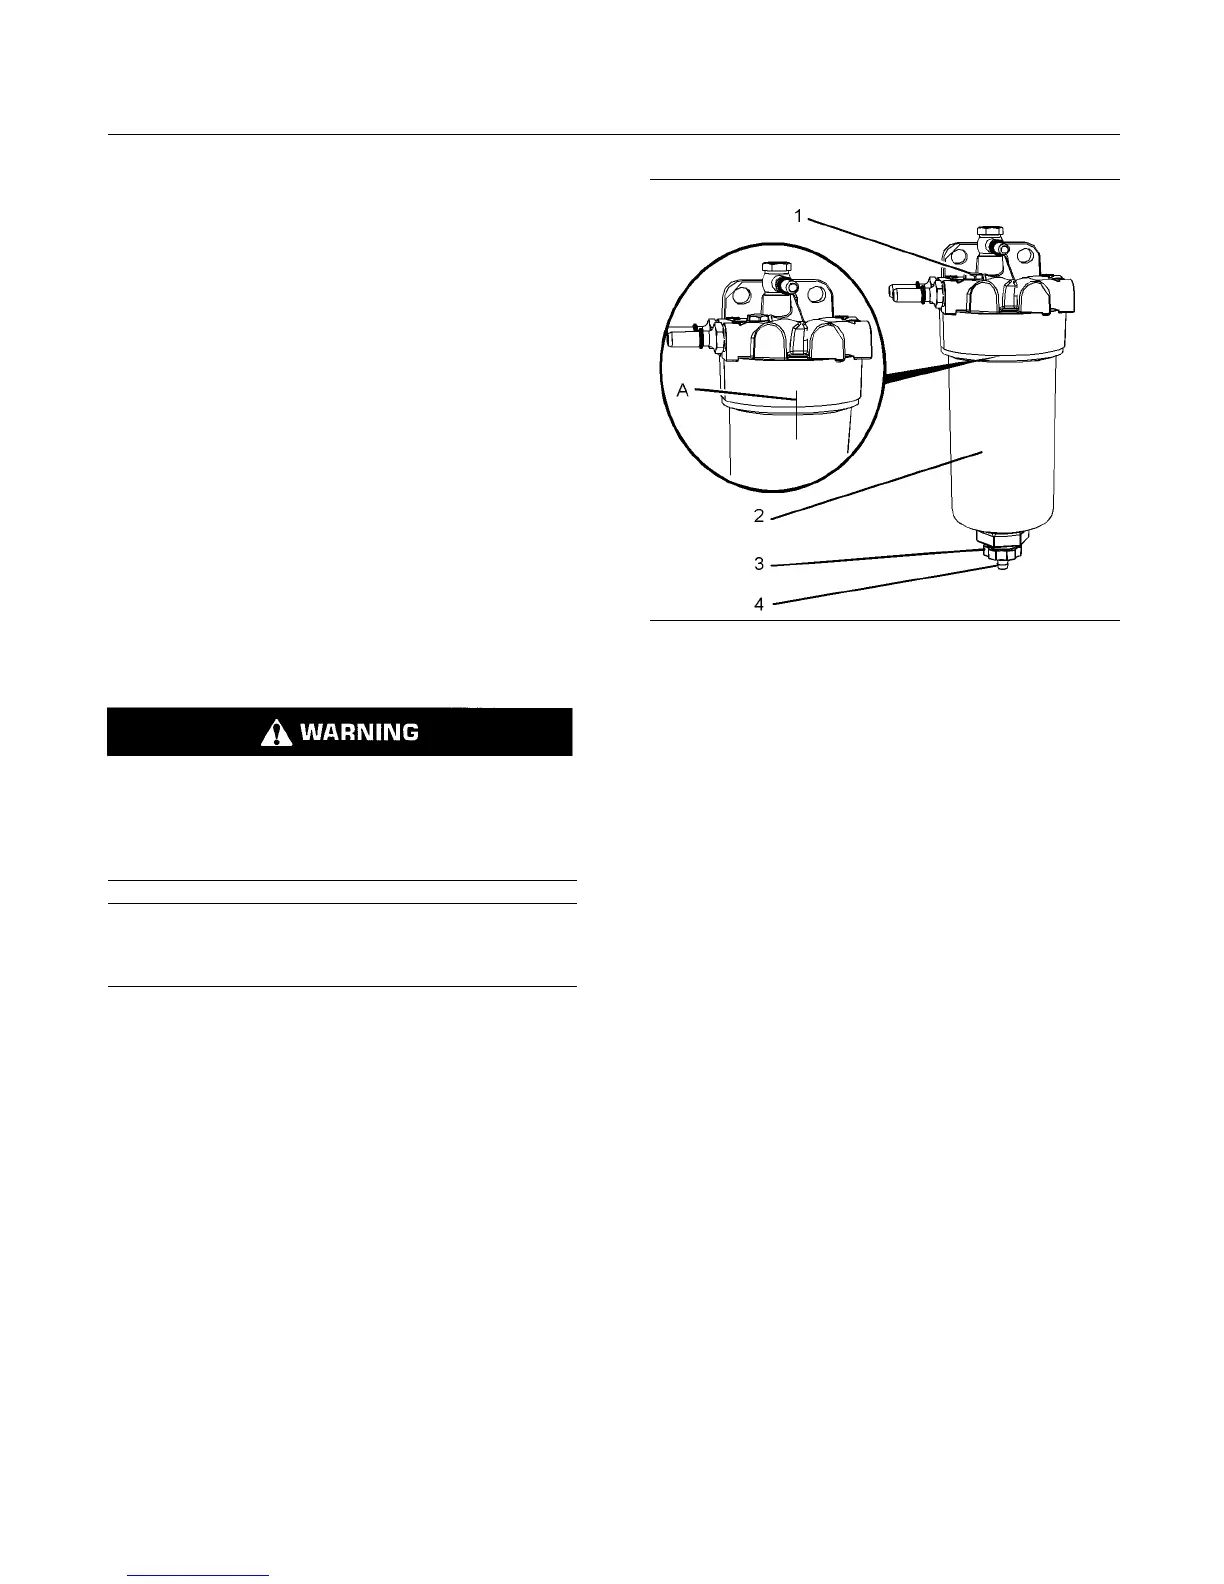
g02546439
Illustration 66
Typical example
3. Make a temporary Mark (A) a cross the filter before
the assembly is removed. Install a suitable tube
onto drain (4). Open the drain valve (3). Rotate
the drain valve counterclockwise. Two full turns
are required. Loosen vent screw (1).
Note: Two complete rotations of the valve will release
the valve from the filter element.
4. Allow the fuel to drain into the container. Remove
the tube and install the valve into the filter element.
Engage the threads of the valve into the filter
element. Do not secure the valve.
5. Tighten the vent screw (1) securely.
6. Remove the filter bowl (2). Rotate the filter
assembly counterclockwise in order to remove the
assembly. Use a suitable tool in order to remove
the filter bowl.