SEBU8603-01 97
Maintenance Section
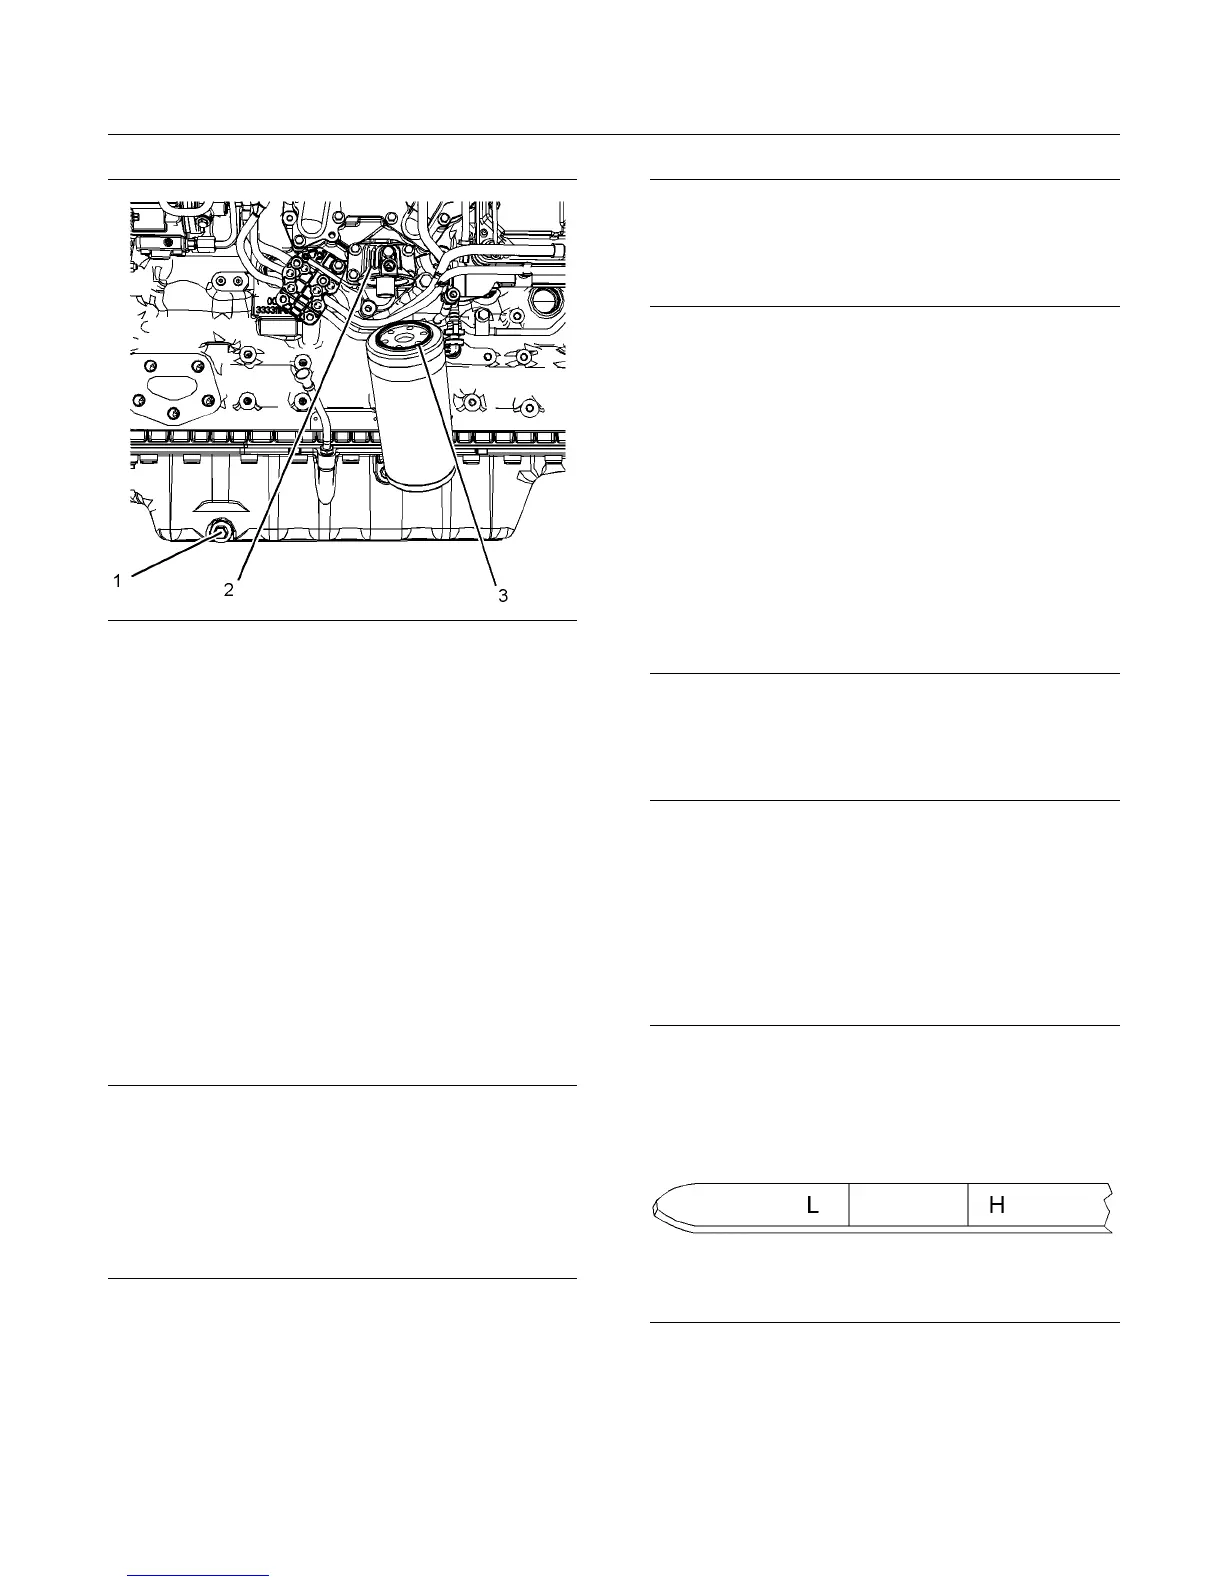
Engine Oil and Filter - Change
g02178063
Illustration 60
Typical e xample
•
If the engine is equipped with a drain valve, turn the
drain valve knob counterclockwise in order to drain
the oil. After the oil has drained, turn the drain valve
knob clockwise in order to close the drain valve.
•
If the engine is not equipped with a drain valve,
remove the oil drain plug (1) in order to allow the oil
to drain. If the engine is equipped with a shallow oil
pan, remove the bottom oil drain plugs from both
ends of the oil pan.
After the oil has drained, the oil drain plugs should be
cleaned and installed. If necessary, replace the O
ring seal. Tighten the drain plug to 34 N·m (25 lb ft).
Replace the Oil Filter
NOTICE
Perkins oil filters are manufactured to Perkins speci-
fications. Use of an oil filter that is not recommended
by Perkins could result in severe damage to the en-
gine bearings, crankshaft, etc., as a result of the larger
waste particles from unfiltered oil entering the engine
lubricating system. Only use oil filters recommended
by Perkins.
1. Place a suitable container below the oil filter
assembly. Remove the oil filterwithasuitabletool.
2. Clean sealing surface of the oil filter base (2).
3. Apply clean engine oil to O ring seal (3) for the
new oil filter.
NOTICE
Do not fill the o
il filters with oil before installing them.
This oil would not be filtered and could be contaminat-
ed. Contaminated oil can cause accelerated wear to
engine compon
ents.
4. Install the new oil filter.Spinontheoilfilter until
the O ring co
ntacts the sealing surface (2). Then
rotate the oil filter ¾ of a full turn.
Fill the Oil Pan
1. Remove the
oil filler cap. Refer to this
Operation and Maintenance Manual, “Fluid
Recommendations” for more information on
suitable o
ils. Fill the oil pan with the correct
amount of new engine lubricating oil. Refer
to this Operation and Maintenance Manual,
“Refill Ca
pacities” for more information on refill
capacities.
NOTICE
If equipped with an auxiliary oil filter system or a re-
mote filter system, follow the OEM or the filter manu-
factures recommendations. Under filling or over filling
the crankcase with oil can cause engine damage.
2. Start the engine and run the engine at “LOW
IDLE” for 2 minutes. Perform this procedure in
order to ensure that the lubrication system has
oil and that the oil filters are filled. Inspect the oil
filter for oil leaks.
3. Stop the engine and allow the oil to drain back to
the oil pan for a minimum of 10 minutes.
g02173847
Illustration 61
4. Remove the engine oil level gauge in order to
check the oil level. Maintain the oil level between
the“L”and“H”marksontheengineoillevel
gauge. Do not fill the crankcase above the “H”
mark.