94 SEBU8603-01
Maintenance Section
Engine Crankcase Breather Element - Replace
7. Remove the cont
ainer.
Bottom Servic
e
Ensure that dirt cannot enter the breather assembly.
g02346498
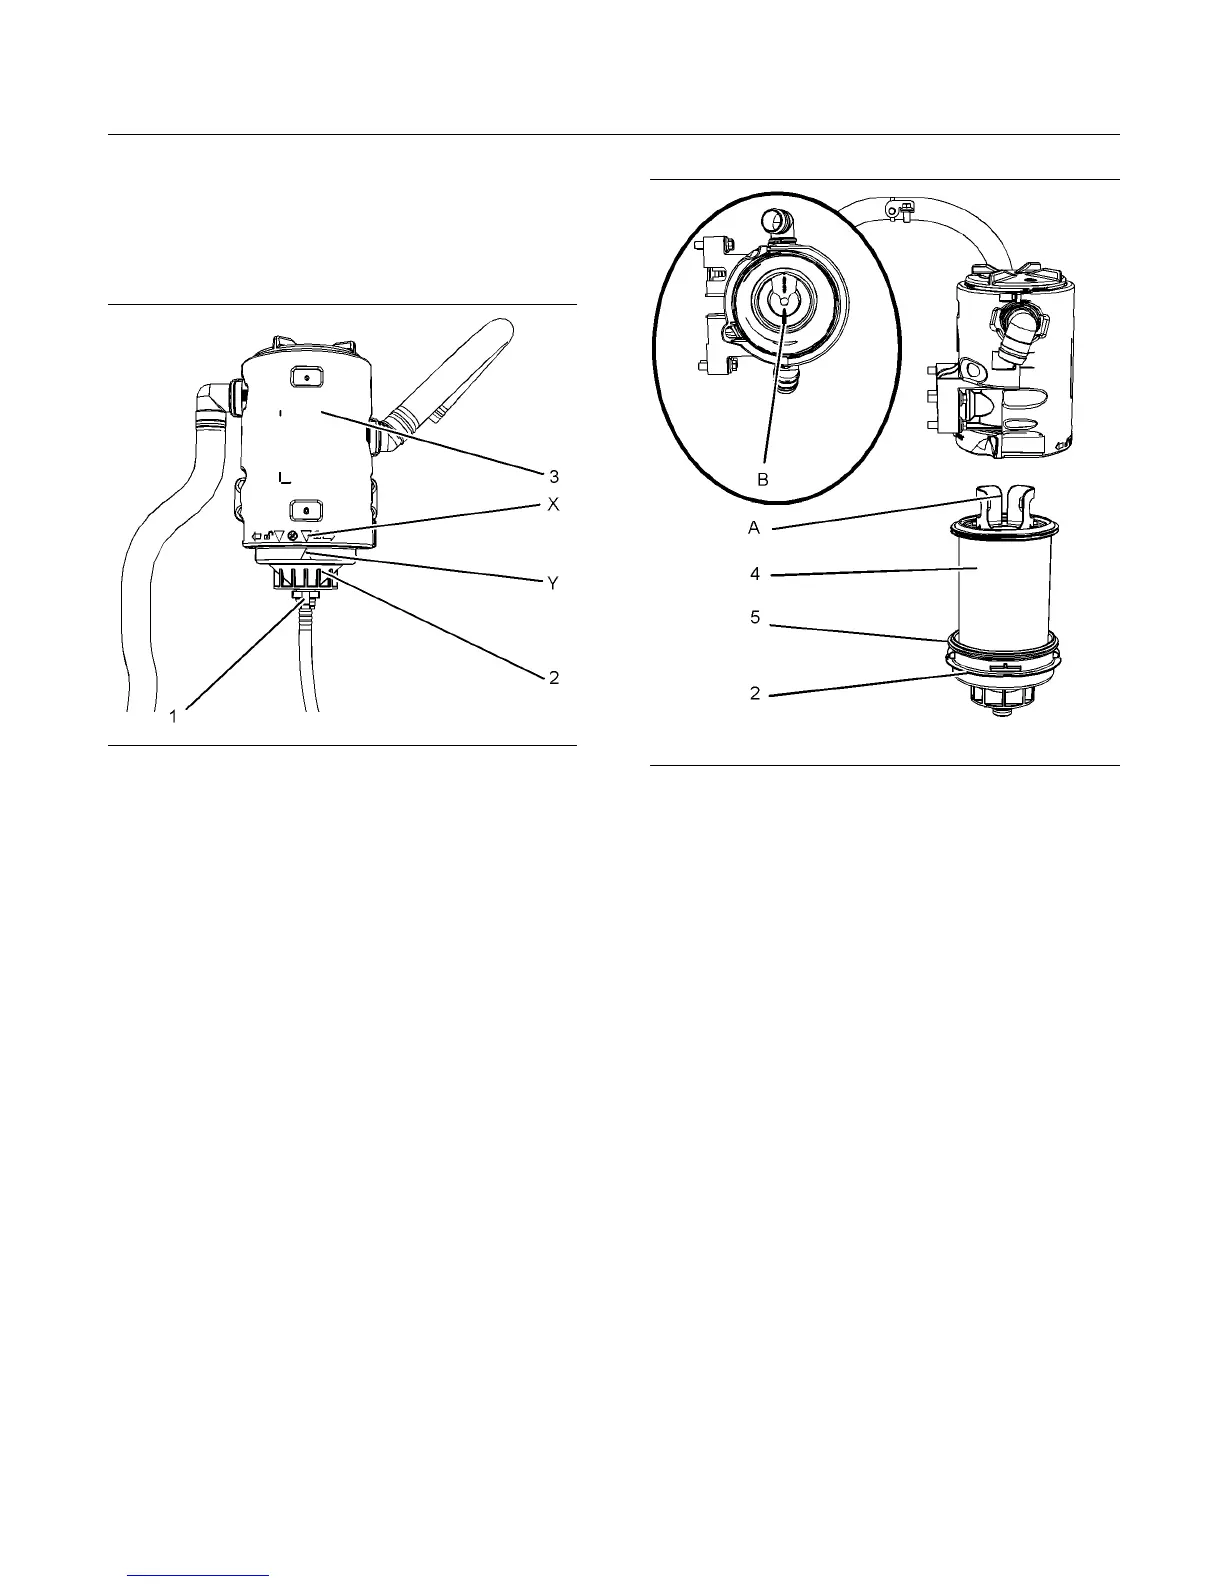
Illustration 56
(X) Alignment mark
(Y) Alignment mark
1. Ensure that the outside body of the breather
assembly is clean and free from damage. Place
a container under the breather.
2. Remove the tube connection (1). Ensure that
dirt cannot enter the tube connection. Note the
position of the alignment marks (X and Y). Rotate
the bottom cap (2) counterclockwise in order to
release the cap and the filter element (4) from the
breather body (3).
g02346499
Illustration 57
Typical
example
(A) Alignment postion
(B) Alignment postion
3. Note the orientation of the filter element. Remove
the filter element (4) from the bottom cap (2).
Remov
e the seal (5).
Note: The bottom cap has a section that allows
acces
s in order to remove the seal.
4. Install a new seal (5). Install a new filter element
into t
he bottom cap (2).
5. Align position (A) on the filter element to position
(B) o
n the top cap. Refer to illustration 57.
6. Install the assembly of the filter element and the
bott
om cap (2). Rotate the bottom cap by hand
clockwise until the bottom cap locks into the
locked position on the breather body. Ensure
tha
t the alignment marks (X and Y) are correctly
aligned. Refer to illustration 56.
7. Ins
tall tube connection (1). Ensure that the
retaining clips on the tube connection are correctly
engaged. Remove the container.