Mixing Pump PFT G4
Operation
2007-09-05 41
Check the mortar consistency
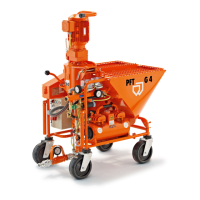
Fig. 30: Controls
5. Position the selector switch for cellular wheel (Fig. 30/1)
"Manual-O-Auto" to "AUTO".
6. Switch on the machine via the green pushbutton (Fig. 30/2).
The mortar will run out of the material connection.
7. Check the consistency of the mortar.
Correct mortar consistency is achieved when the material
merges on the surface being sprayed (we recommend applying
from top to bottom on wall surfaces). If the water quantity is
insufficient, uniform mixing and spraying is no longer ensured.
This can cause blockage in the hose and increased wear on the
pumps.
8. Switch off the machine via the red pushbutton (Fig. 30/3).
Preparing the mortar hose
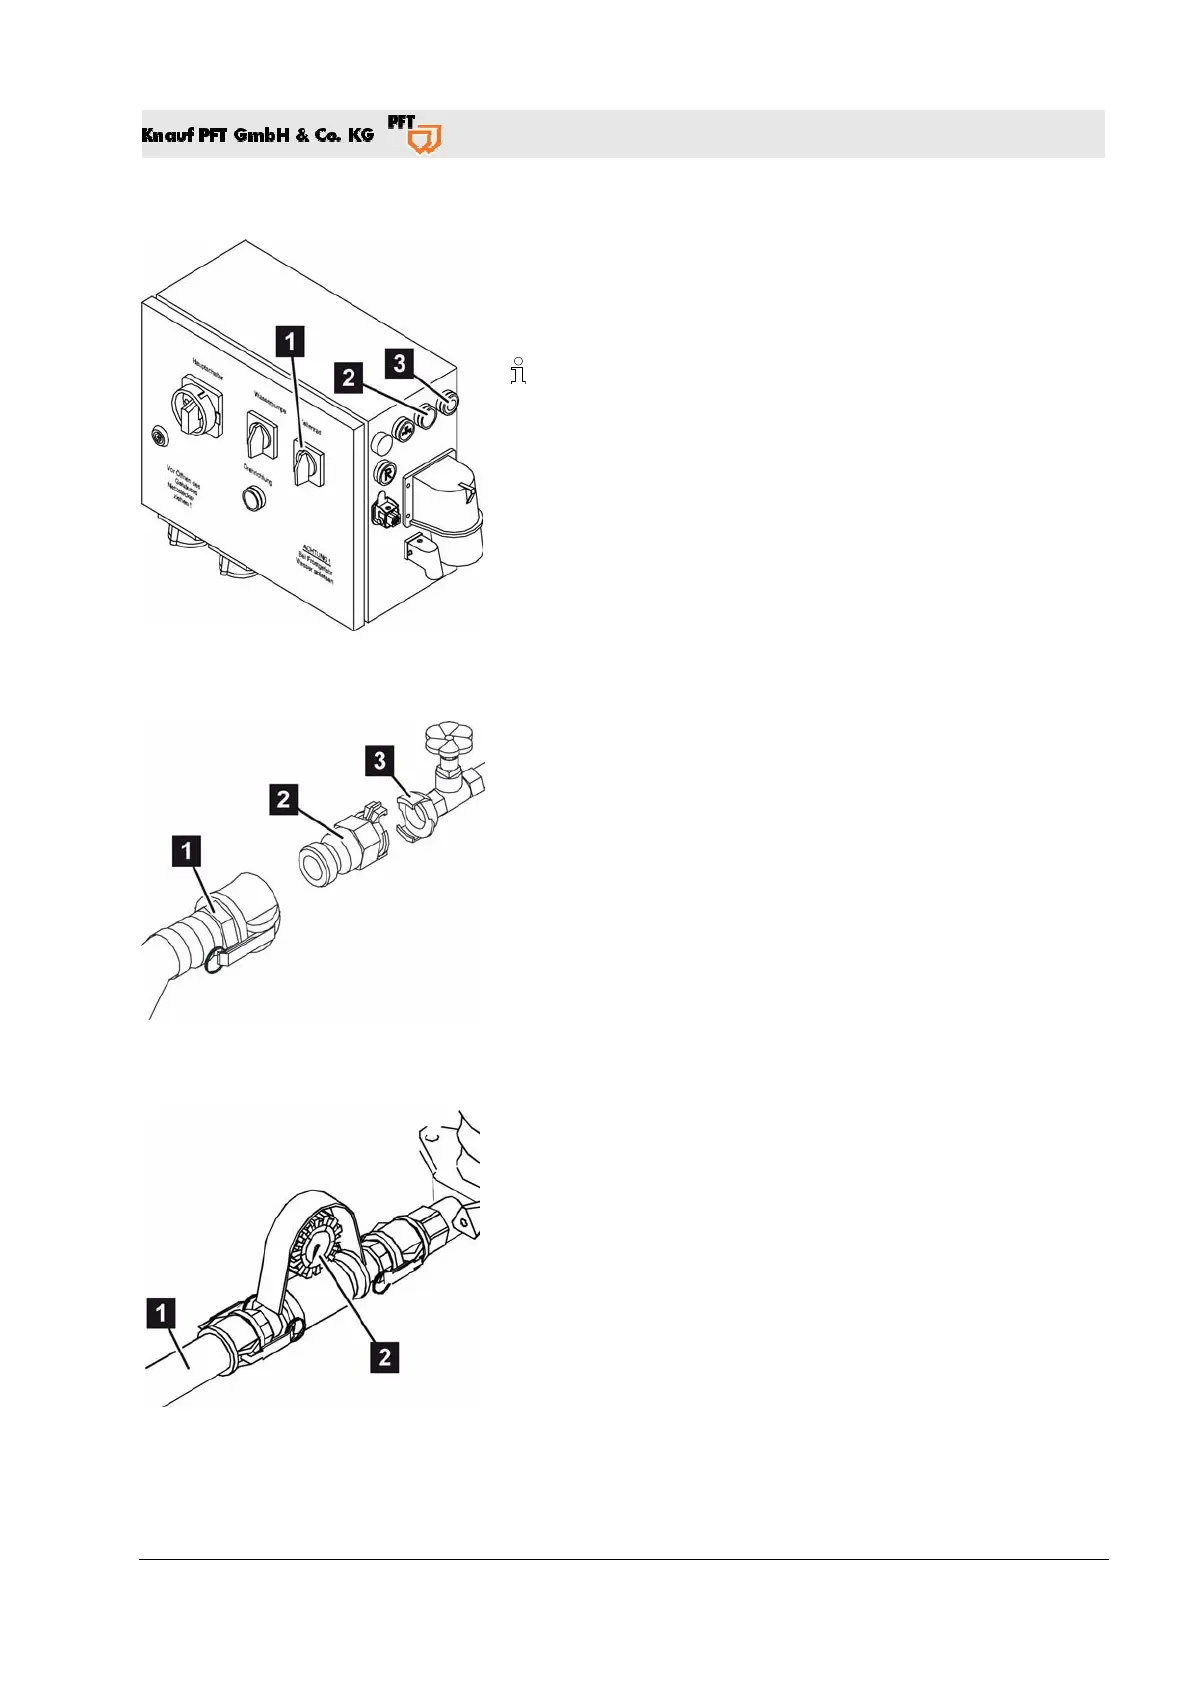
Fig. 31: Preparing the mortar hose
9. Connect the plaster component (Fig. 31/2) on the water
removal valve (Fig. 31/3).
10. Connect the motor hose (Fig. 31/1) and water.
11. Take off the motor hose and plaster component again and
disconnect.
12. Completely empty the mortar hose.
13. Pre-lubricate the mortar hose with approximately 2 liters of
wallpaper paste.
Connecting the mortar hose
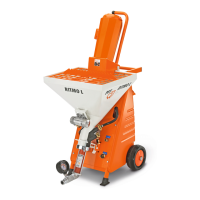
Fig. 32: Connecting the mortar hose
14. Connect the mortar hose (Fig. 32/1) to the mortar pressure
manometer (
Fig. 32/2).
15. Switch on the machine via the "Operation ON" button and let
the machine run until mortar escapes at the end of the mortar
hose.