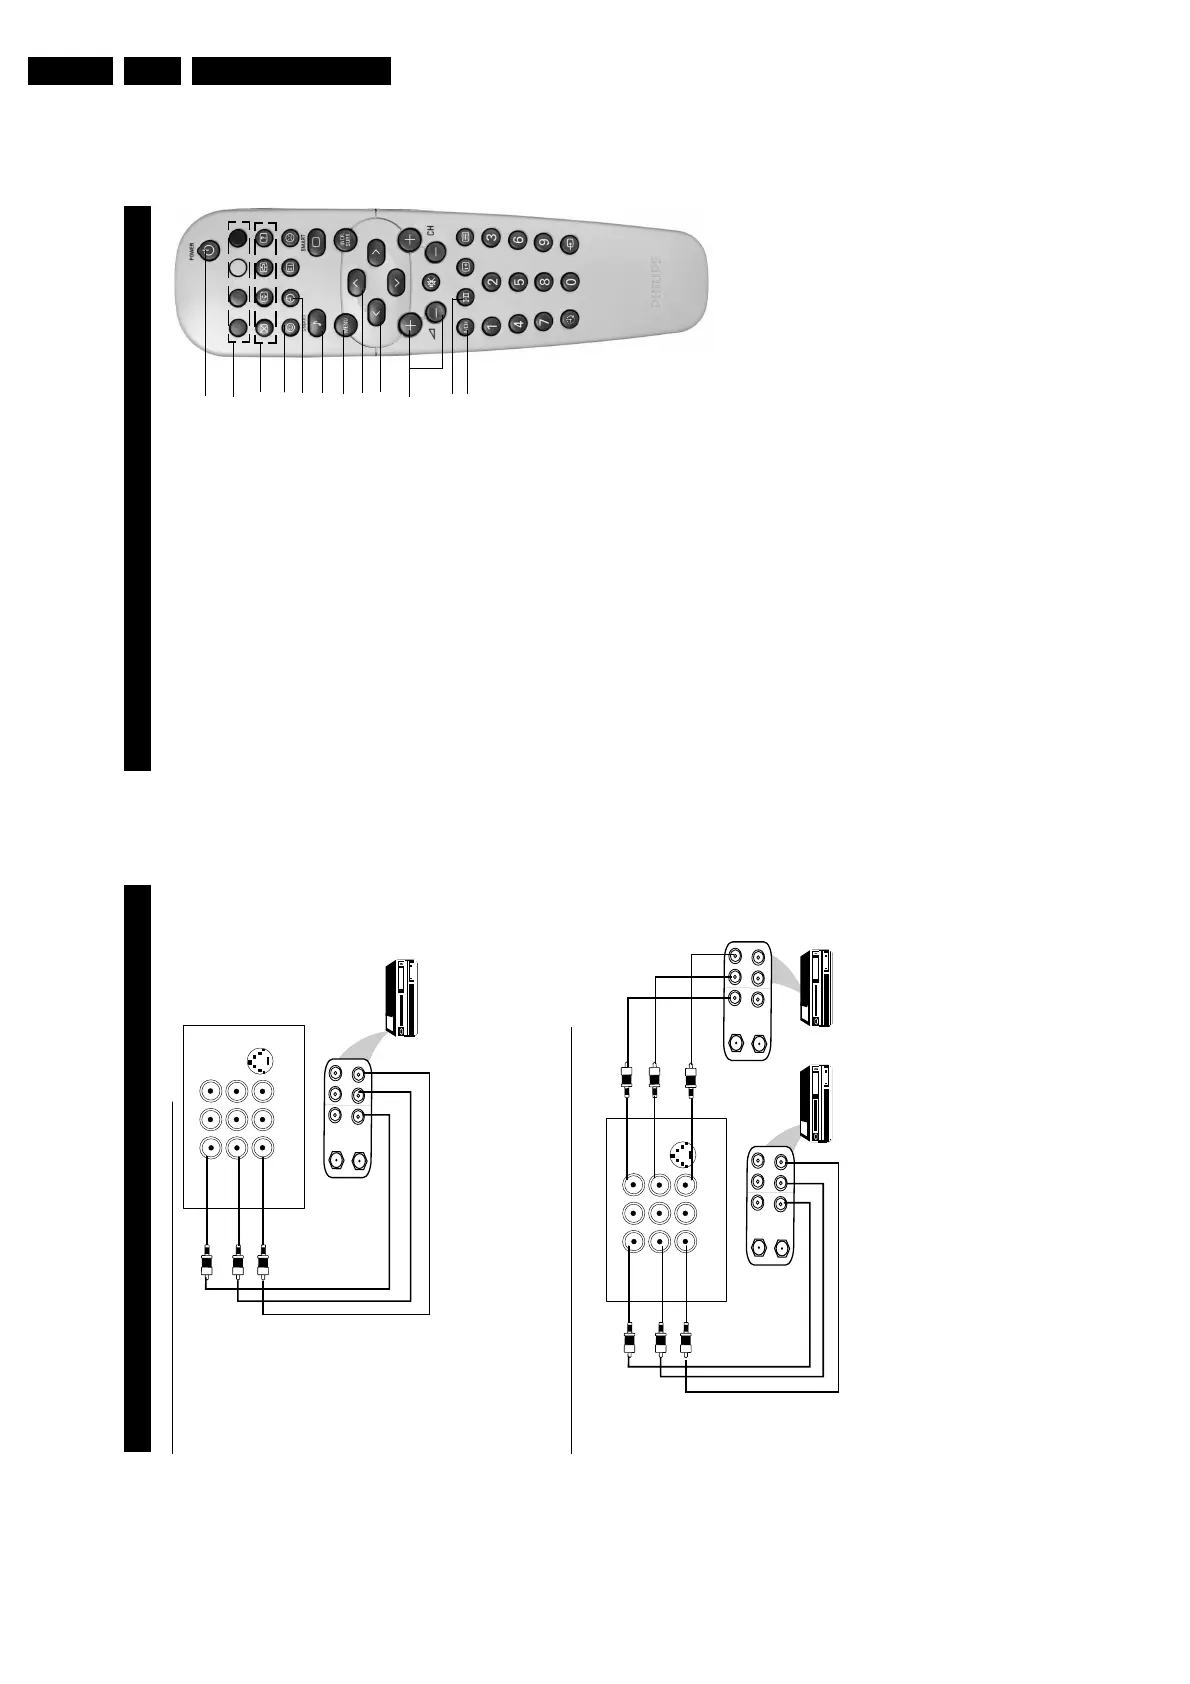
8
& Power button
– Switch set off temporarily to standby mode.
(The red light indicator lights up when the set
is on standby mode).
– To switch on set from standby mode, press
Channel +/– , Digit (0 -9) or Power button.
é Teletext Colour/Personal Zapping buttons
– In teletext mode, the colour buttons allow you to
access directly an item or corresponding pages.
– As Personal Zapping buttons, you can surf up to
10 personal channels for each button. For detailed
description of functions, refer to section on
“Personal Zapping ”.
“ Teletext buttons
Allows you to access teletext information. For
detailed description of functions, refer to section
on “Using the Teletext”
‘ Smiley button
Allows to add and store your personal preference
channels in your Personal Preference list. For
detailed description of functions, refer to section
on “Using your Personal Zapping feature”.
( Timer Button
Allows you to set the clock to switch to another
channel at a specified time while you are watching
another channel or when the set is on standby mode.
§ Smart Sound Button
Press the Smart Sound button repeatedly to
access 4 different types of sound settings and
choose your desired setting.
è Menu Button
Displays the main menu. Also exits menu from screen.
! Cursor Up Button
Allows you to select the next item on the menu.
ç Cursor Left Button
Allows you to select the sub-menus and adjust the settings.
0 Volume + / – Button
Increases or decreases volume.
1
44
44
4
Allows you to switch from Stereo to Mono sound during
stereo transmission or to choose between language5or
language6during dual sound transmission.
2 A/CH(Alternate channel) Button
Allows you to change between the current
channel and the previous channel.
F
UNCTIONS OF
R
EMOTE
C
ONTROL
&
“
(
§
ç
0
‘
1
é
2
!
è