Startup and function
108997_en_04 PHOENIX CONTACT 47 / 226
4.3.1 Assigning the IP address using
FL NETWORK MANAGER BASIC
Requirements
The device is connected to a PC with a Microsoft Windows operating system, and the
FL NETWORK MANAGER has been successfully installed.
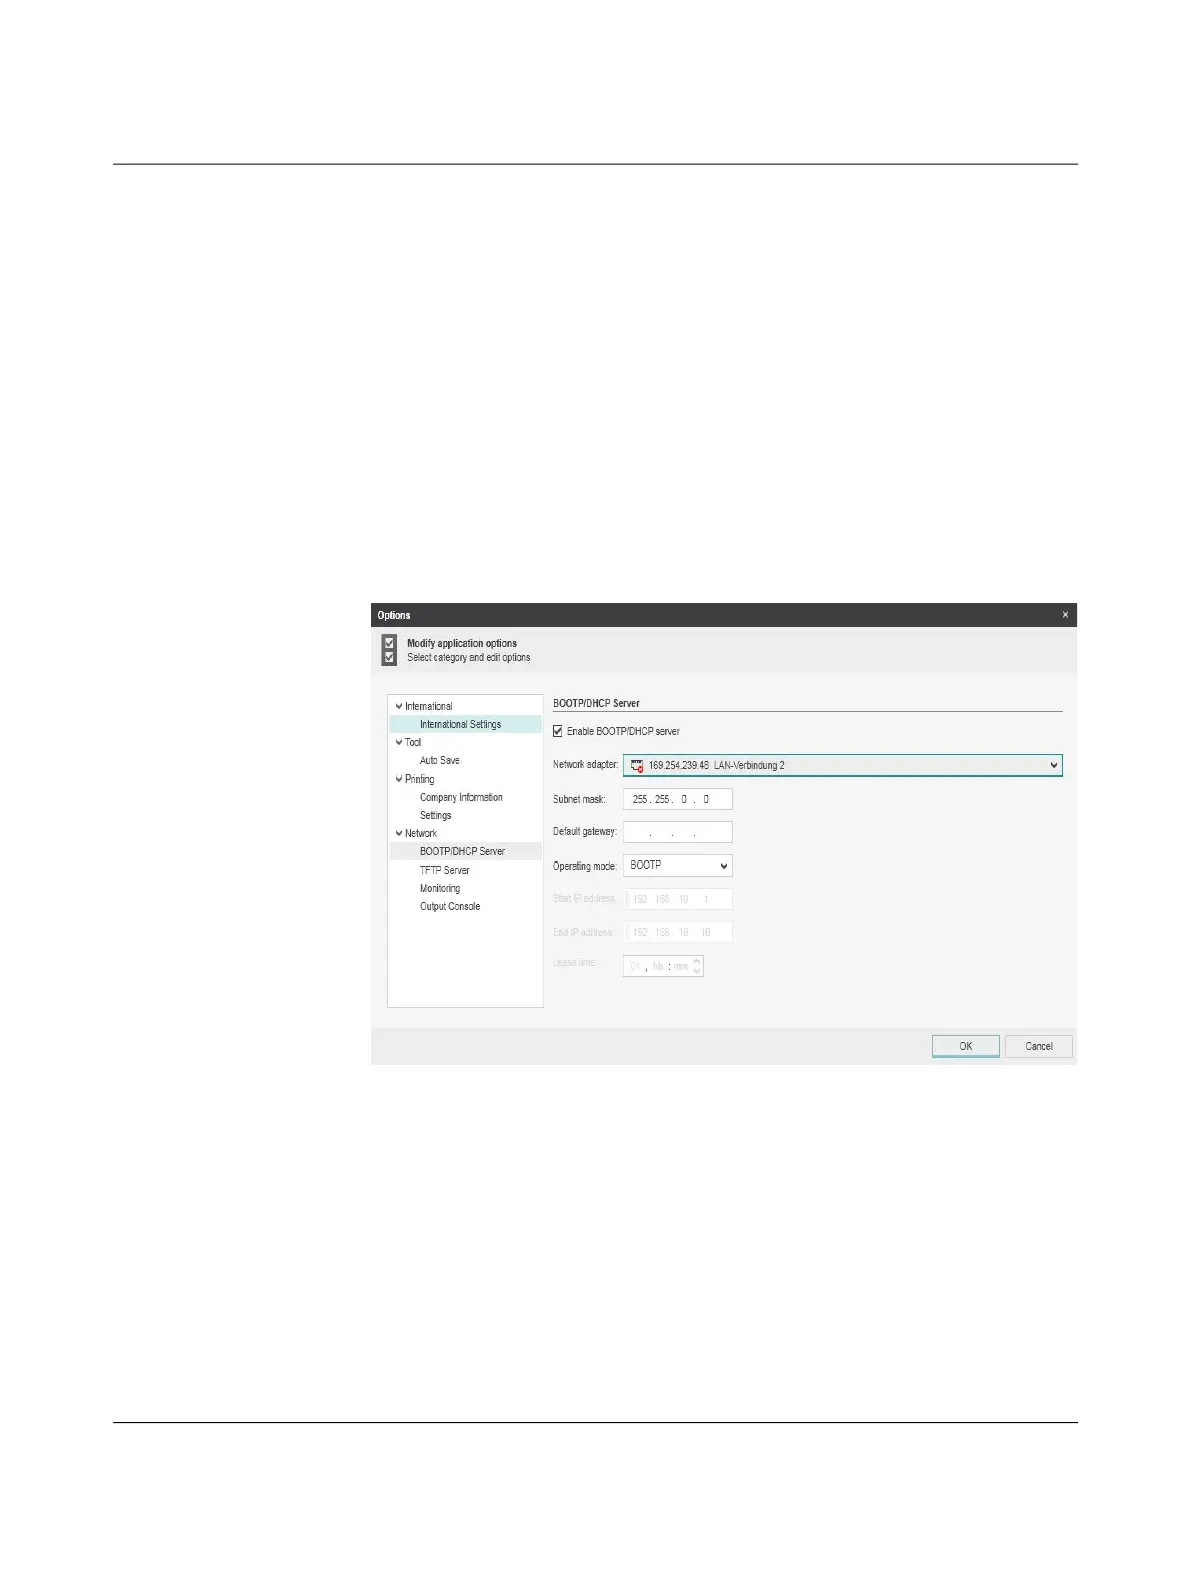
Step 1: Parameterizing the BootP server
• Open the FL NETWORK MANAGER software
• Open a new project in the software.
• Under Extras
Options, select the BOOTP/DHCP Server menu item.
• Configure the network interface on your PC to which the device is connected and select
the “BootP” operating mode. You can also adjust the subnet mask and configure a de-
fault gateway.
• Click “OK” to confirm the parameterization.
Figure 41 Settings for the BootP server
Step 2: Starting the BootP server
• In your project in the BOOTP/DHCP SERVER window, click on the “play” icon next to
the selected network interface. The BootP server is now activated.
• BootP requests that are received are listed in the BOOTP/DHCP SERVER window in
table format.
 Loading...