Startup and function
108997_en_04 PHOENIX CONTACT 49 / 226
4.3.2 Assigning the IP address using IPAssign.exe
Requirements
The device is connected to a computer with a Microsoft Windows operating system.
Step 1: Downloading and running the program
• On the Internet, select the link phoenixcontact.net/products
.
• Follow further instructions to access the search field.
• Enter order number 2702323 in the search field, for example.
The BootP IP addressing tool can be found among the various downloads for the product.
• Double-click on the “IPAssign.exe” file.
• In the window that opens, click on the “Run” button.
Step 2: “IP Assignment Wizard”
The program opens and the start screen of the addressing tool appears.
The program is mainly in English for international purposes.
However, the program buttons change according to the country-specific settings.
The start screen displays the IP address of the PC. This helps when addressing the device
in the subsequent steps.
• Click on the “Weiter” (Next) button.
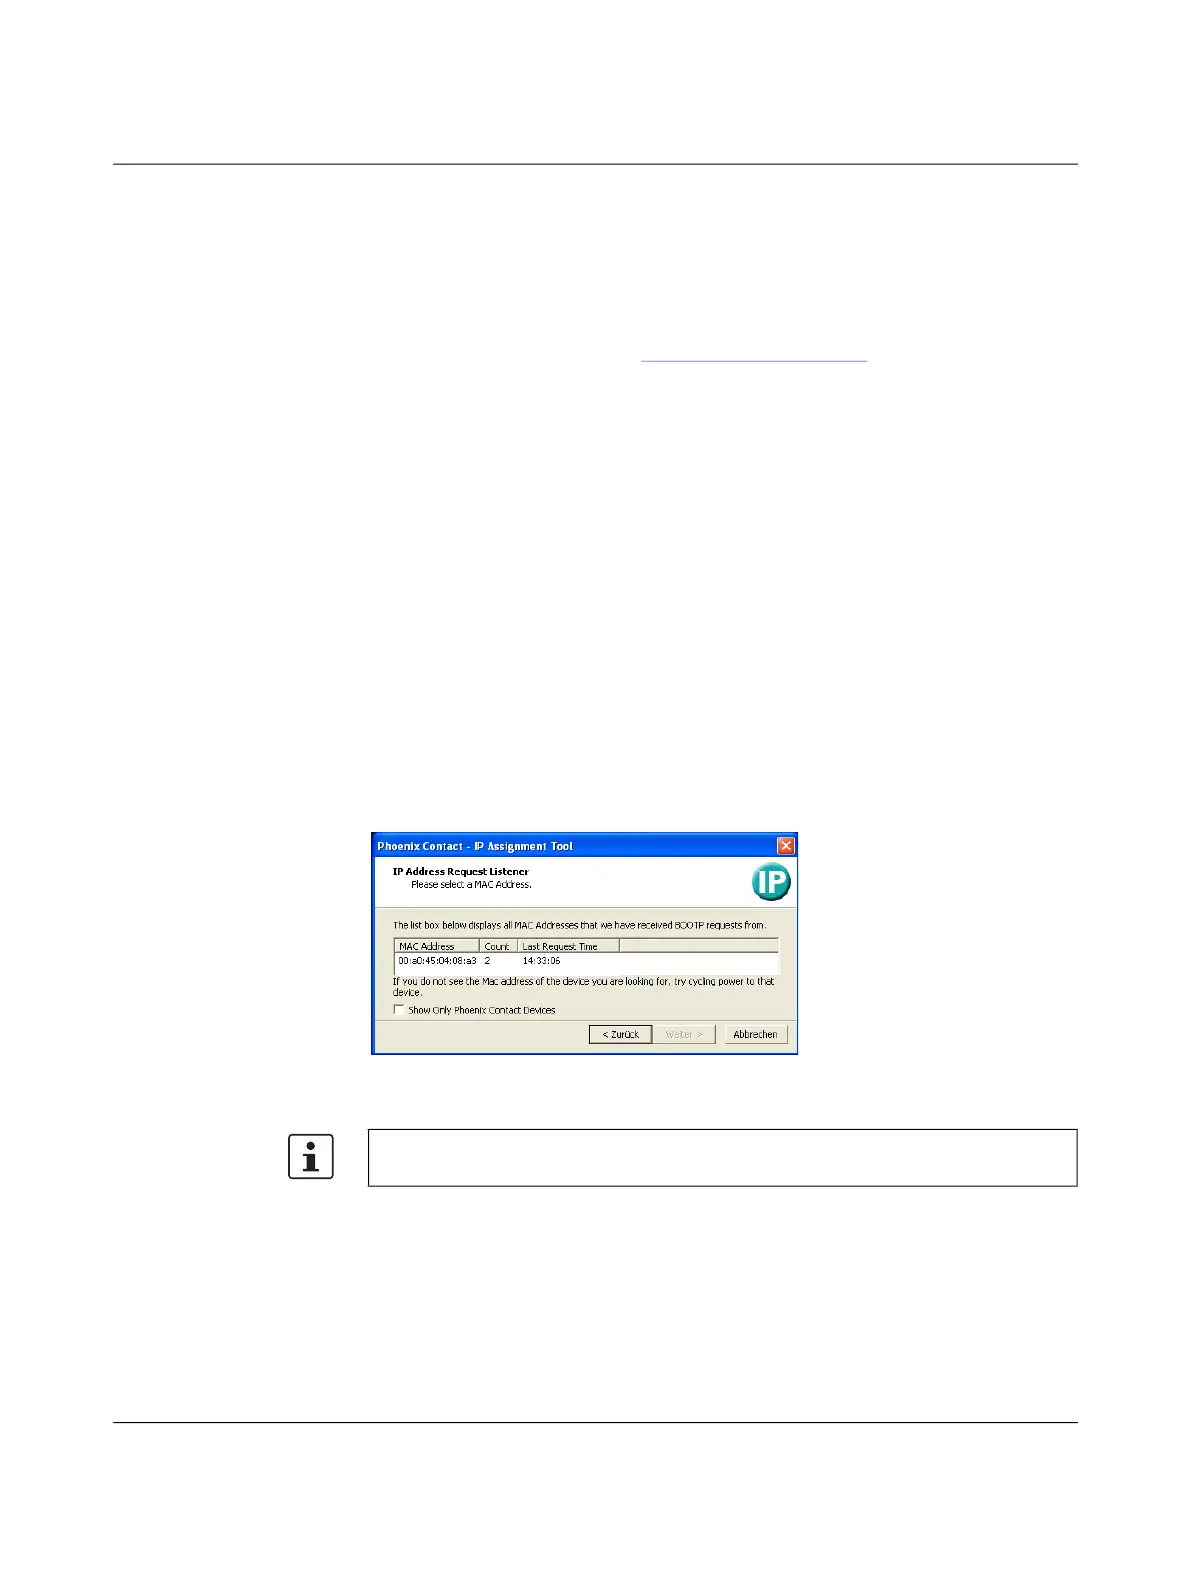
Step 3: “IP Address Request Listener”
All devices that send a BootP request are listed in the window that opens. These devices
are waiting for a new IP address.
Figure 44 “IP Address Request Listener” window
In this example, the switch has MAC address 00.A0.45.04.08.A3.
• Select the device to which you want to assign an IP address.
• Click on the “Weiter” (Next) button.
The MAC address of your switch can be found on the sticker on the side.
 Loading...