9
EN
ENGLISH
12.
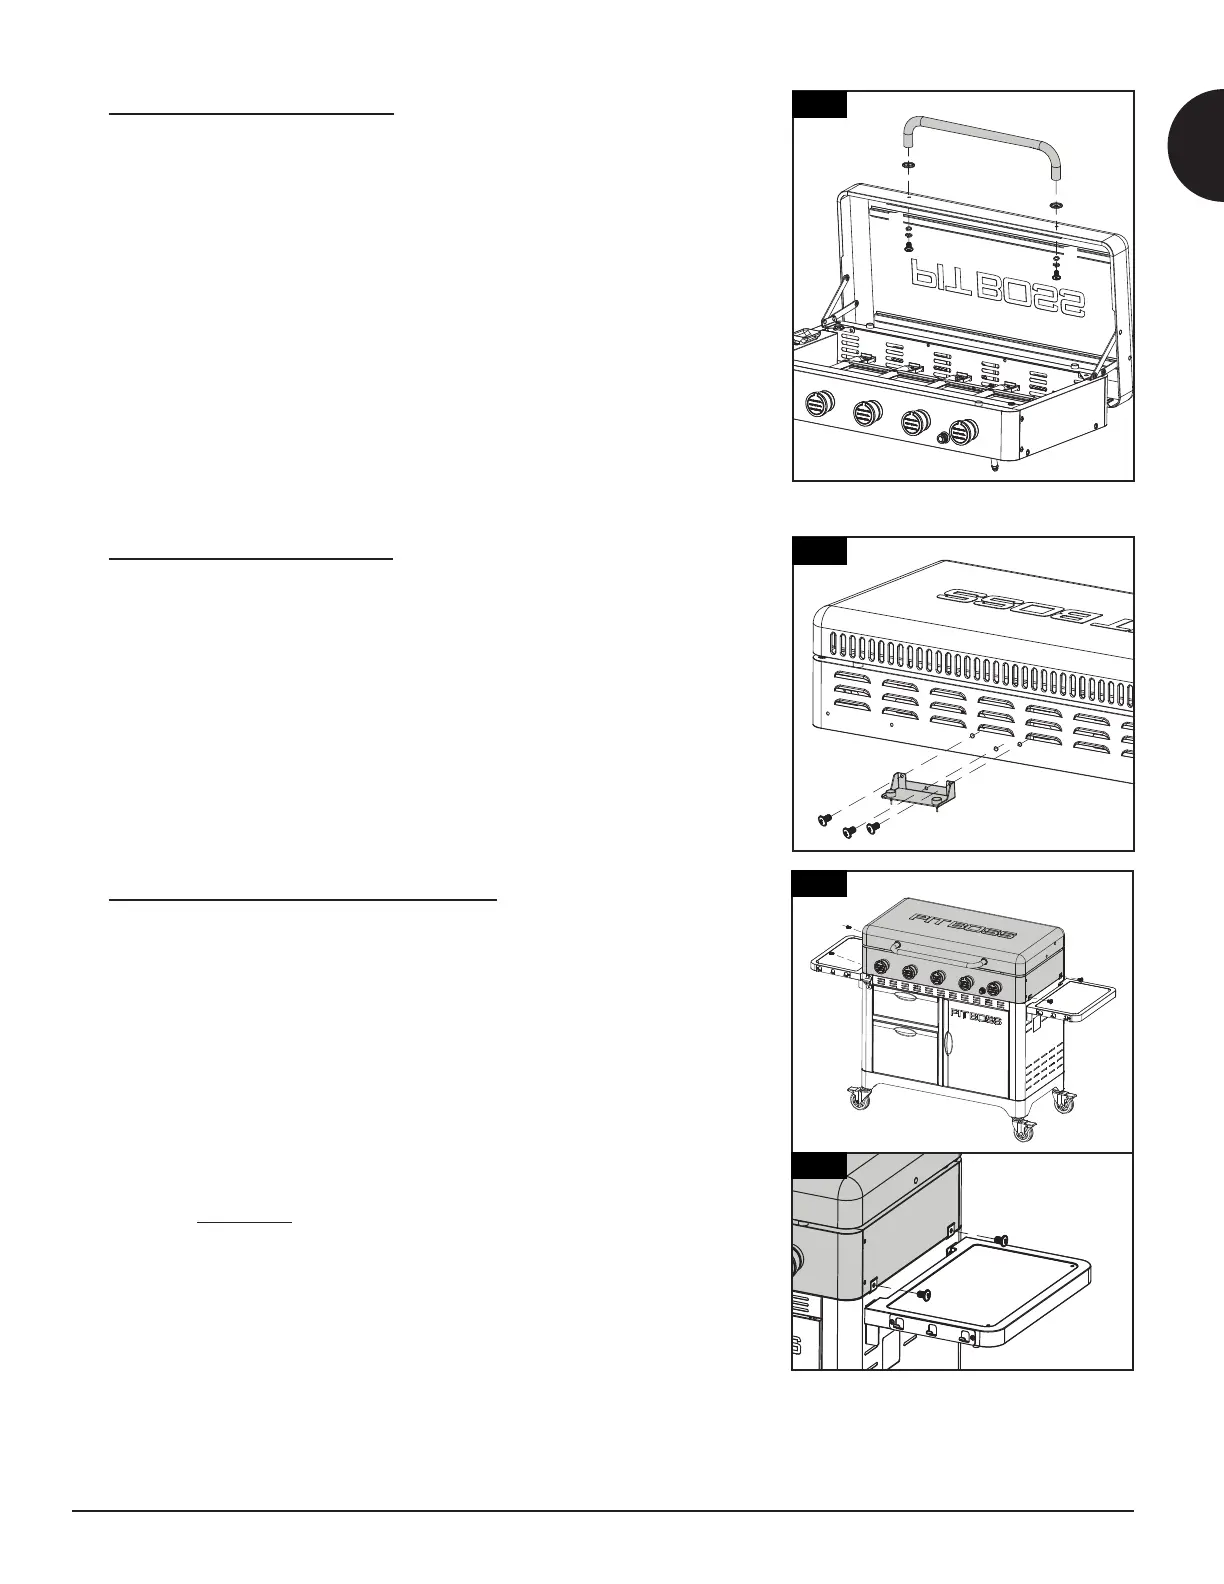
Parts Required:
1 x Firebox (#1)
2 x Lid Handle Bezel (#6)
1 x Lid Handle (#7)
2 x Screw (#B)
2 x Locking Washer (#C)
2 x Washer (#D)
Installation:
• Place a locking washer then a washer onto a screw. From inside the
lid of the Firebox, insert one screw to protrude to the outside. Add a
Lid Handle Bezel on the screw, then hand-tighten the screw (from the
inside) into the Lid Handle.
• Repeat same installation for the other end of the Lid Handle.
13.
Parts Required:
1 x Lid Support (#5)
3 x Screw (#A)
Installation:
• On the backside of the Firebox, fasten the Lid Support to the center of
the panel using three screws.
14.
NOTE: A regulator is shown; however, not all distributors sell the units with
a regulator included. A Manifold Transition Kit is provided should a gas
regulator not come pre-assembled on the griddle. Select the connector
from the Manifold Transition Kit that is required for your gas manifold and
regulator tubing.
Parts Required:
4 x Screw (#A)
Installation:
• Place the Firebox next to the Cart, both facing the same direction.
Using two people, lift the Firebox and slowly place onto the Cart. Note
illustration 14A.
IMPORTANT: The two tabs on each Cart Side Panel should be on the
outside of the Firebox.
• Once in position, secure the Firebox onto the Cart by using two screws
on each side. Note illustration 14B.
14
14
12
13
7
6
6
5
 Loading...