Chapter E - DIMAX3 DIGITAL SYSTEM ADJUSTMENT
Planmeca Proline XC X-ray unit E-19
PANORAMIC X-RAY BEAM ADJUSTMENT
Technical Manual
2.5 Radiation beam adjustment, Planmeca Proline XC Pan/
Ceph X-ray unit
NOTE In case the radiation beam is not correctly aligned check first the sensor head position
before adjusting the primary slot. See instructions given in section “Adjusting the
sensor head position” on page E-16.
Primary slot adjustment - radiation beam too low, high or not
vertical
WARNING
DO NOT ADJUST THE POSITION OF THE PRIMARY SLOT MECHANISM WHILE X-RAYS
ARE BEING GENERATED. CHECK THE BEAM POSITION, ADJUST THE POSITION WITH
THE X-RAYS SWITCHED OFF AND THEN RECHECK THE POSITION. IF THE BEAM IS
STILL MISALIGNED REPEAT THE OPERATION.
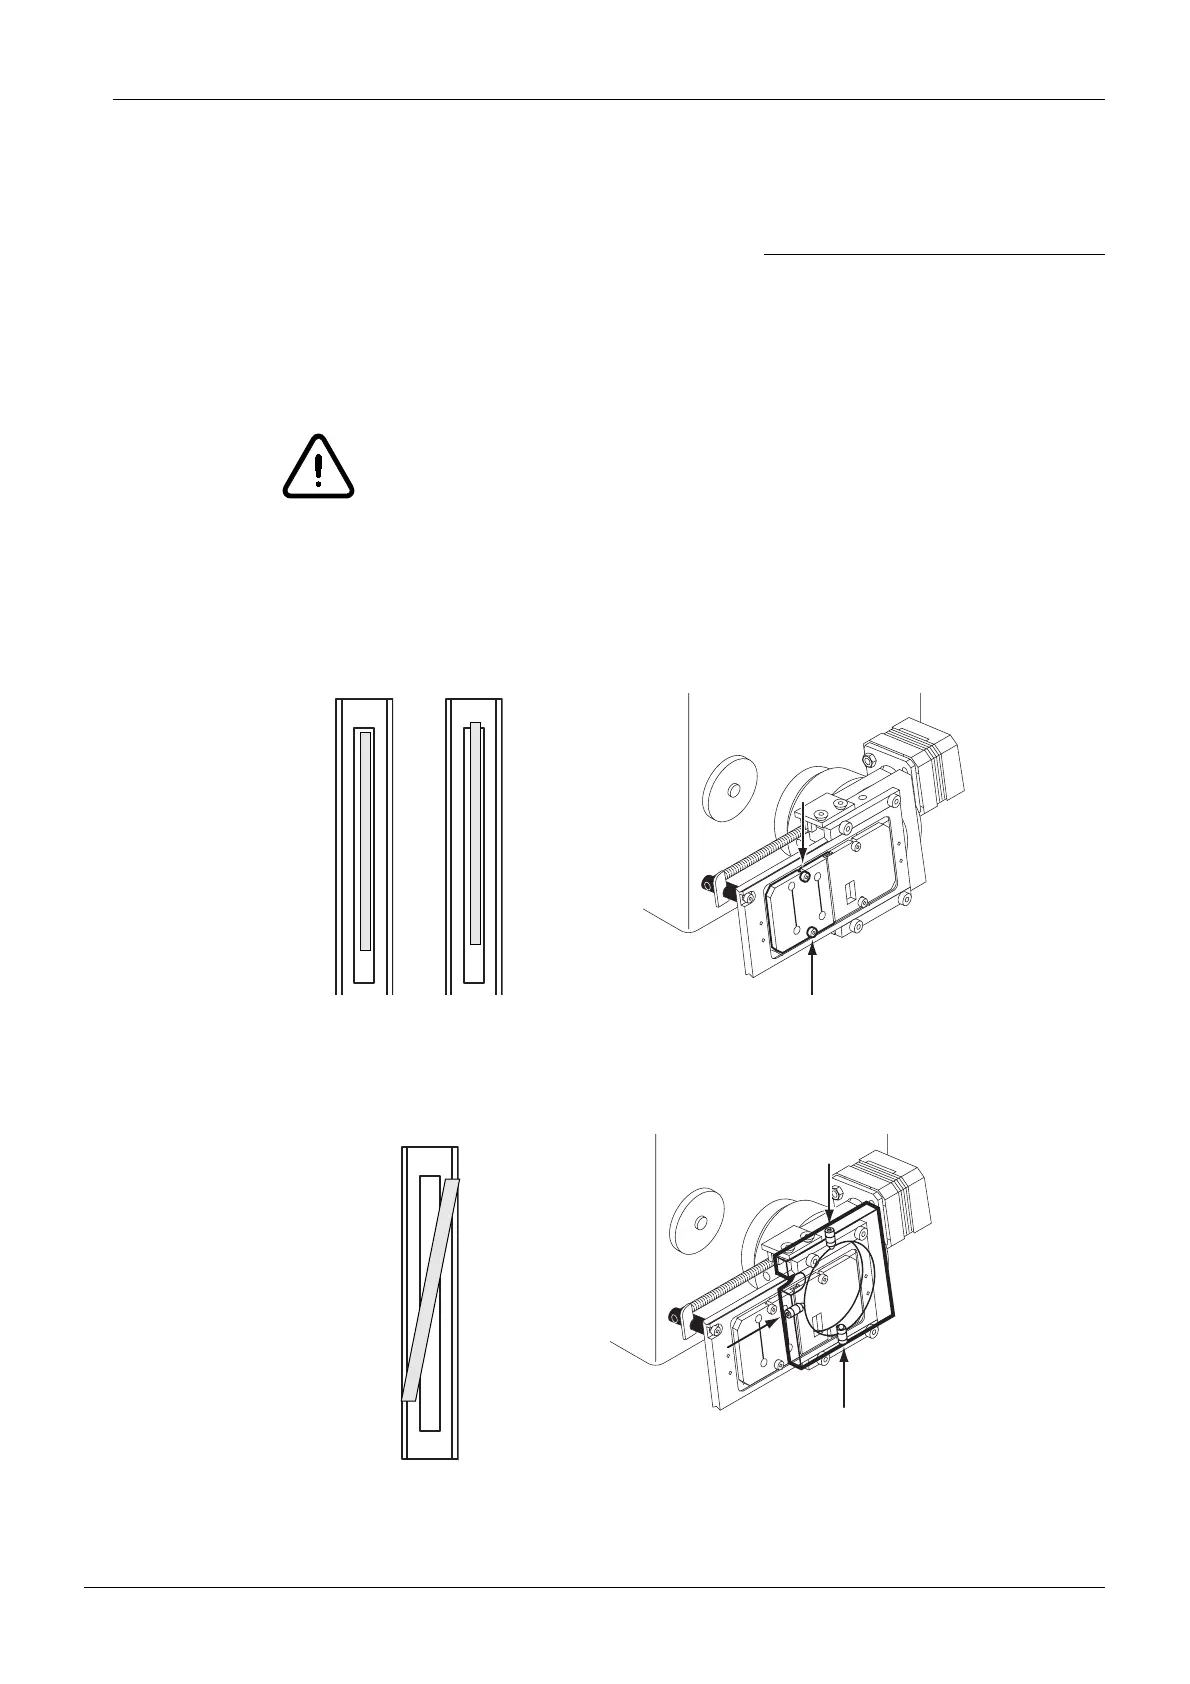
If the beams are too high or too low loosen the two screws that hold the panoramic primary
slot plate in position and adjust as necessary. Tighten the screws and recheck the beam.
Repeat the above procedure until the beam is correctly positioned.
Figure 34
If the beam is not vertical loosen the three screws that hold the primary slot mechanism to the
collimator tube and rotate the mechanism until the beam is correctly positioned. Tighten the
screws and recheck the beam. Repeat the above procedure until the beam is correctly posi-
tioned.
Figure 35
NOTE The ceph primary slots are also adjusted according to instructions given in this sec-
tion.
XC_adj_pri_slot.eps
Securing screws
Beam too lowBeam too high
XC_adj_collim.eps
Securing screws
Beam not vertical