Pleiger Elektronik
GmbH & Co. KG
Page: 52 Manual for 362MC Edition: 6/2007 Subject to modifications
Appendix D1: Steps for commissioning
The 362MC controller incorporates profile memories whose parameters have been pre-parameterised at
the factory for commissioning. This factory set-ups are based on decades of experience in controller
applications. Using the profile memories will place these experiences at your disposal and save your
commissioning time. The following procedure is to be observed:
set the controller to Manual mode (press Man and Exit buttons simultaneously);
select an appropriate profile for the control task concerned, activate the profile memory and
save to an available profile memory via the Save as function (see
5.4);
check the input and output assignments and correct if necessary (see
5.6 + 5.7);
check functions assigned to the LCD displays and adjust if necessary (see
5.8);
check correct acquisition of the measured values;
check the actuator for correct functioning in Manual mode (see
4);
switch the controller to Automatic mode (Auto button) and start up the controlled system
(adjusting the parameters, if appropriate).
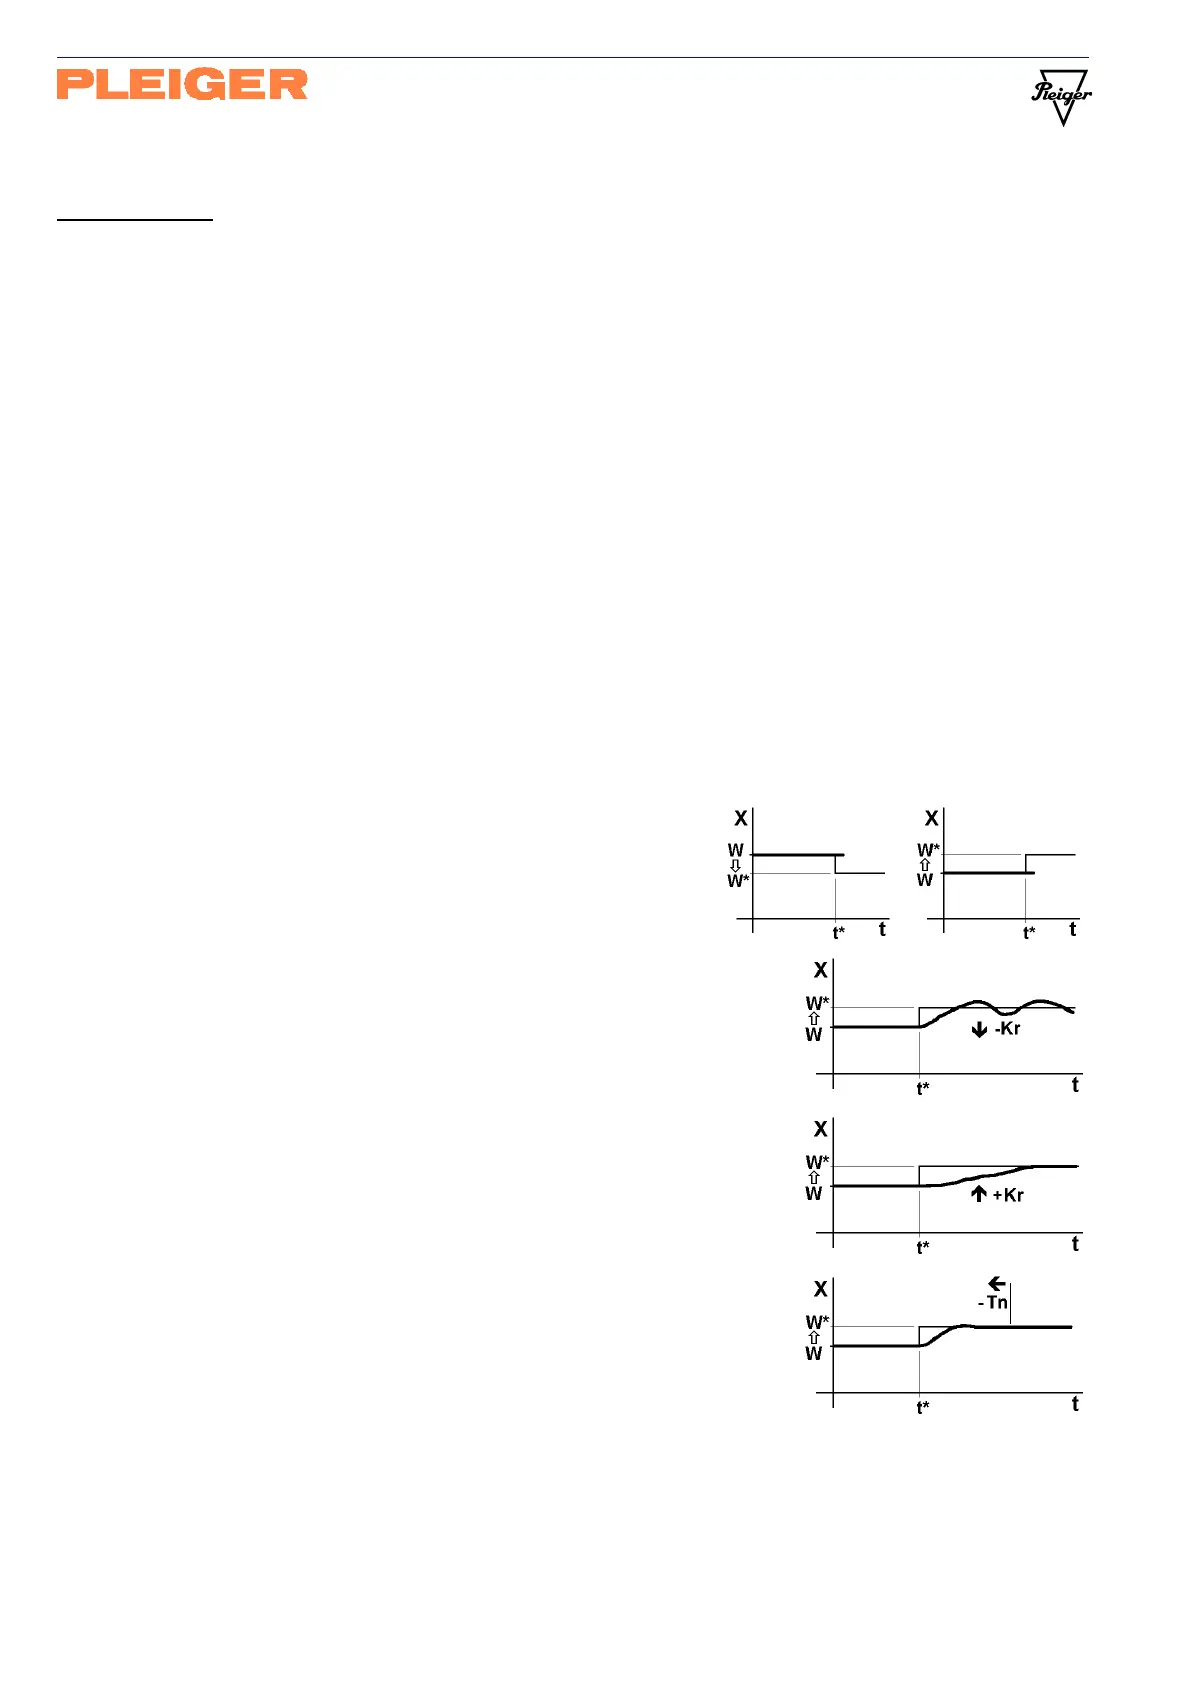
Adjusting the parameters
In most applications only minor adaptations of the factory set-up is necessary. The most important
adaptations concern the controller parameters Kr and Tn. The aim is to make the controlled
system stable and reduce control deviations as fast as required and possible. We recommend the
following steps, starting with the factory set-up:
1 To test the behaviour of the controlled system it
should be stimulated using a small change of the
setpoint W to W* (up or down).
Go on with 2 or 3.
2 If the controlled system is not stable (swinging),
decrease P-gain Kr by steps and loop with step 1
and 2 until the system is stable and shows only a
little or no overshot.
After that go on with 4.
3 If the controlled system is already stable (no swinging),
increase P-gain Kr by steps and loop with step 1
and 3 until the system shows a little or no overshot
and is still stable to.
After that go on with 4.
4 If the control deviation decreases to slowly in the stable
system, decrease reset time Tn by steps and loop with
step 1 and 4 until the system so fast as required
and possible.
Pay attention to the stability of the system and if
required, go on again with 2.
at the end of the commissioning procedure, document the parameter changes,
e.g. in copies of the
profile memory tables in Appendix D2.