___________________________________________________________________________________________________________
Part Number 6300-095D Page 17 of 43
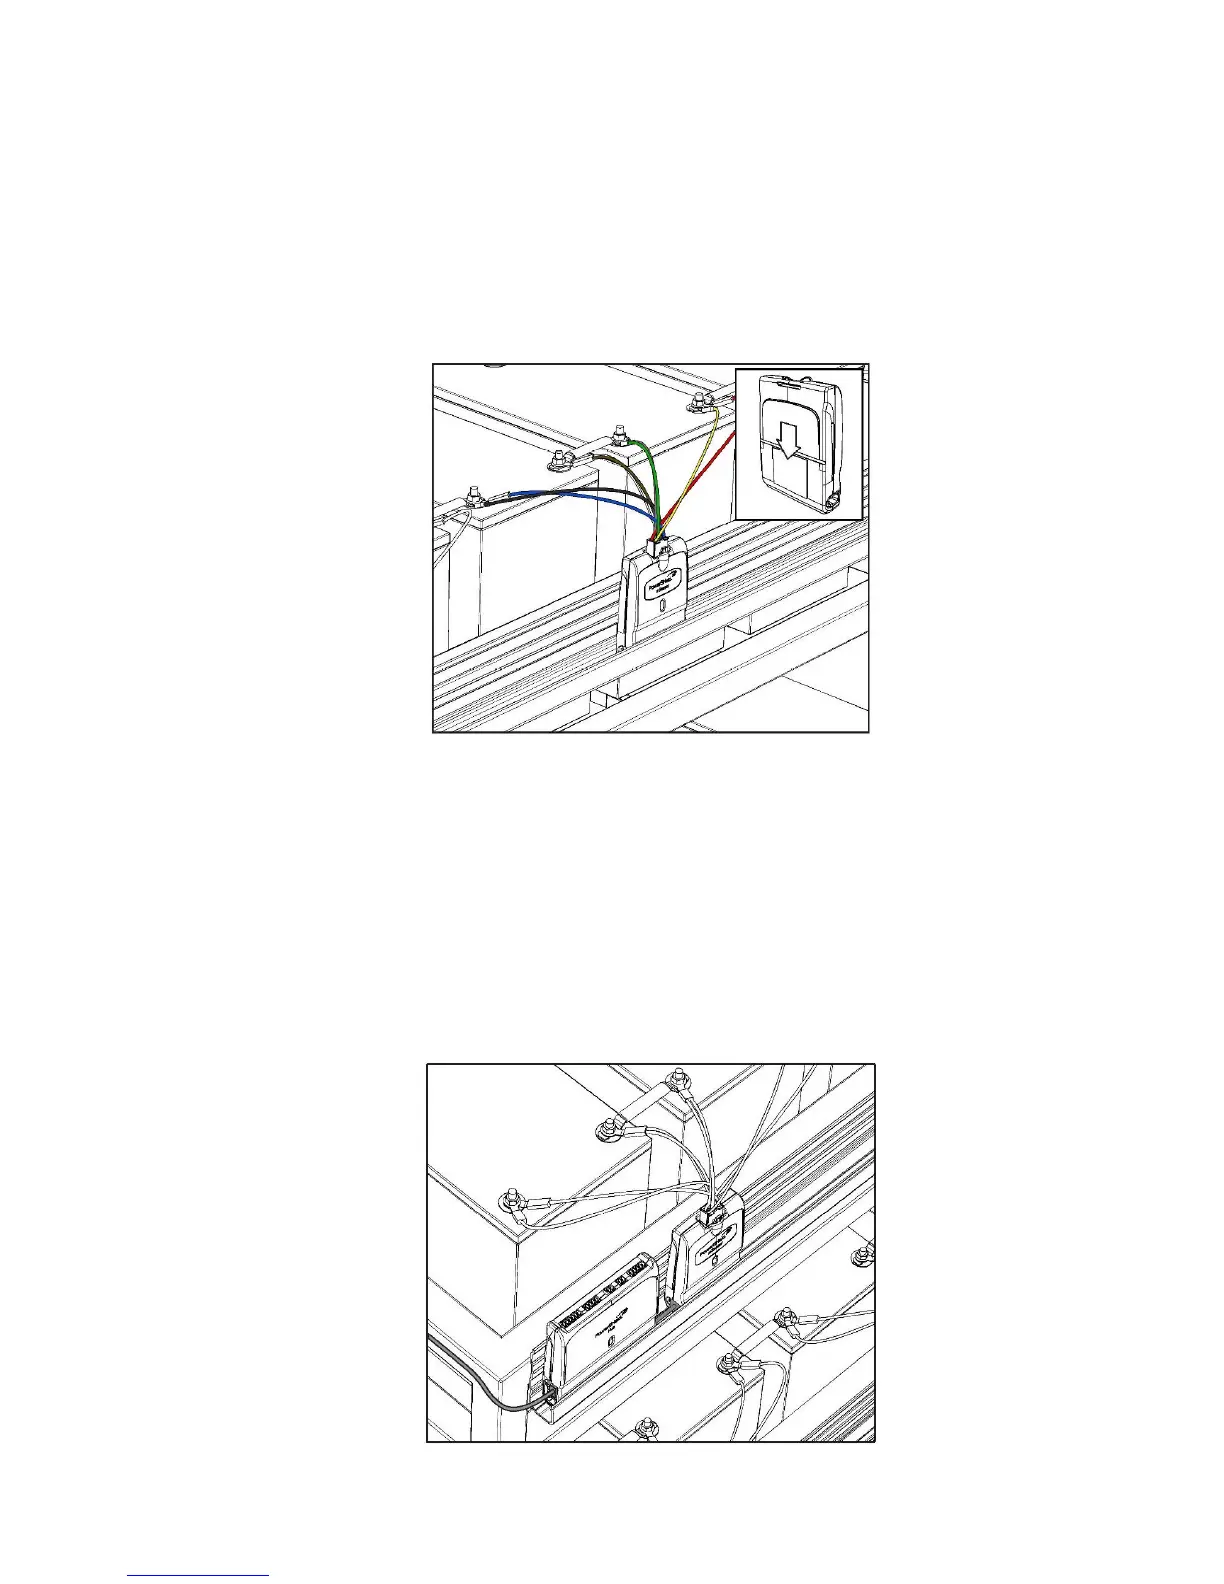
5.6 Connect mSensors to Blocks
Dual mSensors are numbered with IDs in the range 1 to 200 while single mSensors are numbered 201 to 220. For ease
of mapping of mSensors to blocks and subsequent system configuration, it is recommended to connect the mSensors to
the blocks in sequential order of ID. If single mSensors are being used for a string, install these as required but follow
the sequential ID order approach.
Plug the mSensors onto the power leads of the blocks. The mSensor LED should light solid green when the mSensor is
connected correctly. If the LED lights red, check the connections of the power lead at each block. A full list of mSensor
LED states is available in Appendix 2.
Insert the mSensor into the mounting rail when done.
5.7 Install Hub
A PowerShield Hub is required per string to measure string current and ambient temperature. Hubs are numbered with
IDs in the range 221 to 230. Use Hub ID 221 for the first string and subsequent sequentially numbered Hubs for
multiple string systems (where applicable).
Insert the Hubs into the same mounting rail as the mSensors and connect CAT5 cable from the PowerShield Controller
hub ports to each Hub. The Hub LED should flash orange if all is correct. A full list of Hub LED states is available in
Appendix 2.