19
ADMIN: Work Orders
The Work Orders Menu allows you to create work orders which correspond to each individual job. While a work order
. After creating a work
order, it can be assigned to a technician. Once it has been assigned, it will pop up when that technician logs in. When
you export the work order, all of the weld information will come with it.
Create A Work Order:
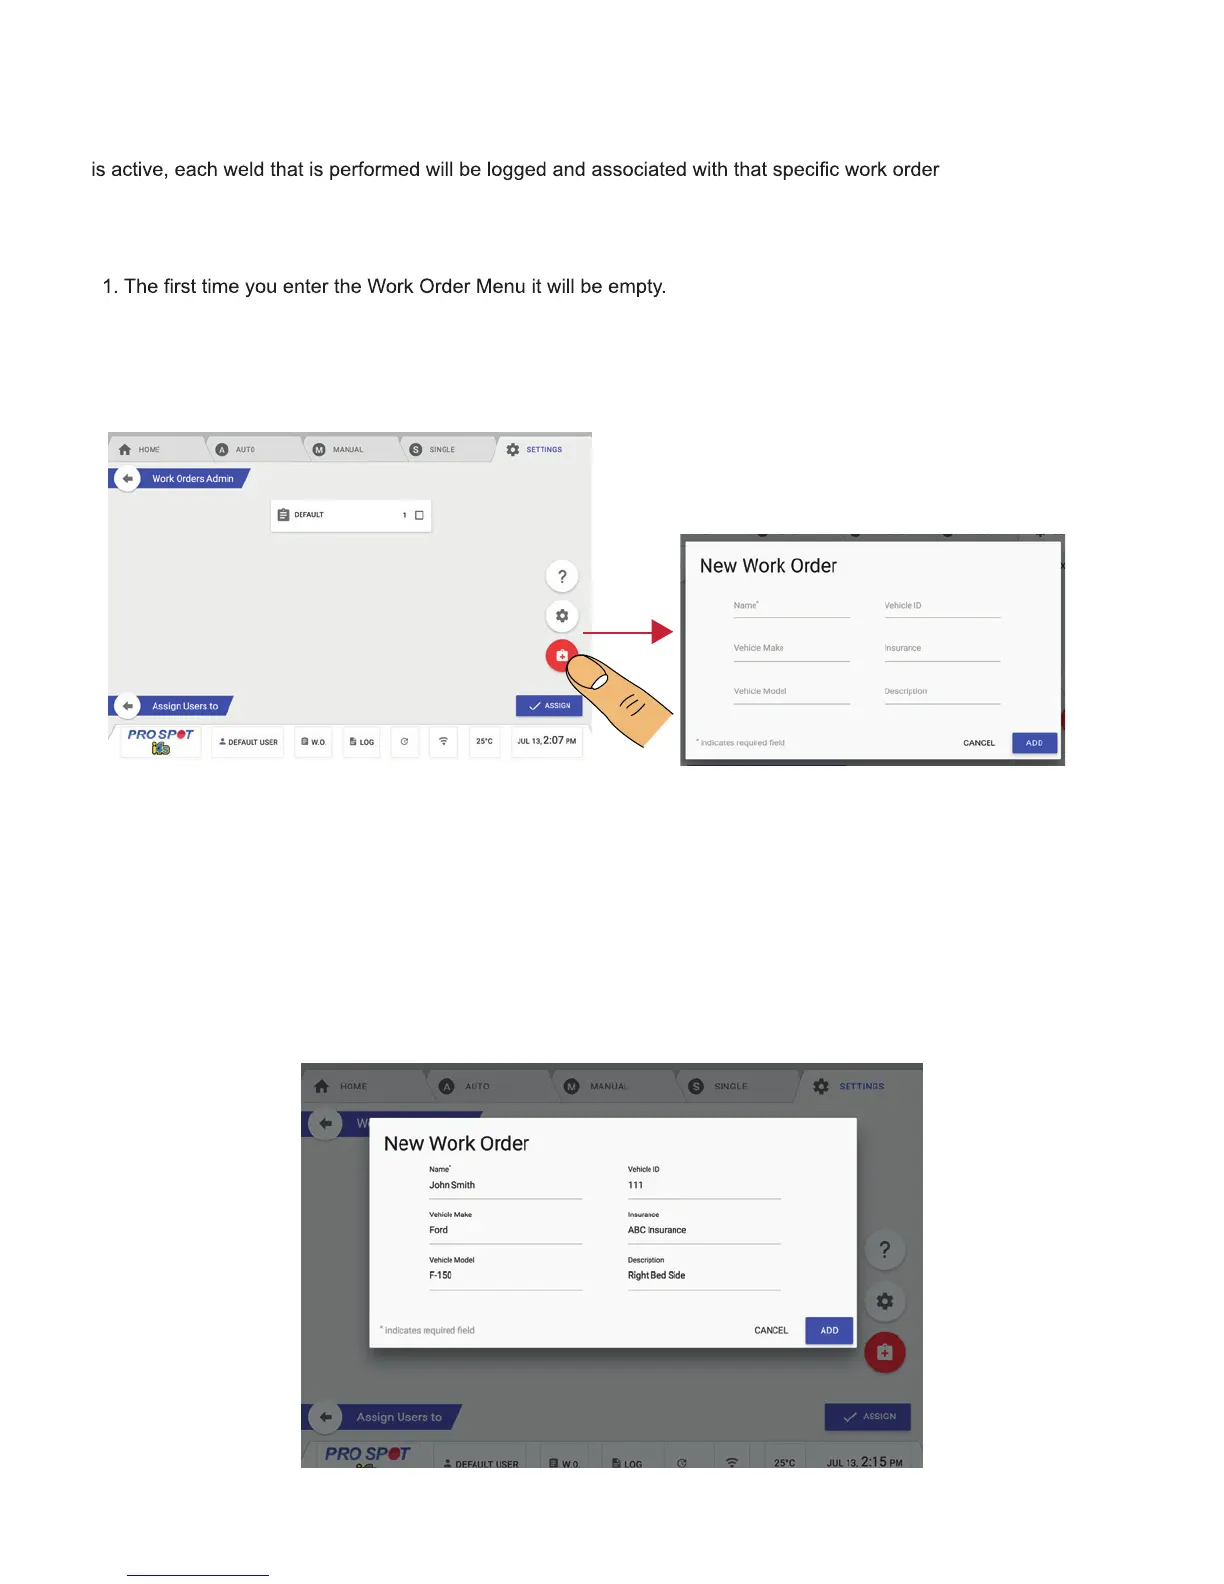
NOTE: After entering work orders, the menu will show the previous work orders you have entered (shown below).
2. To create a new work order, select Add New Work Order. This is the red button with a plus sign (Figure 4.23).
3. Once you press the Add New Work Order Button, a menu will pop up and let you enter in the work order
information (Figure 4.24).
4. Once you have entered in all the information, hit ADD to continue.
Assign A Work Order:
1. To assign someone to the work order, select the work order you wish to assign.
2. On the top right-hand side of the work order you will see four options - Remove, Log, Export and Assign
(Figure 4.25).
3. Select the Assign option.
4. From the Users List, select the User you wish to assign the work order to (Figure 4.26).
5. Once you have selected the user, press the button that says Assign.
6. Once they have been assigned, you will be taken back to the Work Order Menu.
Figure 4.23 Figure 4.24
Figure 4.25