ProtaSteel 2021 - Quick Start Guide 43
34. Profile Annotation
We now add steel profile annotation, i.e. show the member sizes. Firstly, we should select the members
we want to annotate. To select the members easily, we can control what elements is selectable:
➢ Click on Selectability icon at the top menu (or View
→
Selectability Settings) to access the
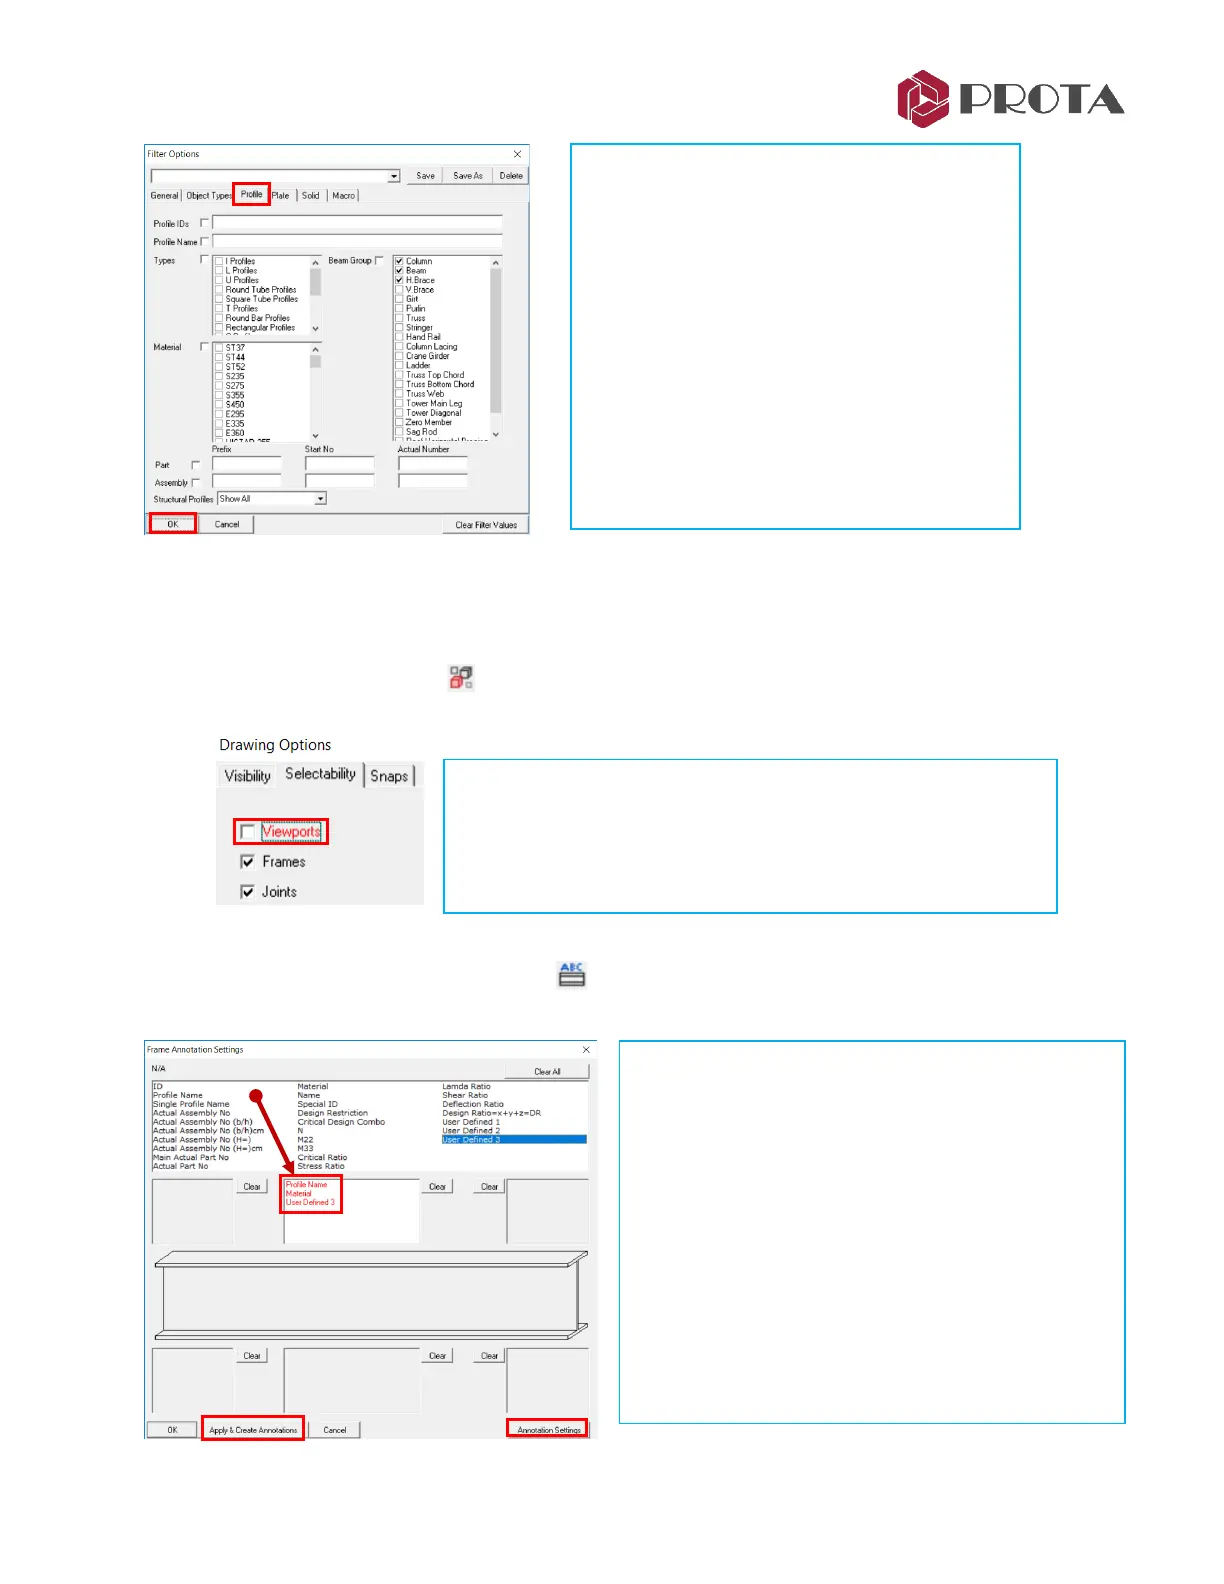
Drawing Options dialog
➢ In the drawing, left click & drag a box around all the steel members to select them
➢ Right-click on Profile Annotation icon to access the Annotation Settings
The settings here controls how steel members are
annotated (labelled) :
• The various type of annotations are listed in the table
• Click & drag any annotation name into the box which
also defines the position of the annotation
➢ Click and drag Profiles, Material & User Defined
3 in the box
➢ Click Annotation Settings to view or change the
text settings :
• Font type & size
• Format or style of the annotations
➢ Change the Text Height to 7 mm
➢ Click Apply & Create Annotations
➢ Untick Viewport
→
OK
This prevents you from selecting the region border.
The same options are available in Visibility tab which controls
what is shown in the drawing.
Filter Options enable advance filtering :
• General : Steel, Concrete, Unique ID, etc
• Object types : Grid, Profile, Joint, Weld, etc
• Profile : Columns, Beams, Brace, etc
• Plate : Plate IDs, Types & Usage
• Solid & Macro
➢ Go to Profile tab
➢ Tick Column, Beam, H. Brace
➢ Pick OK to exit
This ensures that only column, beam and
horizontal elements are shown.