General commissioning (all machine types)
79
8
8.10.2 Correcting the spreading distance
The values in the calibration chart are standard values. If there are deviations in
the fertiliser quality, it may be necessary to correct the setting.
If only minor deviations occur, it is generally sufficient to modify the guiding plate
setting.
To decrease the spreading distance relative to the calibration chart setting:
Change the numeric scale guiding plate position in the direction of the lesser
value.
To increase the spreading distance relative to the calibration chart setting:
Change the numeric scale guiding plate position in the direction
of the
greater
value
.
If there are greater deviations, move the TELIMAT housing along the alphabetic
scale:
To decrease the spreading distance relative to the calibration chart setting:
Move TELIMAT on the alphabetic scale towards the smaller character (ac-
cording to alphabetic order).
To increase the spreading distance relative to the calibration chart setting:
Move TELIMAT on the alphabetic scale towards the greater character (ac-
cording to alphabetic order).
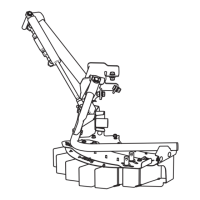
8.10.3 Instructions for spreading with TELIMAT
The TELIMAT position required for the spreading type is set from the tractor by
means of a single-acting control valve.
Boundary spreading: lower position
Normal spreading: upper position.
NOTICE
Boundary spreading at working widths 12 - 50m:
For an optimal spreading pattern, it is recommended that the material output be
reduced by 20% on the boundary spreading side.
n CAUTION
Spreading errors caused by TELIMAT not reaching its end po-
sition
If TELIMAT is not completely at its end position, you may encoun-
ter spreading errors.
Make sure that TELIMAT is always in the specified end
position.
When switching from boundary spreading to normal spread-
ing, actuate the control valve until TELIMAT is completely
in the top end position.
During extended boundary spreading (depending on the
state of your operating unit), actuate the control valve occa-
sionally to return TELIMAT to its end position.
 Loading...