4 - STORE FUNCTIONS
20
Data Bits: 7 / 8
Stop Bits: 1 / 2
Parity: None / Odd / Even
Handshake: RTS / XON
NOTE: Print Inhibit: (LM 9000 y(b) (AWI) mode only). In AWI mode, printing is inhibited when the weight total is less
than 10e, and cannot be added to the totals.
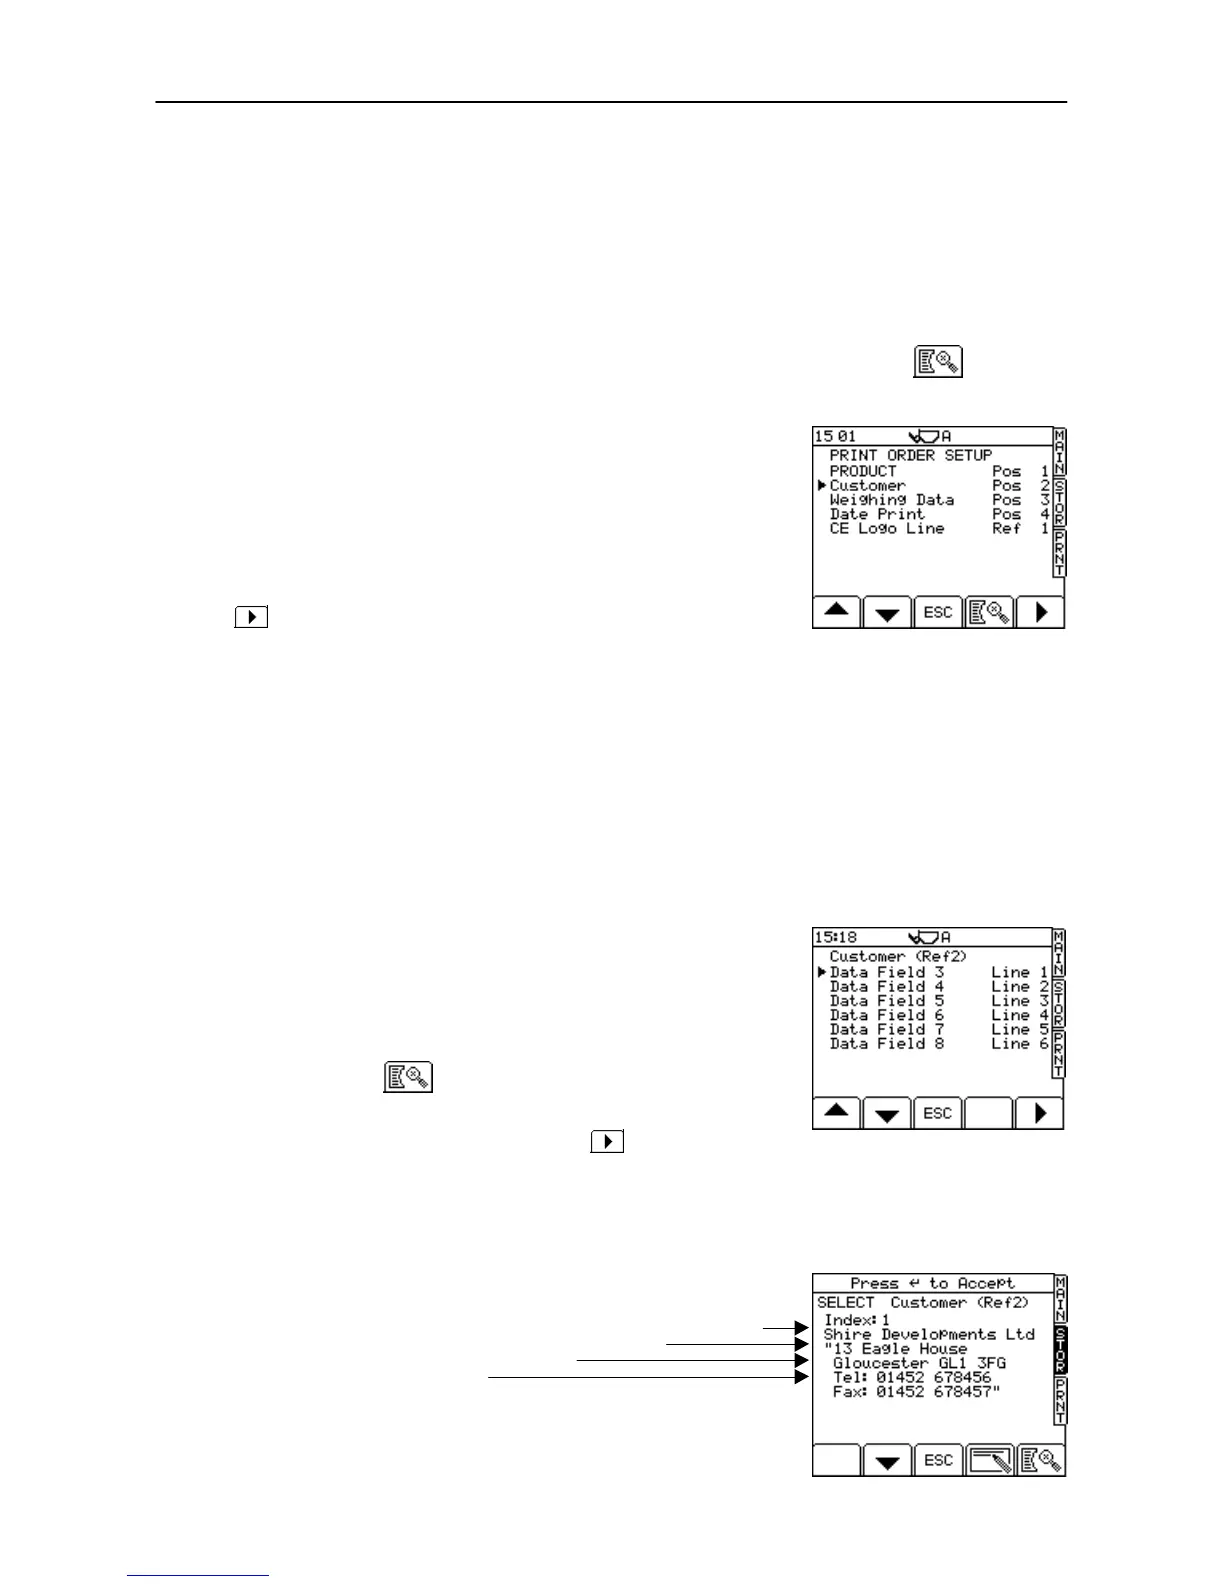
Print Order - Setup
To select the 'Print Order Setup' screen, from the 'Printer Setup' screen (fig. 26), press the key.
Print Order Setup determines the order in which the information is listed on the load ticket. The default order (if
all stores are enabled) is,
1. <Store Reference 1>
2. <Store Reference 2>
3. <Store Reference 3>
4. <Store Reference 4>
5. <Store Reference 5>
6. <Store Reference 6>
7. Weighing Data (Bucket List and Preset Tare if switched on)
8. Date / Time
Using the up/down arrow keys, select the first store and press the
key to confirm. This store reference will appear first on the
ticket. Repeat for the remaining store references in the order you want
them to be listed on the ticket.
'CE Logo Line'
The CE Logo only appears for one of the reference stores on the printout. For example, in Figure 27 the CE
Logo is set to appear next to the 1st reference store ("Product").
For the reference store selected above, you can then set the line position for the CE logo (refer to the following
section).
Reference text order - Setup
For each Reference store listed on the 'Print Order Setup' screen, you
can set the order in which the reference text and extended reference
text fields (i.e. columns 3 and 4 of the table in section 4.2) are listed.
Also, you can set the position of the CE logo on the printout, In figure
28a, the logo is set to print after data field 3 (the reference text line).
With the appropriate store selected on the 'Print Order Setup' screen,
(fig. 27), press the key. The data fields are then displayed for
the selected store.
Using the up/down arrow keys, select the data field that you wish to
appear first on the printout, and then press the key to confirm.
Repeat for the remaining data fields in the order you want them to be
listed on the ticket.
NOTE: Using commas in either column 3 or 4 of the REFDATxx.CSV file will
create up to 4 additional data fields 5 - 8 (as shown in fig. 28a)
Data fields 1 and 2 are for the Index No. and the Target Weight
respectively (fig. 28b), and are not printed out.
Figure 27
UK506-27.PCX