4 - STORE FUNCTIONS
21
4.1.4 Data Card Compatibility and Formatting
The SD data card conforms to the ATA interface standard. The head unit will not recognize a card larger than
2Gb. Cards supplied by RDS are pre-formatted with the correct files ready for use.
If you are using a card not supplied by RDS, then format it in Windows Explorer i.e. if it is Drive D:,
1. Right-click on "Removable Disk (D:) and select "Format".
2. From the "Format" window, select the "Full" checkbox for the format type, enter a volume description if desired,
and then press "Start".
Cards must have a directory called "Rds_data.xxx" in which all data is stored and retrieved. This directory
should be automatically created when you first insert the card into the Data Module. All data is written to this
directory. If the folder "Rds_data.xxx" is not created automatically, manually create it in the normal way from
Explorer.
4.1.5 Data Card files required to enable the Store Functions
The following files must be stored on the Data Module within a directory named RDS_DATA.XXX. (if
necessary, create this directory using Windows Explorer).
LM9KPLOG.CSV Saved Print record
LMSETUP.CSV Main Configuration file for the instrument
LM9KTOTL.CSV
REFDAT01.CSV
REFDAT02.CSV
REFDAT03.CSV
REFDAT04.CSV
REFDAT05.CSV
REFDAT06.CSV
TICKET.NUM This file is necessary for the instrument to print consecutive ticket numbers.
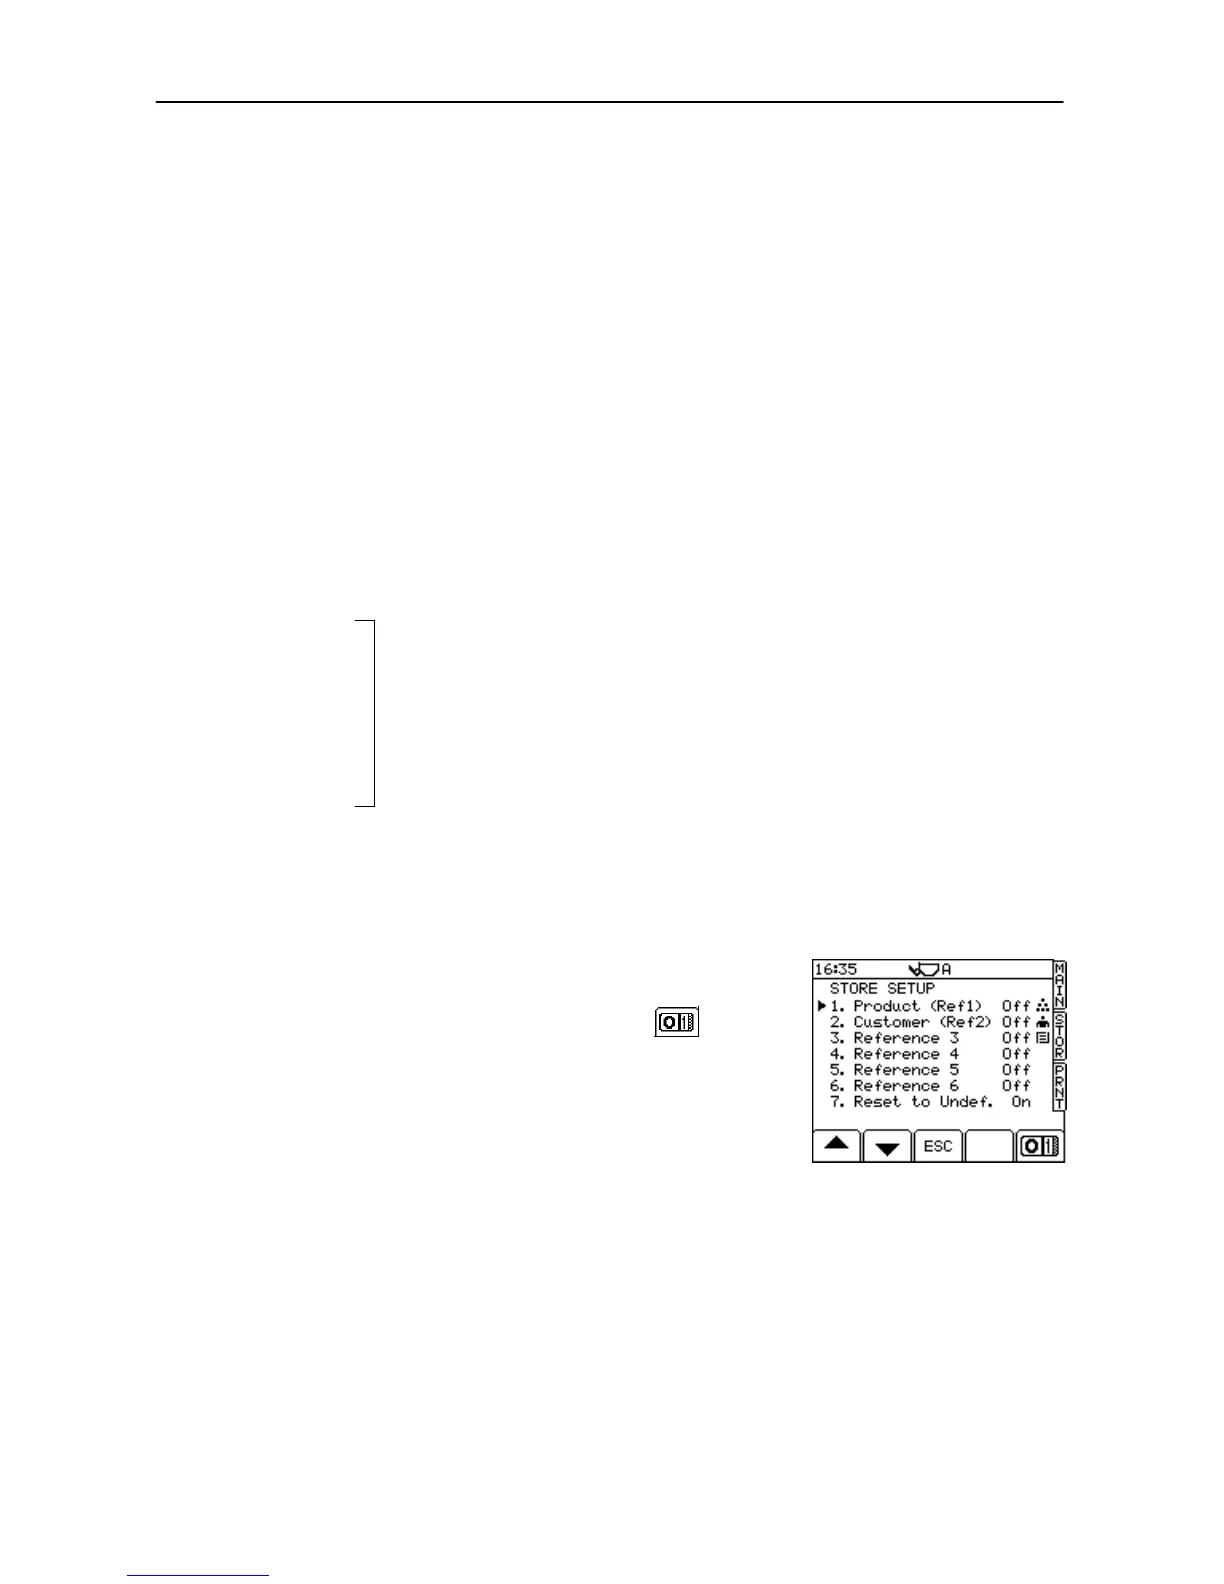
4.1.6 Enable Store Functions
The store references 1 - 6 are disabled with the factory default
settings. To enable them,
1. From the SETUP screen, press "2. Stores Data" and enter the PIN
(default = 1234) to display the STORE SETUP screen (fig. 29).
2. Select the respective store reference and press the key to
enable/disable the store.
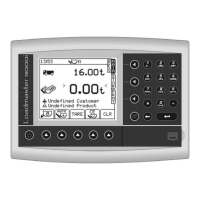
NOTE: (The factory default store references 1 and 2 are titled "1. Product
(Ref 1)" and "2. Customer (Ref 2)" are shown in the example, unless
the REFDATxx.CSV files have been edited otherwise).
3. Press the MAIN key to return to the operating screen.
NOTE: The store icons are pre determined by the settings in the configuration
file LMSETUP.CSV on the data card. They cannot be set from the
instrument.
User-definable store index files including any extended information (REFDAT01
andREFDAT02 are configured 'Product' and 'Customer' by default).