4 - STORE FUNCTIONS
23
4.3 Programming Stores Data (Files REFDAT01 - REFDAT06) via the Head Unit
Only new store information can be added via the instrument keypad.
Existing store information can only be edited in MS Excel.
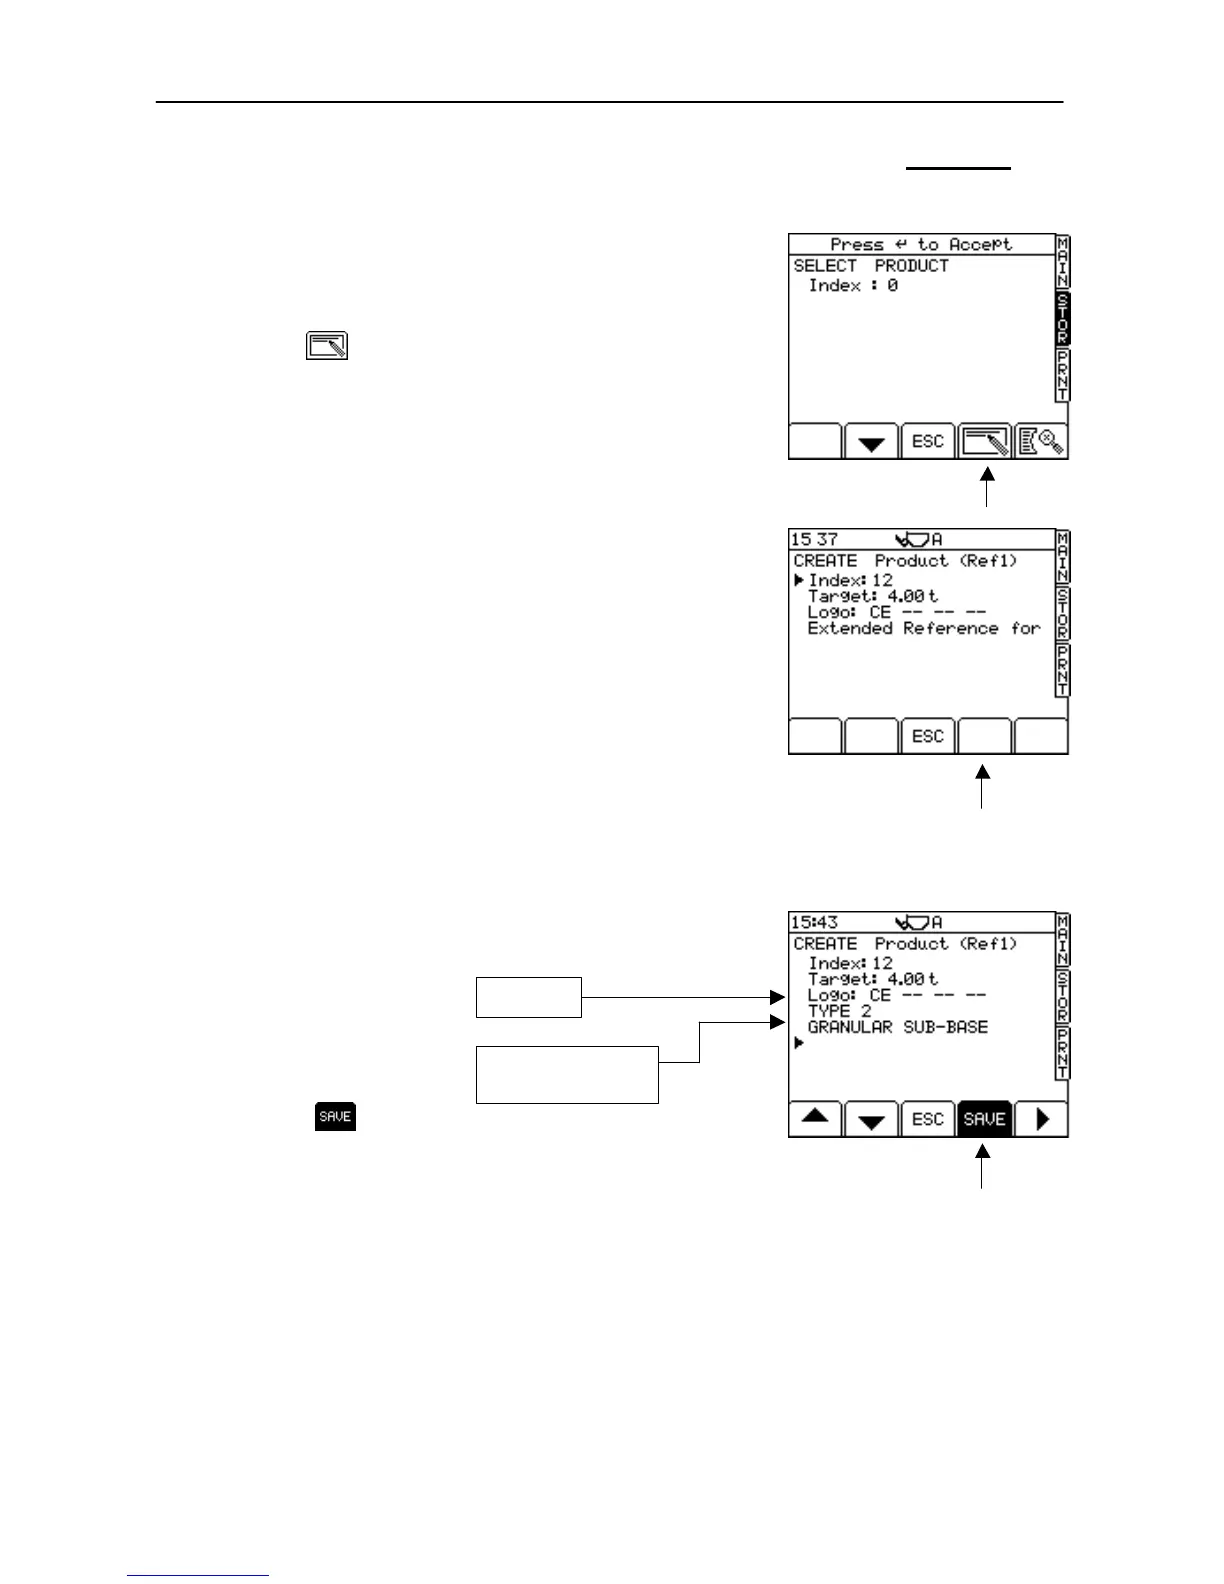
1. Press the STOR key to select the first Reference store screen
(Product) - fig. 30b.
2. Press and release the ENTER key once or more to reach the Store
Reference you want to add to.
3. Press the key to open the 'CREATE' screen. The instrument
then searches the data card and displays the next available index
number (fig. 30c).
NOTE: The larger the number of indexes already programmed, the longer it
will take longer to open the screen)
4. Press ENTER to select the index number. The cursor then moves to
line 2 (Target Weight).
5. Enter the desired target weight in the 'Truck' Store, otherwise ignore
line 2.
6. If the ‘CE’ logo is required on printouts, move the cursor to the
‘Logo:’ line and press the key. Then press the key until
‘CE’ is displayed, and press the ENTER key to confirm. The cursor
then moves to line 4 (Extended Reference).
NOTE: The logo will appear on a printout next to the first line of that Store
Reference. Up to 4 logos with the reference ‘AE’, ‘BE’, ‘CE’ and ‘DE’
(‘CE’ being the ‘CE1137’ logo), can be selected to appear on the
printout in the order that they are displayed on the ‘Logo:’ line (fig.
30c).
The logo data is stored in the main configuration file ‘LMSETUP.CSV’
on the SD card.
7. Using the arrow keys to position the cursor, enter the index name
(line 3) and up to 5 lines of text for an extended reference (lines 4 - 8)
- fig. 30d.
8. Press the key when finished. The instrument then displays
the next Reference Store.