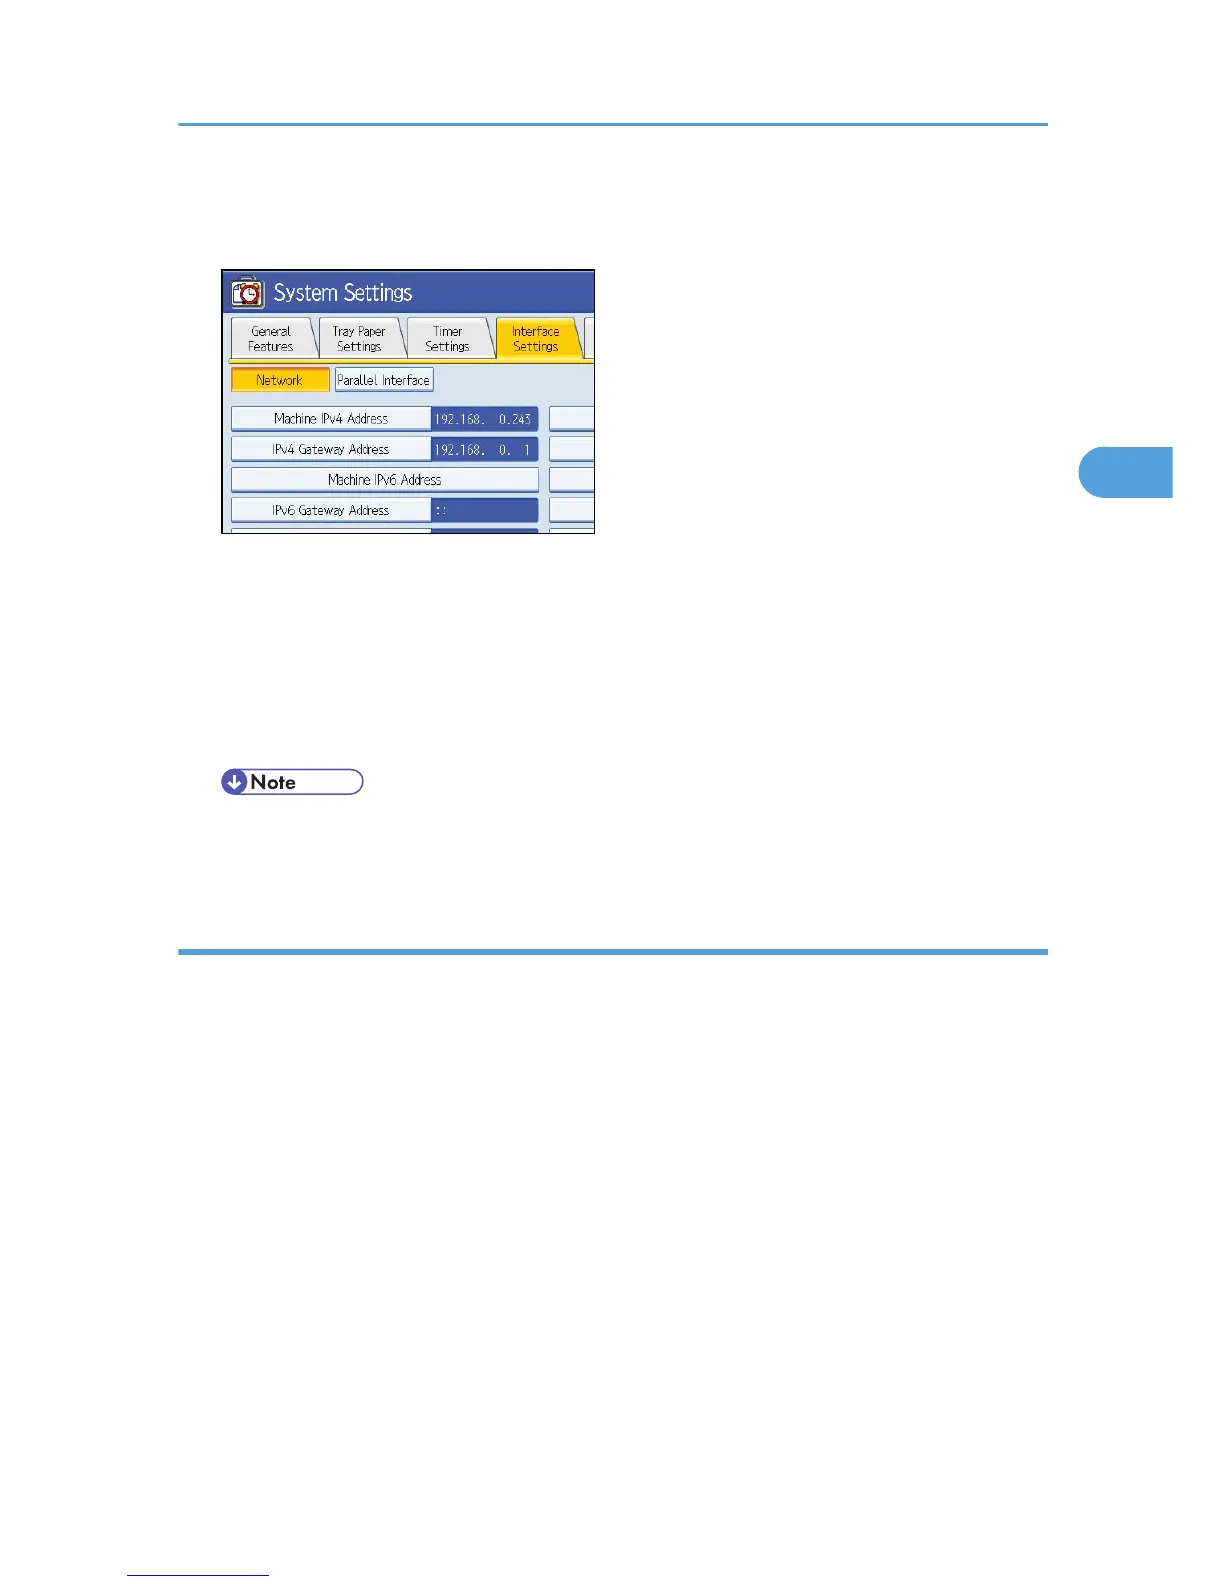
The System Settings screen appears.
2. Press the [Interface Settings] tab.
3. Press [Machine IPv4 Address] to specify the machine's IPv4 address.
To specify a static IPv4 address for this machine, press [Specify], and then enter the IPv4 address and
subnet mask.
To obtain an IPv4 address from a DHCP server automatically, press Auto-Obtain (DHCP).
4. Press [IPv4 Gateway Address], and then enter the IPv4 gateway address.
5. Press [Effective Protocol], and then make [IPv4] active.
• If an extended wireless LAN board (optional) is installed, press [LAN Type] on the [Interface
Settings] tab, then press [Ethernet], and then configure the network settings.
Enabling WSD using Web Image Monitor
To use this machine as a WSD scanner, you must first configure the following settings using Web Image
Monitor on a client computer:
• WSD scanner function (default setting: [Off])
Click [Configuration], click [Initial Settings] under [Scanner], and then set [WSD (Scanner)] to [On].
• WSD protocol (default setting: [Active])
Click [Configuration], click [IPv4] or [IPv6] under [Network], and then enable [WSD (Scanner)].
Use the following procedure to set the WSD scanner function to [On].
1. On the [Start] menu, click [Network].
2. Double-click the icon for this machine.
3. Click [Login].
The Web Image Monitor login page appears.
Before Sending Scan Files Using WSD
79

 Loading...