144
Playback Menu
6
This function allows you to trim a still image you have shot and then
save it as a separate file.
1
Press the 6 (Playback) button.
2
Press the ADJ./OK button !"#$ to display the file you
want to trim.
3
Press the MENU button.
• The playback menu appears.
4
Press
the ADJ./OK button
"
to select [Trim] and press the
button
$
.
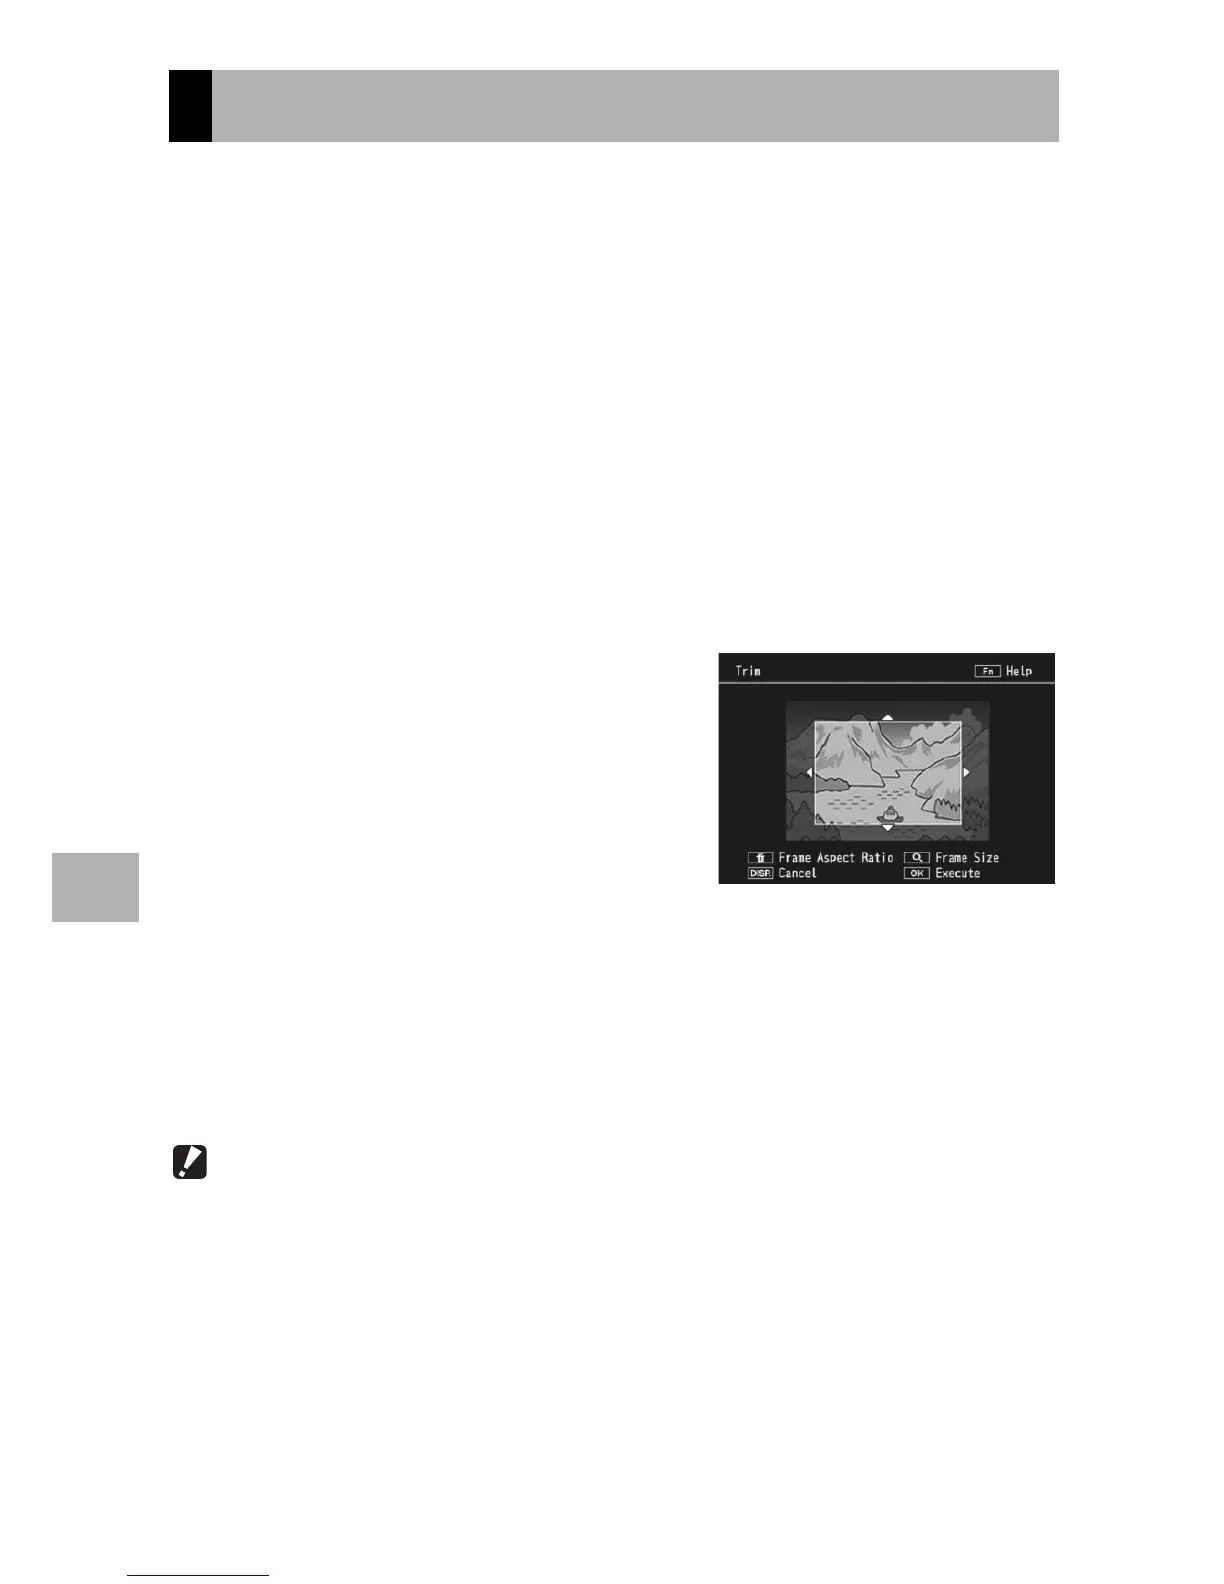
• The [Trim] screen appears.
• To cancel trimming, press the DISP. button.
5
Turn the zoom lever toward 8
or 9 to set the size of the
trimming frame.
• Pressing the Fn (Function) button at
this point displays the screen for
describing the operating procedure.
Pressing the Fn button again returns
the display to the previous screen.
• Press the D button to choose between aspect ratios of 4 : 3 and 1 : 1.
6
Press the ADJ./OK button !"#$ to set the position of
the trimming frame.
7
Press the ADJ./OK button.
•
The trimmed image is recorded. The original image remains unchanged.
Caution------------------------------------------------------------------------------------------
• You can only trim still images shot using this camera.
• You cannot trim movies or MP files.
• With the exception of images with an aspect ratio of 1 : 1 and a size, after cropping,
of 2592 x 2592, images can be cropped repeatedly. The compression applied when
a copy is saved results in a drop in image quality.
Trimming Images