182
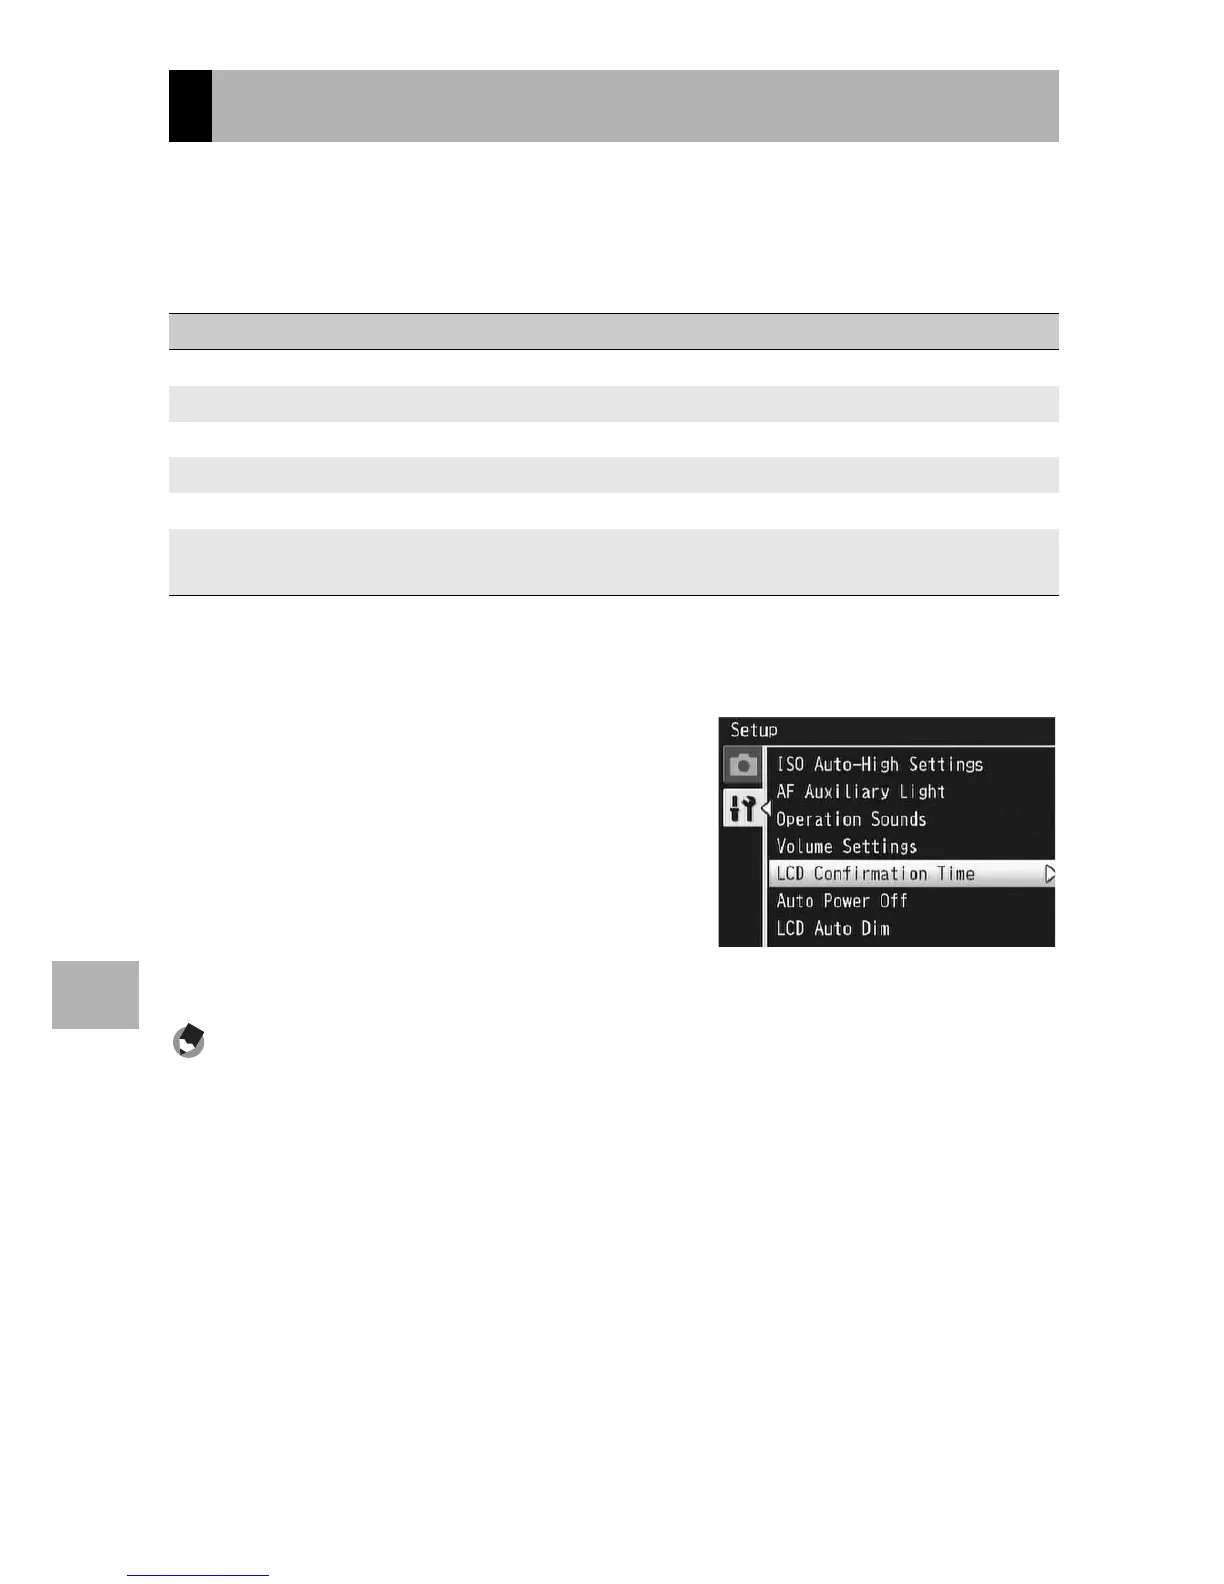
Setup Menu
7
Immediately after you press the shutter release button, the still
image taken is displayed on the screen for a moment so you can
check it. By default, the image confirmation time is set to 0.5
second, but this can be changed.
1
Display the setup menu.
• For the operating procedure, see P.166.
2
Press the ADJ./OK button " to
select [LCD Confirmation
Time] and press the button $.
3
Press the button !" to select
the desired setting.
4
Press the ADJ./OK button.
Note ----------------------------------------------------------------------------------------------
When [LCD Confirmation Time] is set to [Hold], the displayed image can also be enlarged
(GP.50) or deleted (GP.52).
LCD Image Confirmation Time
Available Settings
Off (The image is not displayed for confirmation.)
0.5 seconds *Default setting
1 second
2 seconds
3 seconds
Hold (The image remains displayed until the next time you half-press the shutter release
button.)