150
Playback Menu
6
This function allows you to correct the green, magenta, blue and
amber color tones in still images you have taken and then record
the corrected images.
1
Press the 6 (Playback) button.
2
Press the ADJ./OK button !"#$ to display the file you
want to correct.
3
Press the MENU button.
• The playback menu appears.
4
Press the ADJ./OK button " to
select [White Balance
Compensation] and press the
button $.
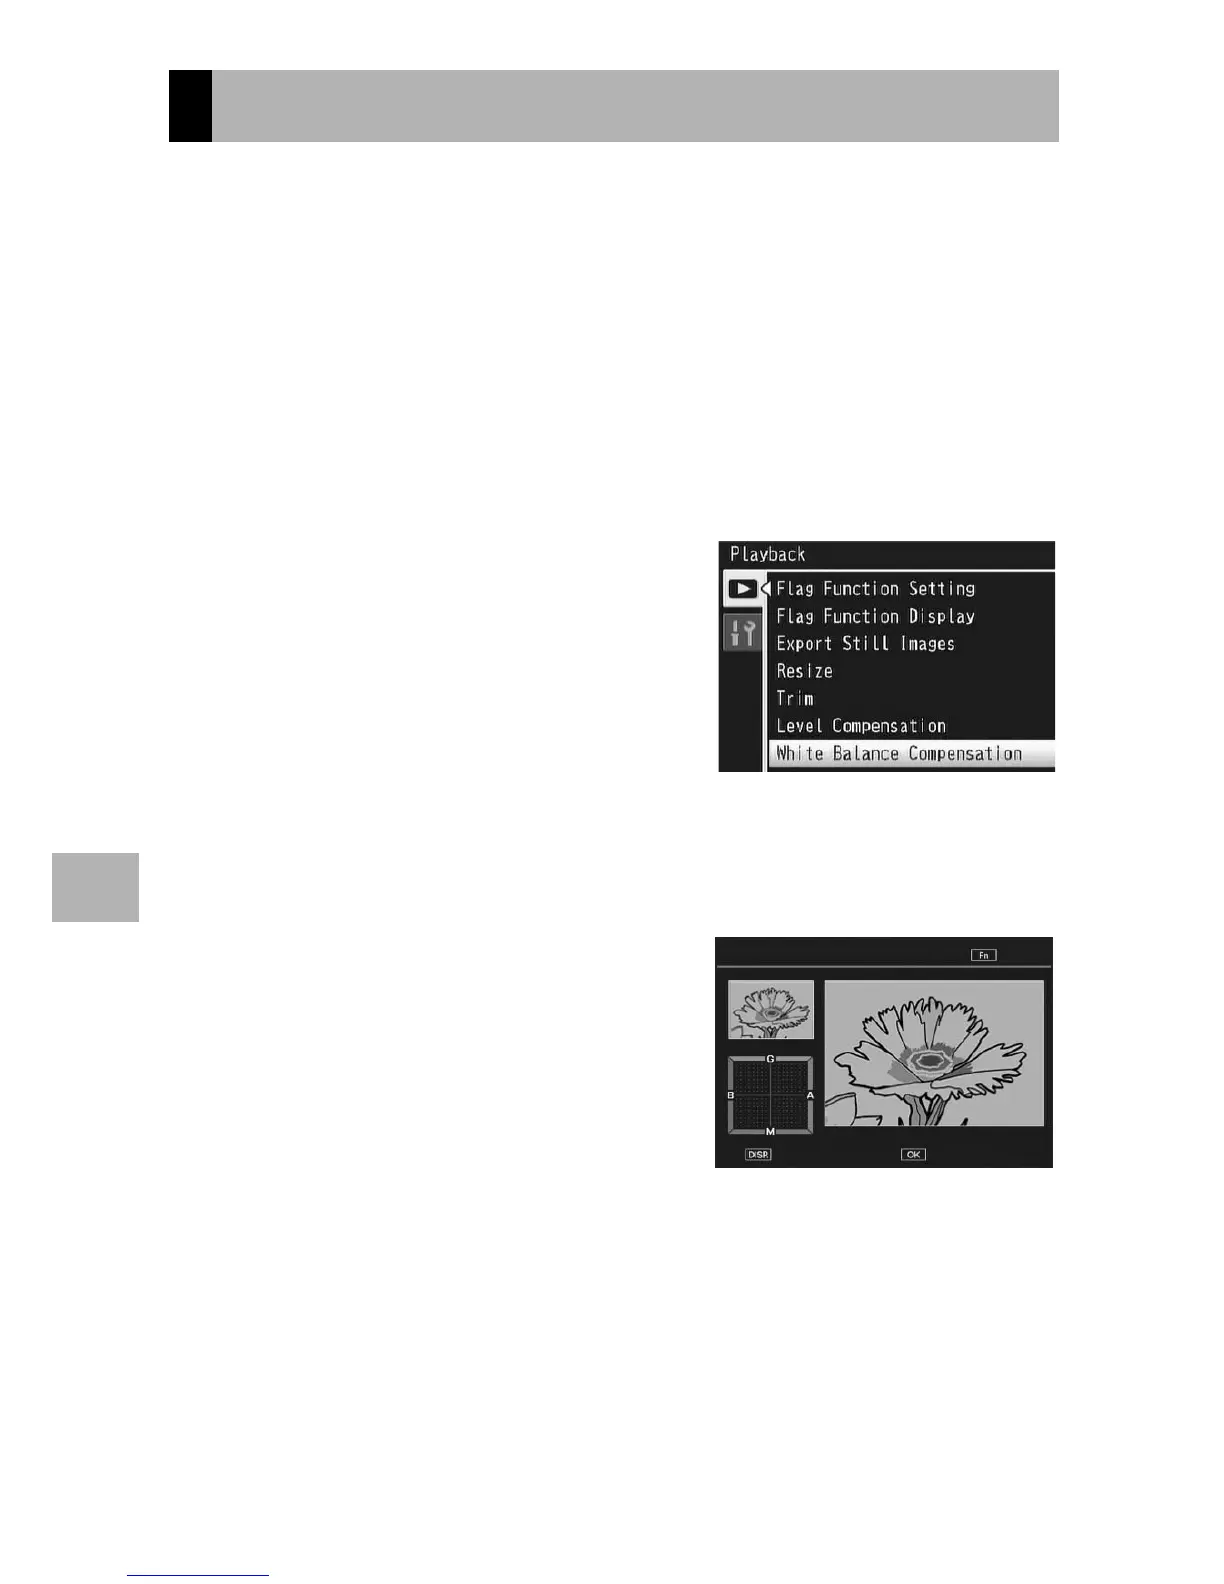
• The original image appears at the
upper left of the screen, the white
balance compensation map is at the
lower left, and the corrected image is
shown on the right.
• If you select a file that cannot use white balance compensation, an
error message appears and you are returned to the playback menu.
5
Press the button !"#$ to
move the point around the
white balance compensation
map and adjust the color
tones.
• Press the button !"#$ to move the
point around the white balance
compensation map. [G] denotes
green, [A] denotes amber, [M] denotes magenta and [B] denotes blue,
and the color tones change toward the respective colors depending on
the location of the point.
•
To cancel white balance
compensation, press the DISP. button.
• Press the D button to reset the color tone while correcting.
• Pressing the Fn (Function) button at this point displays the screen for
describing the operating procedure. Pressing the Fn button again
returns the display to the previous screen.
Correcting the White Balance
White Balance Compensation
Help
Cancel Ok