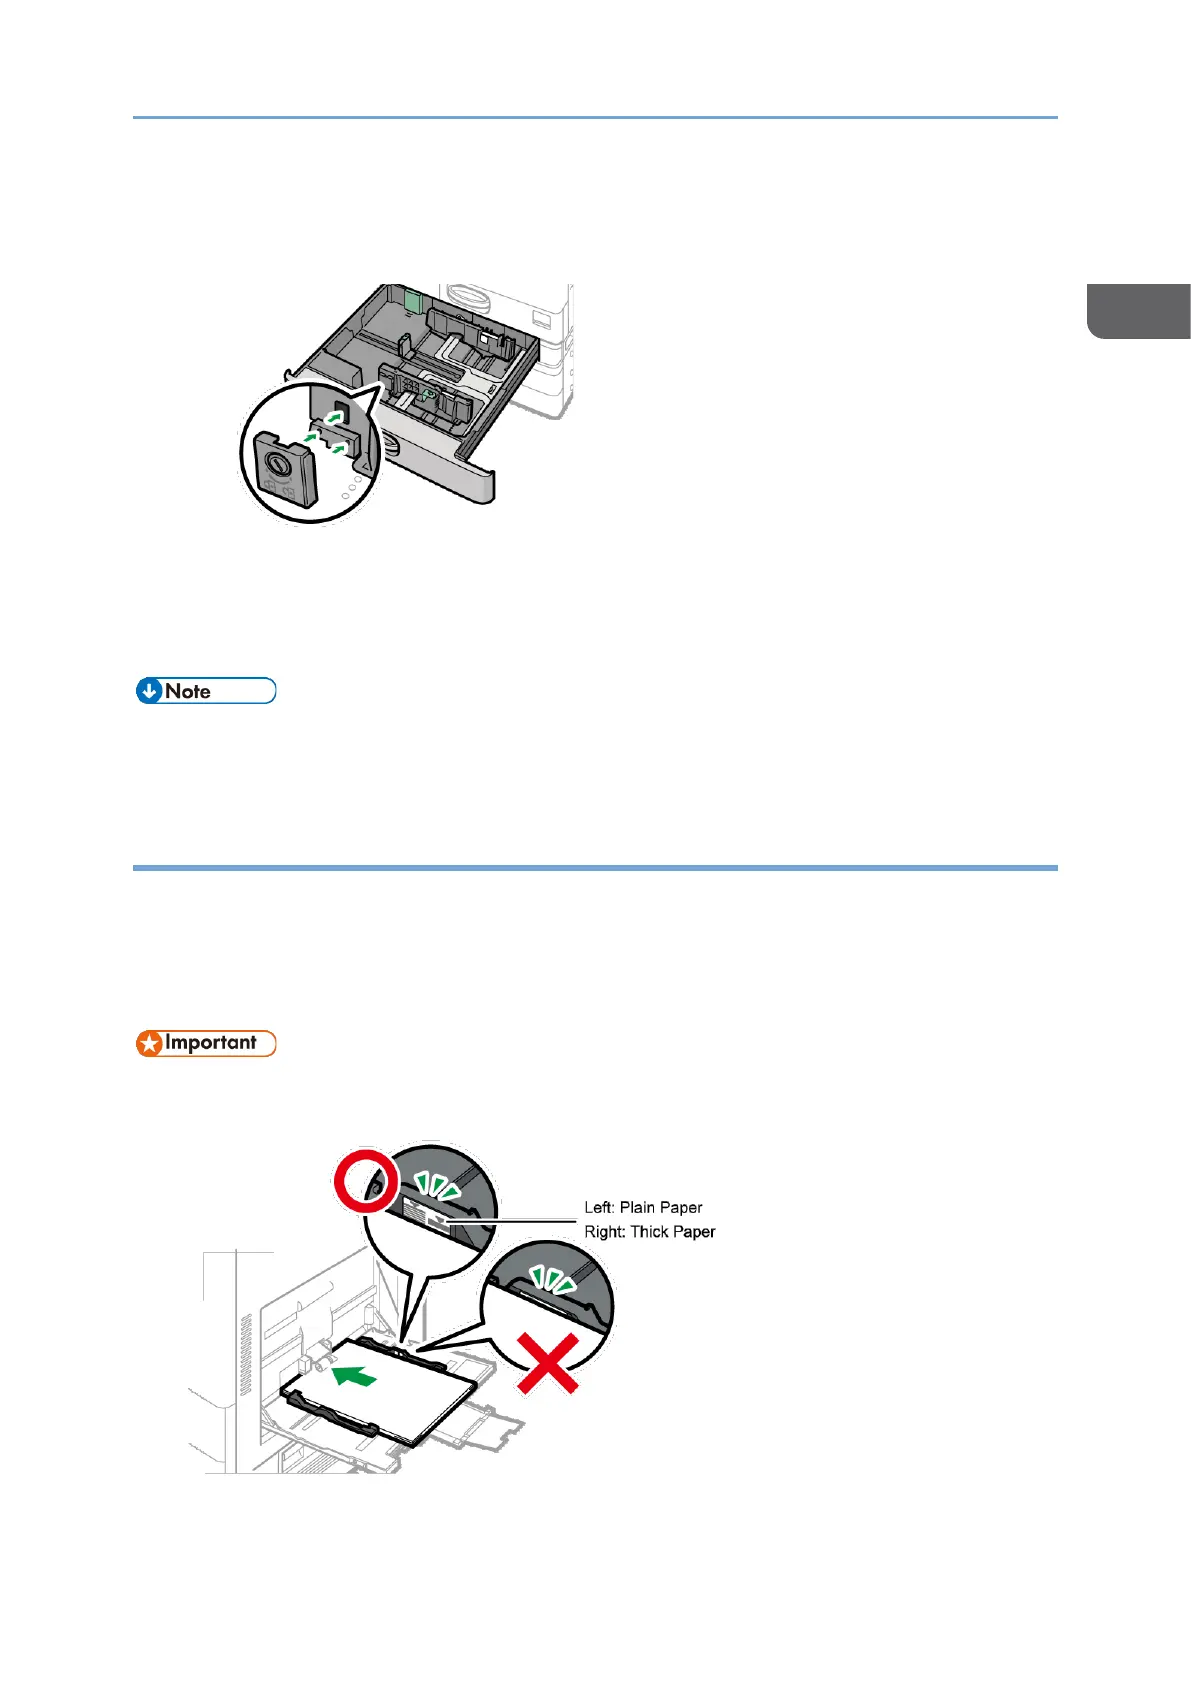
• If you will not fix the end fence, put the stopper in the position as shown in the
illustration, and then rotate the fixing screw 90 degrees clockwise with a coin or
similar object.
8. Push the tray in the original position carefully.
To return the completely pulled out tray to the original position, push the tray
straight in. If the paper tray is damaged, it may cause a paper jam. Also, if you push
the tray forcibly, the side fence of the tray may be moved.
• You can load envelopes into Tray 2 to 4.
page296”Envelope Orientation and Recommended Status”
Loading Paper into the Bypass Tray
Use the bypass tray to load paper of a size that cannot be loaded into Tray 1 to 4, such as
label paper (adhesive labels).
The maximum number of sheets you can load at the same time depends on paper type.
page285”Recommended Paper Sizes and Types”
• Do not stack paper over the limit mark. If you load paper over the limit mark, the
print image may be slanted or the paper may be jammed.
 Loading...