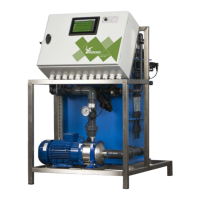
4.5 Installing other components
During the initial installation and commissioning of the FertiMiX-Go!, the components
listed below will usually already be connected. However, it is also possible to add and
connect these components to the FertiMiX later.
Before connecting components such as a dosing channel or sensor, make sure
that the FertiMiX is switched off.
4.5.1 Connecting dosing channel
Since a dosing channel is always supplied preassembled, you only need to tighten up
the screw couplings.
Use the dosing channels that have already been installed as an example.
To connect an extra or new (acid) dosing channel, complete the following steps:
1. Make sure that there is no water pressure in the FertiMiX.
2. Remove the black protective cap on the mixing tank
3. Unscrew the sealing cap of the dosing street
4. Put the new dosing channel in place.
5. Tighten all the screw couplings securely.
6. Connect the wiring terminal block to the dosing valve.
7. Route all the wiring to the cabinet (follow the already connected wiring)
8. Connect the wiring according to the included wiring diagram.
An acid dosing channel should be connected to the last channel of the dosing
module.
Depending on the pH, different material is used for an acid dosing channel.
4.5.2 Connecting EC sensor
One or two EC sensors can be connected to the FertiMiX-Go!. If two sensors are
connected, the first sensor in the direction of water flow is the control sensor, and the
second sensor is the verification sensor (also see section "Measurement module
(sensors)" on page14).
To connect an extra or new EC sensor, complete the following steps:
1. Make sure that there is no water pressure in the FertiMiX.
2. Unscrew the sealing cap at the location where the sensor will be connected.
3. Place the sensor in the hole.
4. Connect the wiring according to the included wiring diagram.
5. Calibrate the sensor See section "Calibrating the sensors" on page40 for
explanation.
You can find more information in the OEM manual provided with the EC sensor.
FertiMiX
32