The exact layout of the home screen depends on your configuration. The screenshot
below shows what the home screen may look like on your system.
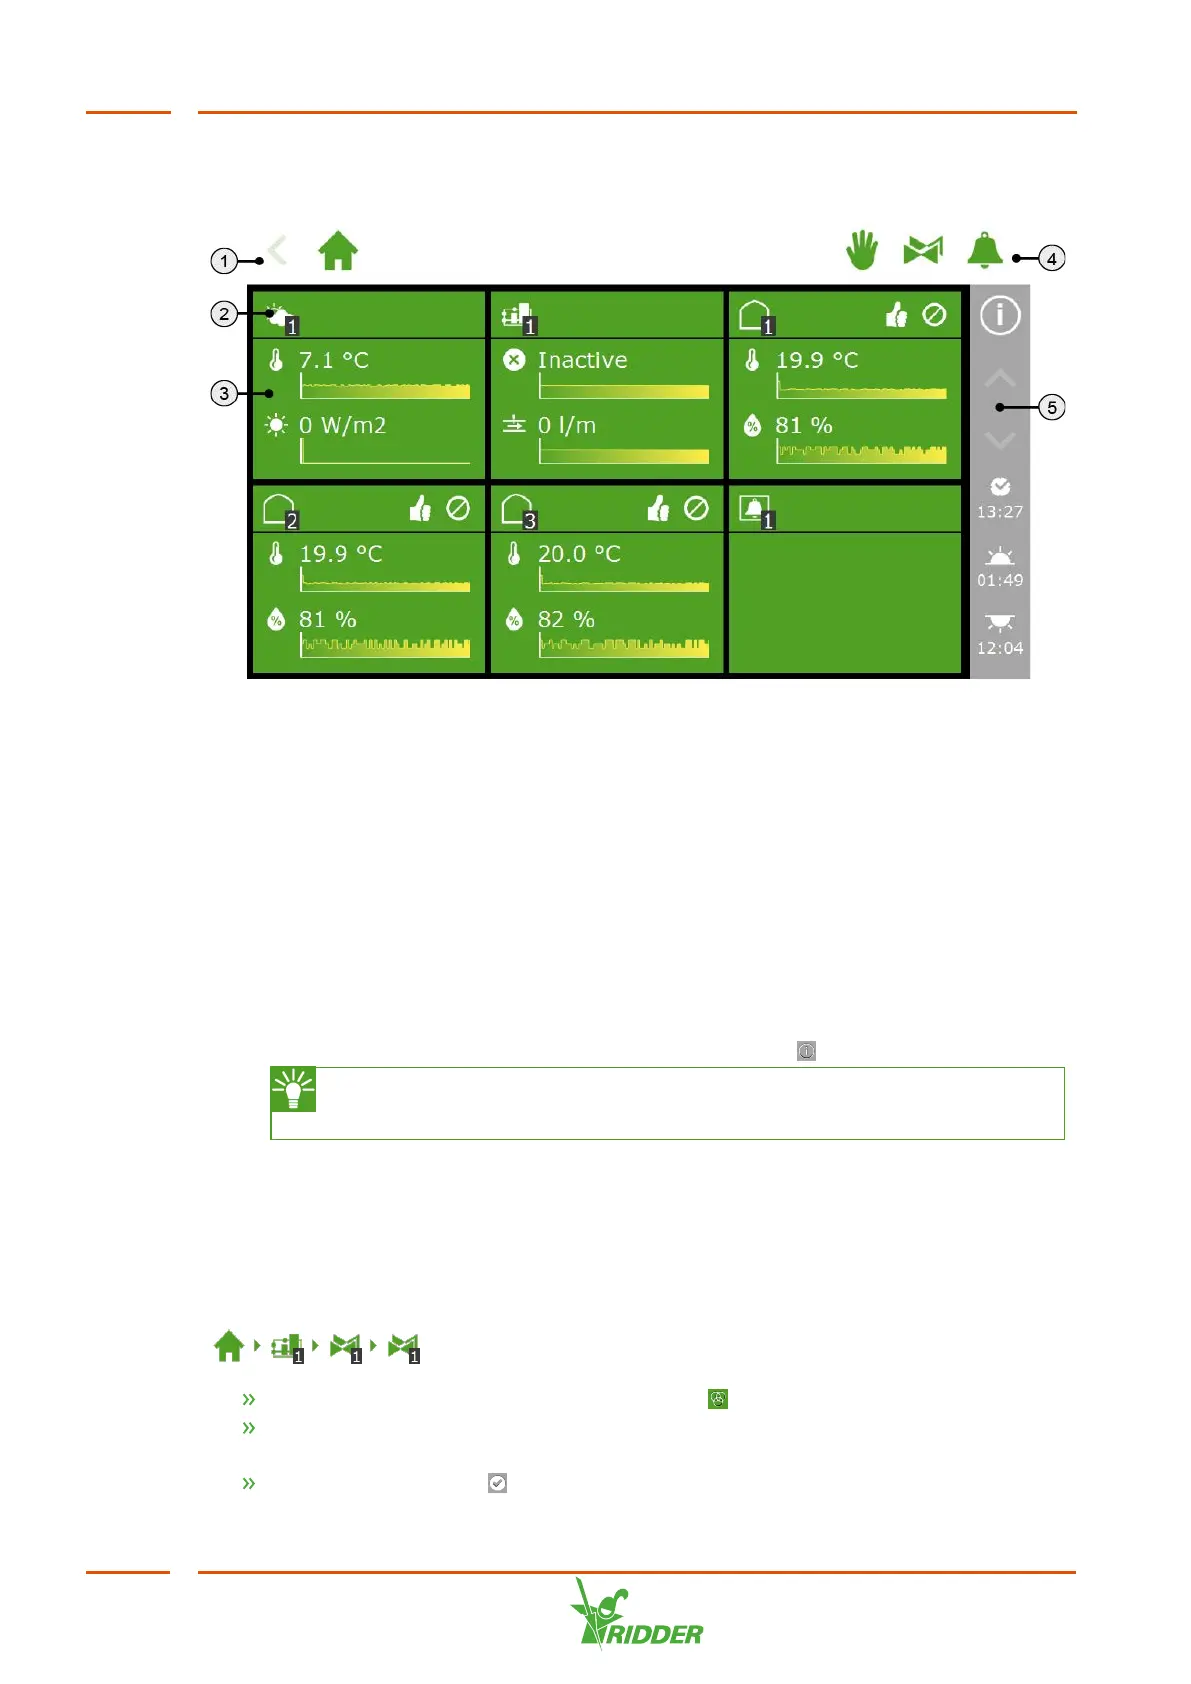
Figure 6-2: HortiMaX-Go! home screen
1. Top bar with the breadcrumb trail on the left-hand side.
The breadcrumb trail shows your current location within the software.
2. Tile header
The tile header contains the following information: the type of tile, the control
mode and the control status.
3. Tile body with information
The tile body shows readouts and trend graphs.
4. Top bar with, on the right-hand side, direct access to fixed position control, the
valve group (manual start control) and the alarm screen.
5. Right sidebar
The bar on the right-hand side of the screen provides access to a number of
basic settings and functions, such as the help button ‘ '.
Tap the help button to display a help screen with a QR code. Scan the QR
code to access our online help.
6.3.2 Assigning valves to valve groups
The irrigation program works based on valve groups. A valve group consists of one or
more valves including the start conditions and irrigation settings set for those valves.
You set up the irrigation program for each valve group.
To assign valves to a valve group, navigate the following path (for each valve group):
.
Tap the Assign Valves to Valve Groups icon ‘ '. A pop-up window appears.
Select the valves that you want to assign to the valve group by tapping them. A
white border appears around the selected valves.
Tap the Confirm icon ‘ '.
FertiMiX
46