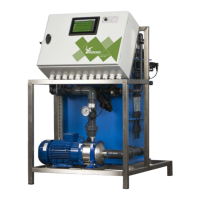
4.5.3 Connecting pH sensor
Zero, one or two pH sensors can be connected to the FertiMiX-Go!. If two sensors are
connected, the first sensor in the direction of water flow is the control sensor, and the
second sensor is the verification sensor (also see section "Measurement module
(sensors)" on page14).
To connect an extra or new pH sensor, complete the following steps:
1. Make sure that there is no water pressure in the FertiMiX.
2. Unscrew the sealing cap at the location where the sensor will be connected.
3. Remove the protective cap from the sensor.
4. Place the sensor in the hole.
5. Connect the wiring according to the included wiring diagram.
6. Calibrate the sensor See section "Calibrating the sensors" on page40 for
explanation.
You can find more information in the OEM manual provided with the pH sensor.
A pH sensor must not be allowed to dry out. The pH sensor is kept moist
during transport and storage with a protective cap containing water. Remove
this cap before use and place the sensor back into it if the FertiMiX-Go! is not
in use for an extended period.
4.5.4 Connecting the I/O modules
To connect the I/O modules (Smart Switches), you need to set the DIP switch
addresses. If you have one or more Valves Smart Switch(es), these must first be
installed in the FertiMiX cabinet or the valves cabinet.
For more information about Smart Switches, please refer to the
documentation included and the "Smart Switch inserts".
Valves Smart Switch
The Valves Smart Switch (called "Smart Switch Valves” in the price list) needs to be
installed in a valves cabinet or the FertiMiX cabinet.
Valves Smart Switch in valves cabinet
1. Make sure that the valves cabinet has been installed in a suitable location.
2. Install the Smart Switch(es) in the valves cabinet.
3. Connect the valves cabinet to the FertiMiX cabinet.
4. Connect the Smart Switch as described in the "160211 HortiMaX-Go! Installation
Manual".
Smart Switch Valves in FertiMiX cabinet
1. Install the Smart Switch(es) in the FertiMiX cabinet.
2. Connect the Smart Switch as described in the "160211 HortiMaX-Go! Installation
Manual".
FertiMiX
33