54 Rockwell Automation Publication 6200-UM001C-EN-P - July 2018
Appendix A Install Accessories
5. Reinstall the two screws that you removed in step 2.
6. Follow the steps for Post-configuration
on page 53.
For VersaView 5200 ThinManager Thin Client Non-display
Computer (cat. no. 6200T-BA)
1. Follow the steps for Pre-configuration on page 52.
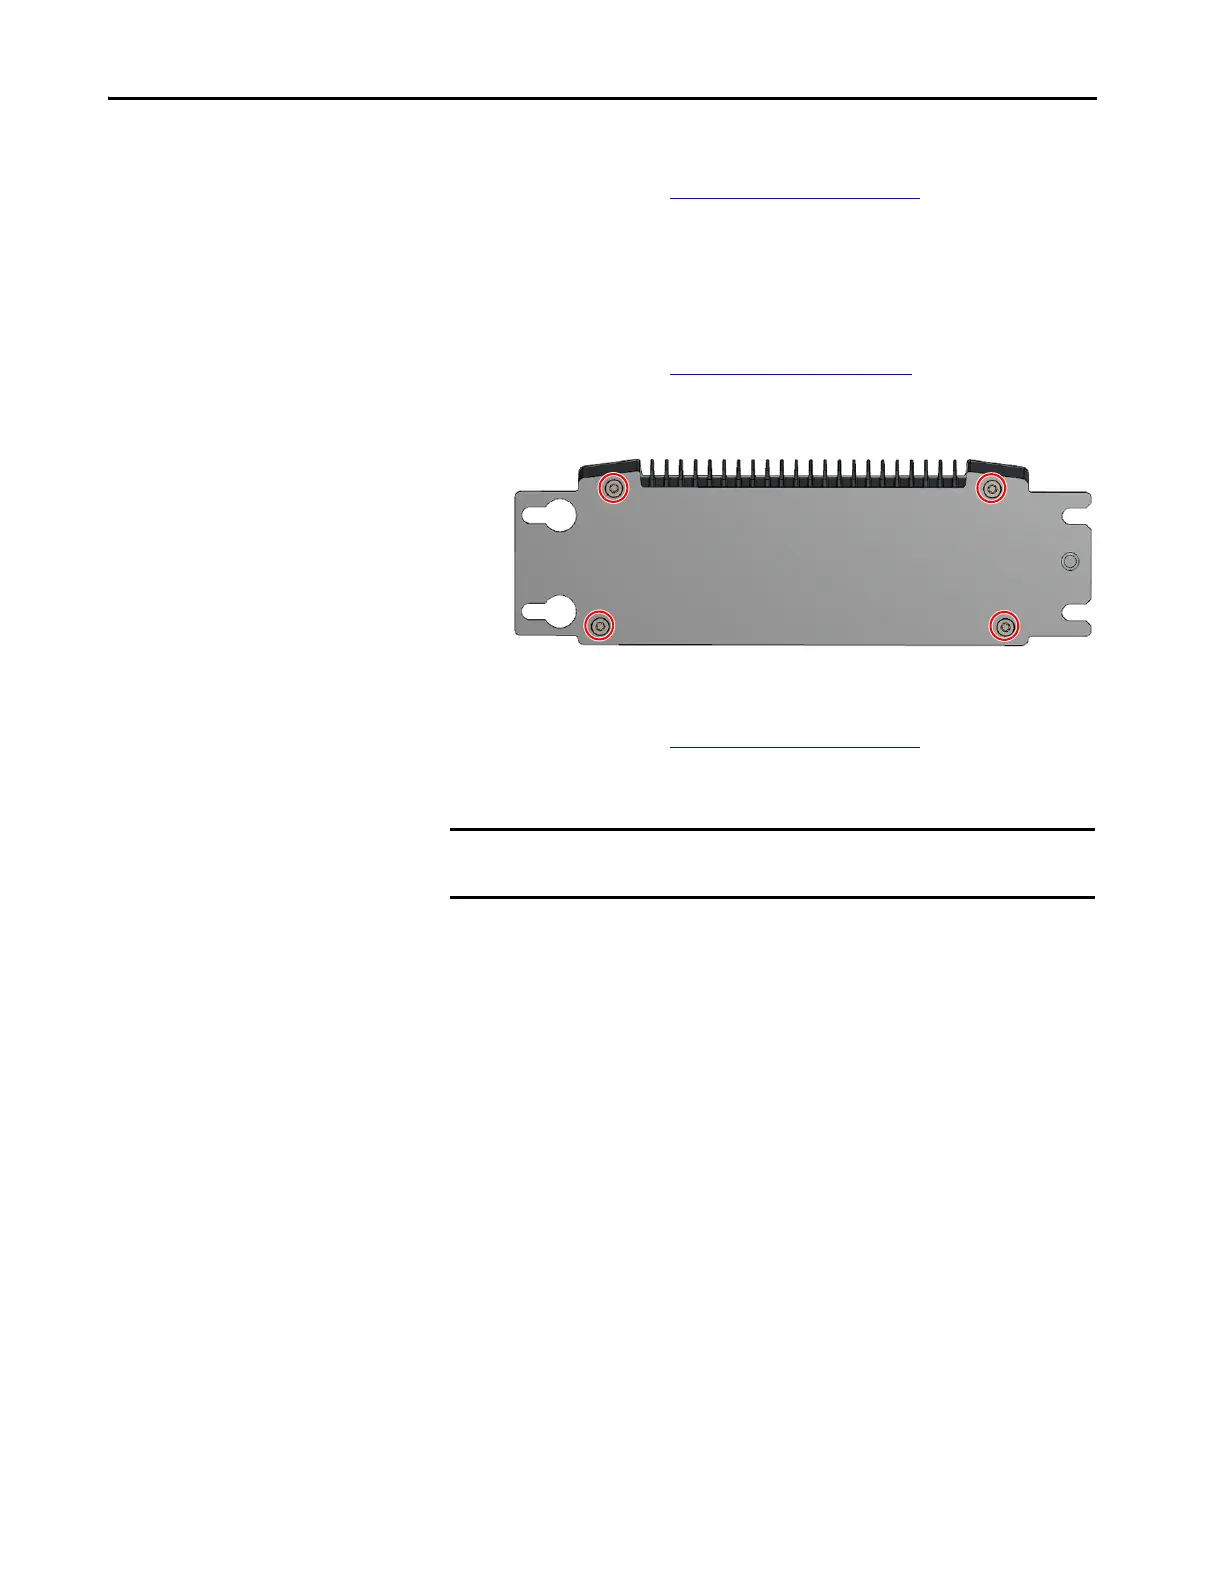
2. With the Torx 10 key or screwdriver, remove the four screws that secure
the factory-installed mounting plate to the back of the thin client.
3. Install the new mounting plate (cat. no. 6200V-BXWALL2) with the
four screws that you removed in step 2.
4. Follow the steps for Post-configuration on page 53.
Install the VESA Mounting
Plate
Observe these guidelines when you install an integrated display VersaView thin
client or industrial computer on a mounting arm:
• The mounting surface and the mounting arm must be strong enough to
support the thin client or computer and the mounting hardware.
• The interface between the mounting arm and the computer must meet
VESA FPMPMI 100 mm (3.94 in.) standards.
• The mounting location must provide adequate clearance to position and
move the adjustable unit, and to route cables.
IMPORTANT If you choose to VESA mount an integrated display thin client or industrial
computer, its IP rating is reduced from IP65 to IP20.
 Loading...