Do you have a question about the ROEL CERBER C52 and is the answer not in the manual?
Overview of central unit's core features, EEPROM memory, user-friendly programming, and event log capabilities.
Details on programmable user codes, their rights, and ambush capability for system operation.
Information about the installer programming code for system parameter adjustments.
Features of the digital communicator, including phone line tone detection and reporting formats.
Details on various upload/download operations like parameter transfer, event log upload, and PC communication.
Description of zone types, attributes, and features like zone doubling and tamper recognition.
Detailed explanation of PGM functions, including 18 options for programmable outputs.
Covers monitoring of battery voltage, AC power, siren, AUX overload, telephone line, and keypad tamper.
Describes response to remote calls, status interrogation, and automatic reporting via synthesis sounds.
Details on chime feature, quick arming modes, autoarming options, and audible warnings.
Provides specifications for power, inputs, and main board outputs.
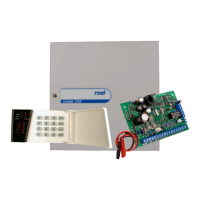
Lists available keypad models (KP-106P, KP-106L, KP-164P, KP-166L) and their features.
Illustrates the layout of different keypad models.
Explains the meaning of A & B READY LEDs on different keypad models according to system status.
Details the status indications for the READY LED on the KP-164P keypad.
Explains the meaning of the SYSTEM LED in various system states, including bypass functions.
Describes the function and status indication of the Bypass LED on applicable keypads.
Explains the status indications for the ARMED A LED for system/partition arming modes.
Explains the status indications for the ARMED B LED for partition B arming modes.
Details the meaning of Zone LEDs during system arming, disarming, and programming menus.
Guidance on selecting a suitable location and mounting the alarm control panel securely.
Instructions for locating and mounting the keypad at a convenient height for users.
Note regarding completing all wiring to the control panel before applying power.
Description of the various connectors on the panel PCB, including AUX, PGM, and BELL outputs.
Procedure for commissioning the system after connections are complete.
Step-by-step instructions to reset the system to its default factory settings.
Description of keypad functions, data entry, and system status display via LEDs.
Details on the system's installer programming code and user codes, including master code.
Explanation of user codes, master code operations, and user code rights programming.
Details on the partitioning feature, dividing the system into two distinct areas (A and B).
Explains how a partitioned system functions, user access rights, and partition arming/disarming.
Describes the method for regular or away arming the system/partition using a user code.
Explanation of the timed autoarming option for automatic system arming at scheduled times.
Details on inactivity autoarming, which arms the system based on detected movement.
Describes the instant stay arming mode for perimeter protection, allowing users to remain inside.
Explains stay arming mode for perimeter protection, allowing delayed zones to function normally.
Describes how the system automatically switches to stay arming after regular arming.
Instructions for arming/disarming the system using a keyswitch or pushbutton.
Details on quick arming modes allowing arming without user codes.
Explains the procedure for quick away arming without using a user code.
Describes the procedure for quick instant stay arming.
Explains the procedure for quick stay arming.
Procedure for disarming the system and deactivating an active alarm.
Step-by-step guide for disarming the system or partition and deactivating alarms.
How to deactivate an alarm when the siren is sounding by entering a user code.
Introduces other operational commands available for system interaction.
Instructions for bypassing zones, useful for troubleshooting or faulty wiring situations.
How to display system trouble conditions using the [*][4] command and interpret zone LED indicators.
Procedure to display memorized alarms using the [*][5] command and interpret zone LEDs.
How to activate or deactivate the chime feature for zone openings.
Commands to activate or deactivate PGM outputs defined as mono-stable, bi-stable, or clock timer.
Steps to enter the main programming menu using the master user's code for system adjustments.
Lists the available submenus for master user programming, including user codes and phone numbers.
Procedure to program or erase user codes from 01 to 30, excluding the master code.
Details the sequence for programming or erasing a selected user code and setting its rights.
Procedure to erase all user codes except the master code.
Steps to program or selectively erase follow me phone numbers.
Details on programming phone numbers, including HEX digits and pauses.
Procedure to selectively erase follow me phone numbers.
How to erase all programmed follow me phone numbers simultaneously.
Procedure for programming the system date and hour in DD/MM/YY HH:MM:SS format.
How to manually start the upload/download process for PC programming.
Command to stop sound communication and upload/download without affecting central station communication.
Details on keypad special alarms like panic, fire, and medical emergency triggered by key combinations.
Instructions for installers to enter the system parameters programming menu using the installer's code.
Explanation of how to select and navigate programming sections and submenus.
Procedure to program zone types and attributes for zones 1 to 10/16.
Details on selecting zone types (e.g., delayed, instant, follower) using a 2-digit code.
How the panel displays ATTRIBUTES¹ set on zone LEDs after zone type selection.
Explains the meaning of ATTRIBUTES¹ set for zone LEDs, covering audible alarm, bypass, forced arming, and chime.
Explains ATTRIBUTES² set for zone LEDs, including Intellizone, tamper recognition, and ATZ connections.
Shows default values for zone types and active attributes for zones 1 to 10/16.
Procedure to program zone 1 parameters, including zone type and attributes.
Instructions for defining zones 2 through 16, referencing the procedure for zone 1.
Configuration of the first set of general system options, including keypad lockout and zone restoration.
Configuration of the second set of general system options, related to keypad tamper alarms and siren behavior.
Configuration of the third set of general system options, assigning keypads to partitions.
Configuration of the first set of options for partition A, including quick arming modes.
Configuration of the first set of options for partition B, covering quick arming and ding settings.
Configuration of the second set of options for partition A, including autoarming and beep settings.
Configuration of the second set of options for partition B, covering autoarming and autodisarming.
Configuration of telephone options, including dialing modes and telephone line monitoring.
Configuration of digital communicator options, such as PC calls and sound reporting.
Setting the swinger shutdown and keypad lockout counters to manage alarm limits.
Setting entry delay timers for zones, defining the time allowed to disarm the system.
Setting exit delay timers for arming the system, defining time to leave the protected area.
Configuring siren activation timings for burglary and fire alarms.
Setting the time window for Intellizones, defining how long a zone must remain violated to trigger an alarm.
Setting the delay for transmitting AC power loss/restore events to the central station.
Setting activation times for PGM outputs when defined as pulse type.
Setting the number of rings before the panel automatically answers remote calls.
Configuring sound dialing sequences and reporting time for synthesis sounds.
Setting the interval for periodical system tests in hours or minutes.
Programming the type of outputs for PGM1 and PGM2, selecting from various functions.
Defines reporting codes for user arming, disarming, tamper, and duress events in Contact ID format.
Defines reporting codes for zone shutdown, bypass, burglary, panic, fire, and medical alarms.
Defines reporting codes for zone alarm restore, tamper restore, keyswitch operations, and module status.
Defines reporting codes for PC arming/disarming, timed and inactivity autoarming, and quick arming modes.
Defines reporting codes for partial arming, autoarm failure, power/battery/bell/supply troubles, and time inaccuracy.
Defines reporting codes for AC power restore, battery restore, bell/supply restore, time reprogram, and periodical test reports.
Sets the time for the first periodical system test in hour and minute format.
Sets inactivity time for auto arming of system/partition A, based on detected motion.
Sets inactivity time for auto arming of partition B, based on detected motion.
Procedure to program or change the installer's code.
Procedure for the installer to program the master code and its associated rights.
Sets the daily activation time for PGM1 when configured as a clock timer.
Sets the daily deactivation time for PGM1 when configured as a clock timer.
Sets the daily activation time for PGM2 when configured as a clock timer.
Sets the daily deactivation time for PGM2 when configured as a clock timer.
Sets the daily auto-arming time for system/partition A.
Sets the daily auto-disarming time for system/partition A.
Sets the daily auto-arming time for partition B.
Sets the daily auto-disarming time for partition B.
Programming the first panel account number for central station reporting.
Programming the second panel account number for central station reporting.
Programming the first CS phone number for reporting events within system/partition A.
Programming the second CS phone number for reporting events within partition B.
Setting the panel identification code for PC upload/download processes.
Setting the PC identification code for upload/download processes.
Allows installer to manually start PC upload/download communication.
Command for installer/master user to cut off phone communication during tests.
Details single zone input terminal connections for NC/NO contacts with EOL resistors.
Wiring single zones with NC/NO contacts, EOL resistor, no tamper recognition.
Wiring single zones with NC contacts, EOL resistor, and tamper recognition.
Explains zone doubling and ATZ connections to increase zone capacity.
Wiring single zones with NC contacts, EOL resistor, no tamper/wire fault recognition.
Wiring single zones with NC contacts, EOL resistor, and tamper/wire fault recognition.
Wiring for single zones with EOL resistor, tamper recognition, and fire loop supervision.
Wiring for zone doubling with EOL resistor and tamper recognition for fire detection.
| Brand | ROEL |
|---|---|
| Model | CERBER C52 |
| Category | Control Panel |
| Language | English |