Instruction Manual
IM-106-350C, Rev 2.2
July 2008
8-9
Hazardous Area Oxymitter 5000
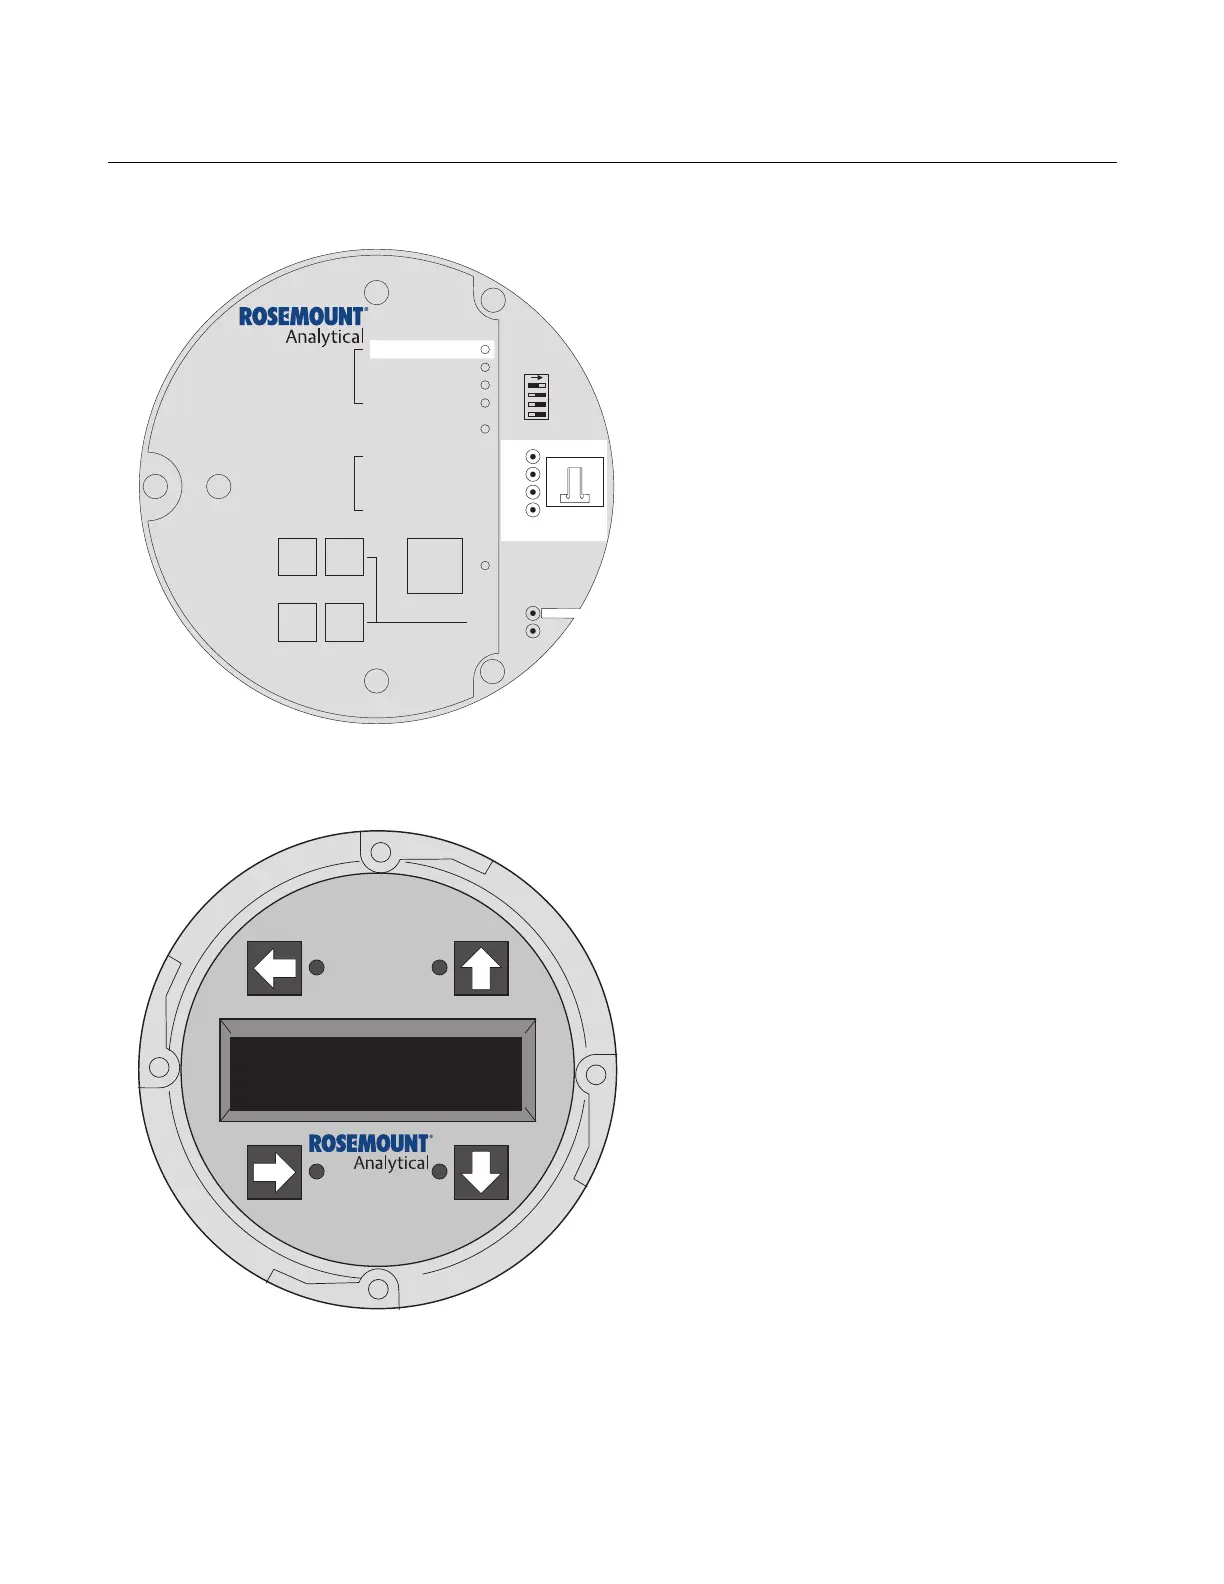
Figure 8-5. Fault 3, Reversed Thermocouple
Fault 3, Reversed Thermocouple Wiring or
Faulty PC Board
Figure 8-5 shows the electronic assembly for a
Hazardous Area Oxymitter 5000 with a
membrane keypad (upper view) and a
Hazardous Area Oxymitter 5000 with an LOI
(lower view). The upper view also shows J1 and
test points TP1 through TP6, located on the
microprocessor board, below the membrane
keypad or the LOI module.
Membrane Keypad
When Fault 3 is detected, the HEATER T/C LED
flashes three times, pauses for three seconds,
and repeats.
1. Using a multimeter, measure the voltage
from TP3+ to TP4-. If the reading is
negative, the thermocouple wiring is
reversed.
2. Check red and yellow wires in the J1
connector for the proper placement.
3. If the wiring is correct, the fault is in the PC
board. See "Electronic Assembly
Replacement" in Section 9: Maintenance
and Service.
LOI
When Fault 3 is detected, the LOI displays the
"O2 T/C Reversed" message.
1. Remove power. Unscrew and remove the
LOI module from the electronic assembly.
2. Reconnect power to the Oxymitter 5000.
3. Perform the diagnostic steps 1 through 3
shown for the membrane keypad.
Alarms
O2T/CReversed
DIAGNOSTIC
ALARMS
TEST
POINTS
HEATER T/C
HEATER
O2 CELL
CALIBRATION
CALIBRATION RECOMMENDED
O2 CELL mV +
O2 CELL mv -
HEATER T/C +
HEATER T/C -
INC INC
DEC DEC
HIGH
GAS
LOW
GAS
CAL
TEST GAS +
PROCESS -
% O2
SW2
TP1
J1
TP2
TP3
RED
YEL
GRN
ORG
TP4
TP5
TP6
ON
38740046
LOI
KEYPAD



 To Next Page