SECTION 5
:
PRESET, TABLE DATA
SATO HT200e Page 5-5
MODIFICATION OF PRESET DATA
[RCL]
[
→
]
[
→
]
[ENTR]
[ENTR]
[ENTR]
[ENTR]
Note: Where asterisk mark or “*” can be seen in the upper right on the screen, entry by scanner can
be made
possible.
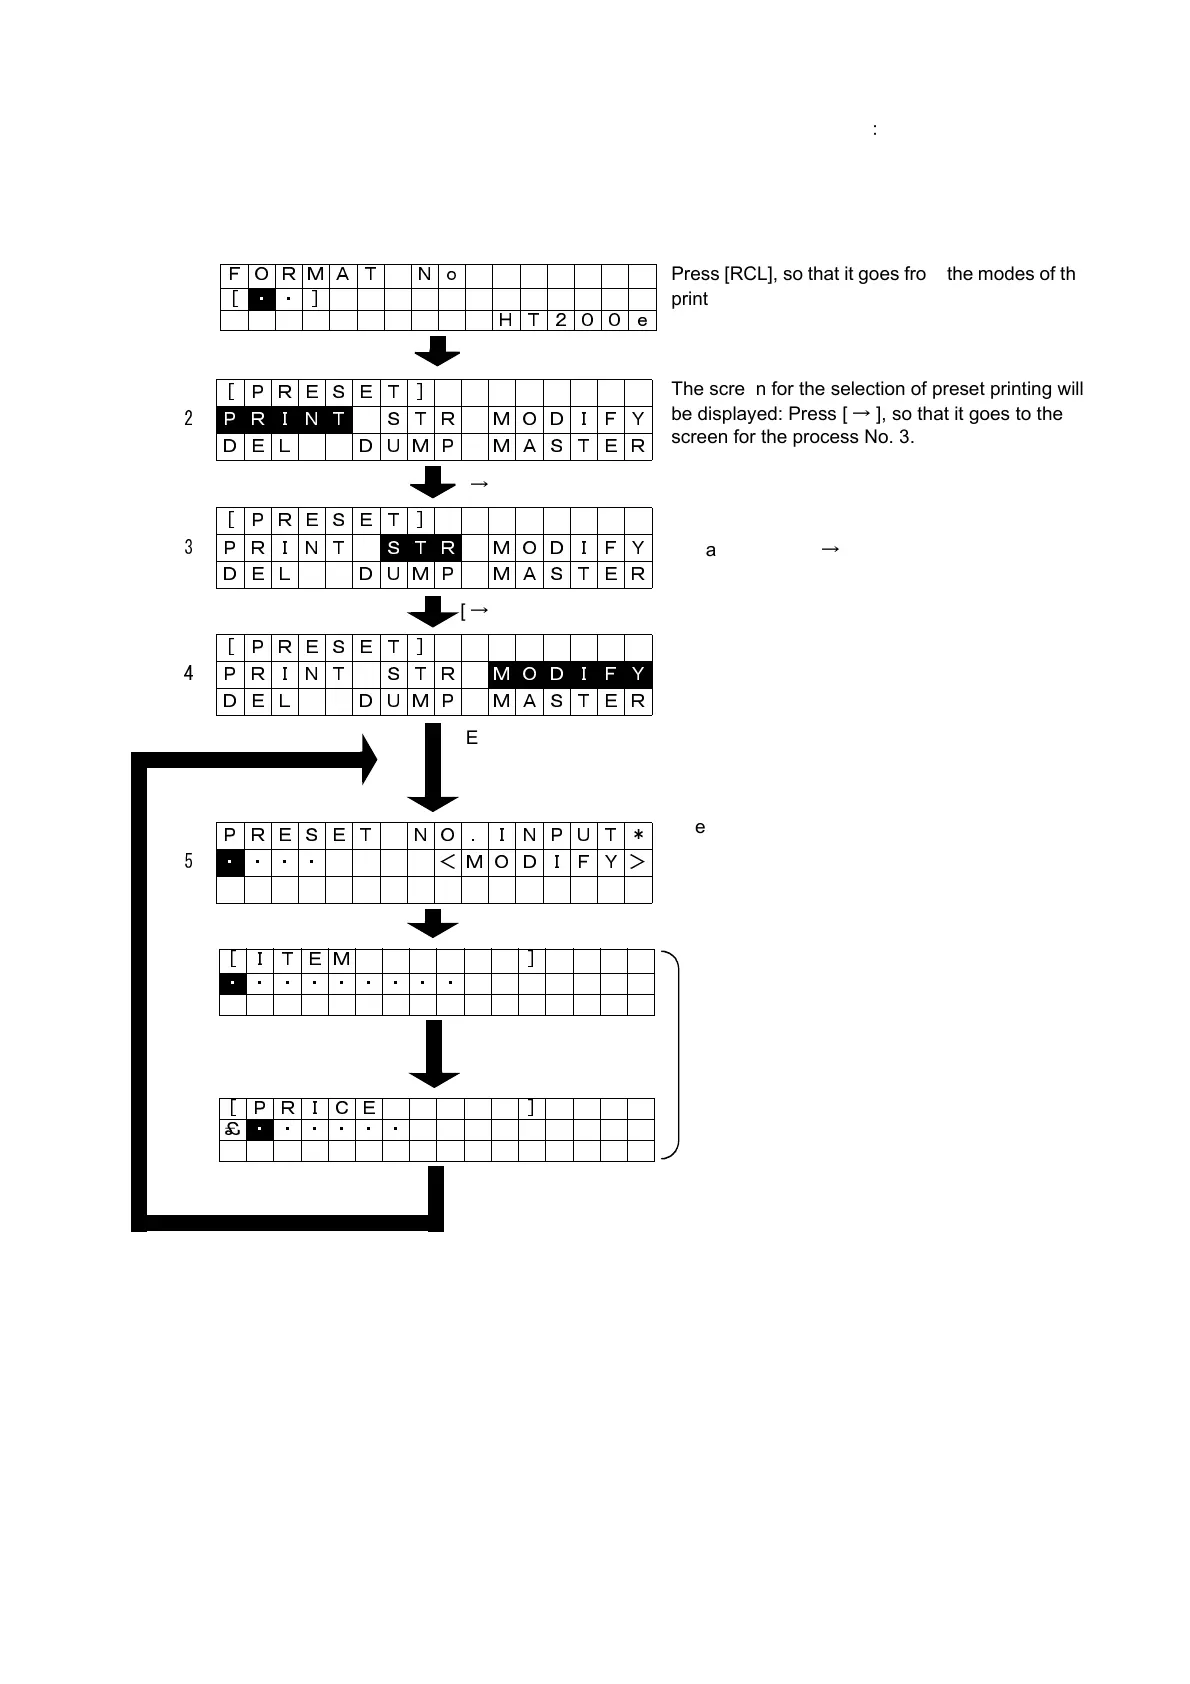
FORMAT No
1
[ ・ ・]
HT200e
[PRESET]
2
P R I N T STR MODIFY
DEL DUMP MASTER
[PRESET]
3 PRINT
S T R MODIFY
DEL DUMP MASTER
[PRESET]
4 PRINT STR
M O D I F Y
DEL DUMP MASTER
PRESET NO .INPUT*
5
・ ・・・ <MODIFY>
[ ITEM ]
6
・ ・・・・・・・・
[ PRICE ]
7
£
・
・・・・・
The screen for the selection of preset printing will
be displayed: Press [
→
], so that it goes to the
screen for the process No. 3.
Press [RCL], so that it goes from the modes of the
print to the preset.
The screen for the selection of preset storing will be
displayed: Press [
→
], so that it goes to the screen
for the process No. 4.
The screen for the selection of preset modification
will be displayed: Press [ENTR], so that it goes to
the entry of preset number.
The preset No. that is required to print can be
entered: Press [ENTR], so that it displays the pre-
set data specified.
Since the contents for data will be changed,
based on the format No. retrieved, enter data
required to modify for each field, and press
[ENTR].
Note: Entry by scanner is available when ITEM
is input.
In the last field, press [ENTR] so that data will
be replaced.