SECTION 5
:
PRESET, TABLE DATA
SATO HT200e Page 5-7
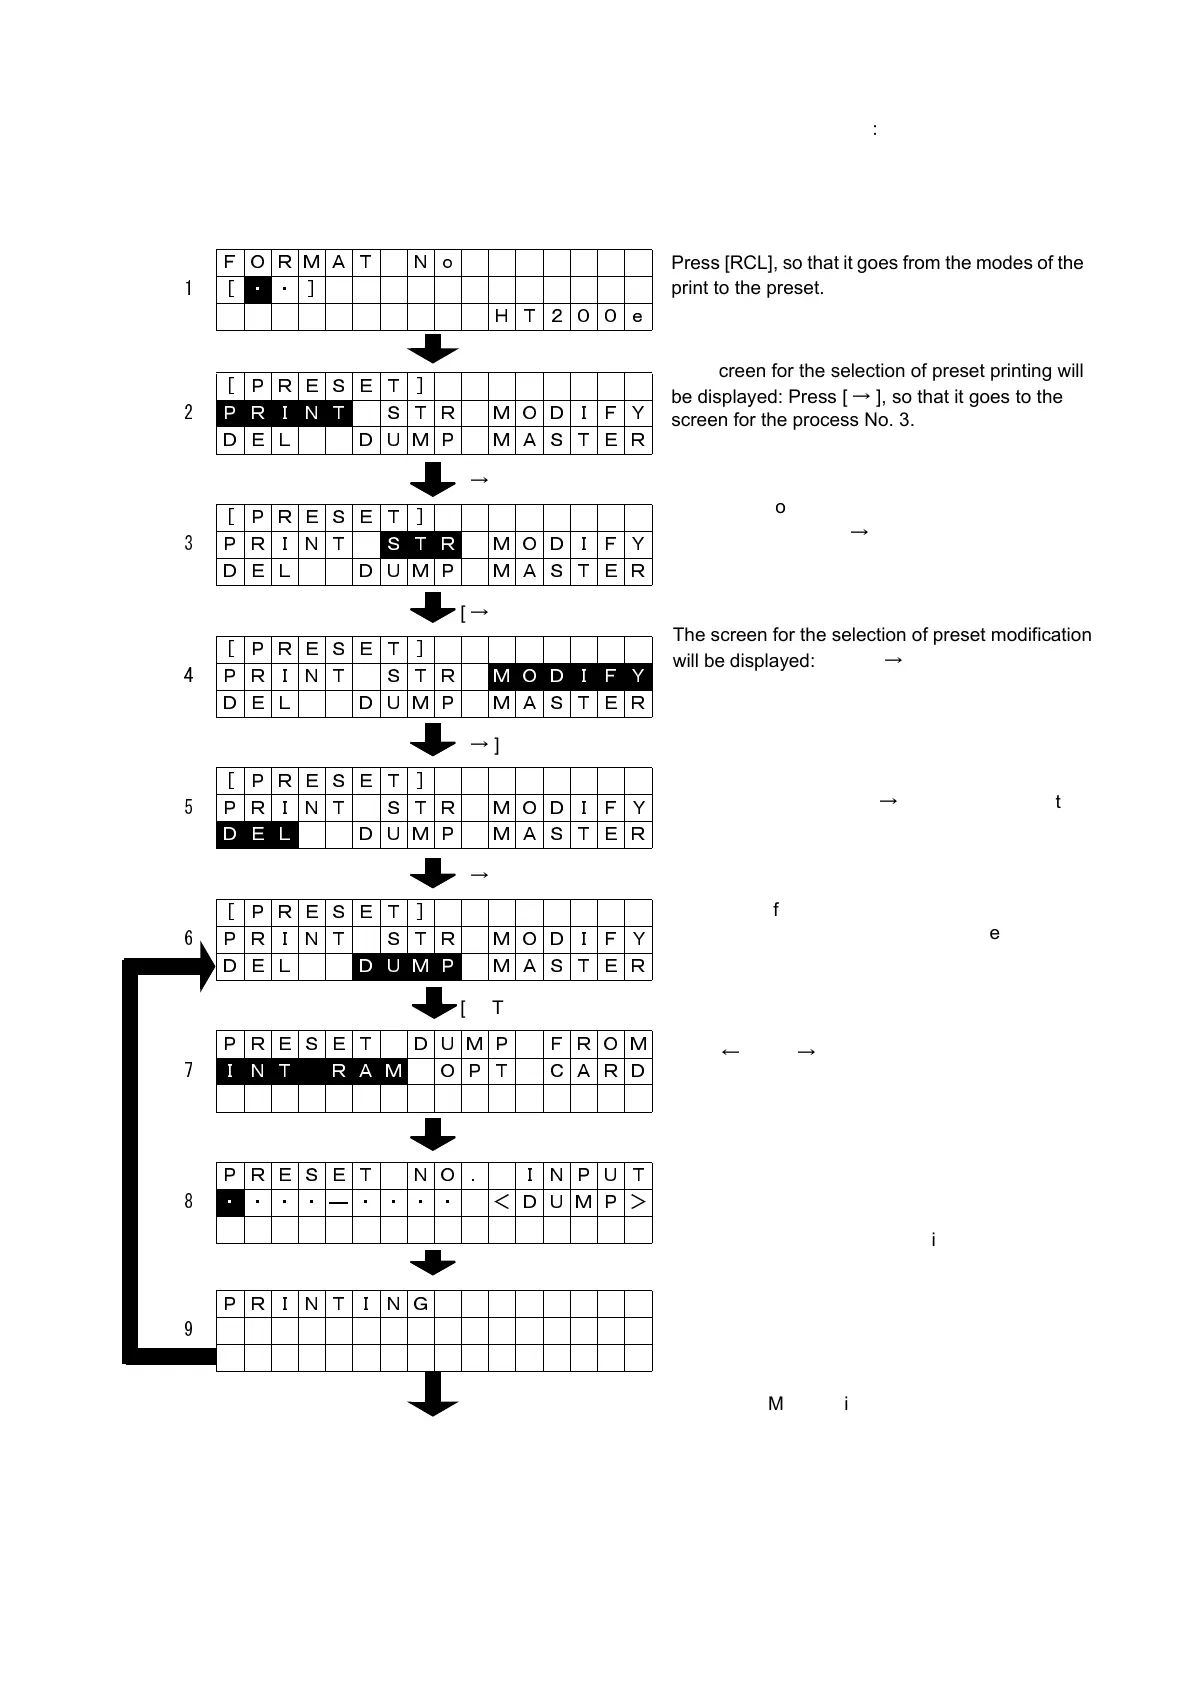
DUMP PRINTING FOR PRESET DATA
[RCL]
[
→
]
[
→
]
[
→
]
[
→
]
[ENTR]
[ENTR]
[ENTR]
Note: Where, in the format for different sizes of label, dump is printed for preset data, proper print may not be
gained. To avoid this situation, specify area for the preset data that are registered with the format of same
size of label.
FORMAT No
1[
・ ・]
HT200e
[PRESET]
2
P R I N T STR MODIFY
DEL DUMP MASTER
[PRESET]
3 PRINT
S T R MODIFY
DEL DUMP MASTER
[PRESET]
4 PRINT STR
M O D I F Y
DEL DUMP MASTER
[PRESET]
5 PRINT STR MODIFY
D E L DUMP MASTER
[PRESET]
6 PRINT STR MODIFY
DEL
D U M P MASTER
PRESET DUMP FROM
7
I N T R A M OPT CARD
PRESET NO . INPUT
8
・ ・・・―・・・・ <DUMP>
PRINTING
9
The screen for the selection of preset printing will
be displayed: Press [
→
], so that it goes to the
screen for the process No. 3.
Press [RCL], so that it goes from the modes of the
print to the preset.
The screen for the selection of preset modification
will be displayed: Press [
→
], so that it goes to the
screen for the process No. 5.
The screen for the selection of preset storing will
be displayed: Press [
→
], so that it goes to the
screen for the process No. 4.
The screen for the selection of preset dump will be
displayed: Press [ENTR], so that it goes to the
entry of preset number.
The screen for the selection of preset deletion
will be displayed: Press [
→
], so that it goes to the
screen for the process No. 6.
The preset No. that is required to print dump can
be entered: Press [ENTR] so that it prints dump for
area that preset data are specified.
Note that if [ENTR] is pressed without entering a
preset No., the preset data registered will be
printed from the beginning.
Use [
←
] and [
→
] to select the destination for pre-
set storing, where dump will be printed.
While the dump is being printed, the screen of the
process No. 9 remains displayed. When print is
complete, it returns to the process No. 6.
Press [S/S], so that it suspends. Whereas
pressing [FMT] terminates to print.