6.4 Changing the side brushes 37
6.4 Changing the side brushes
Move the brush to be changed all the way outwards and the other one inwards.
Power down the machine and secure it against reactivation.
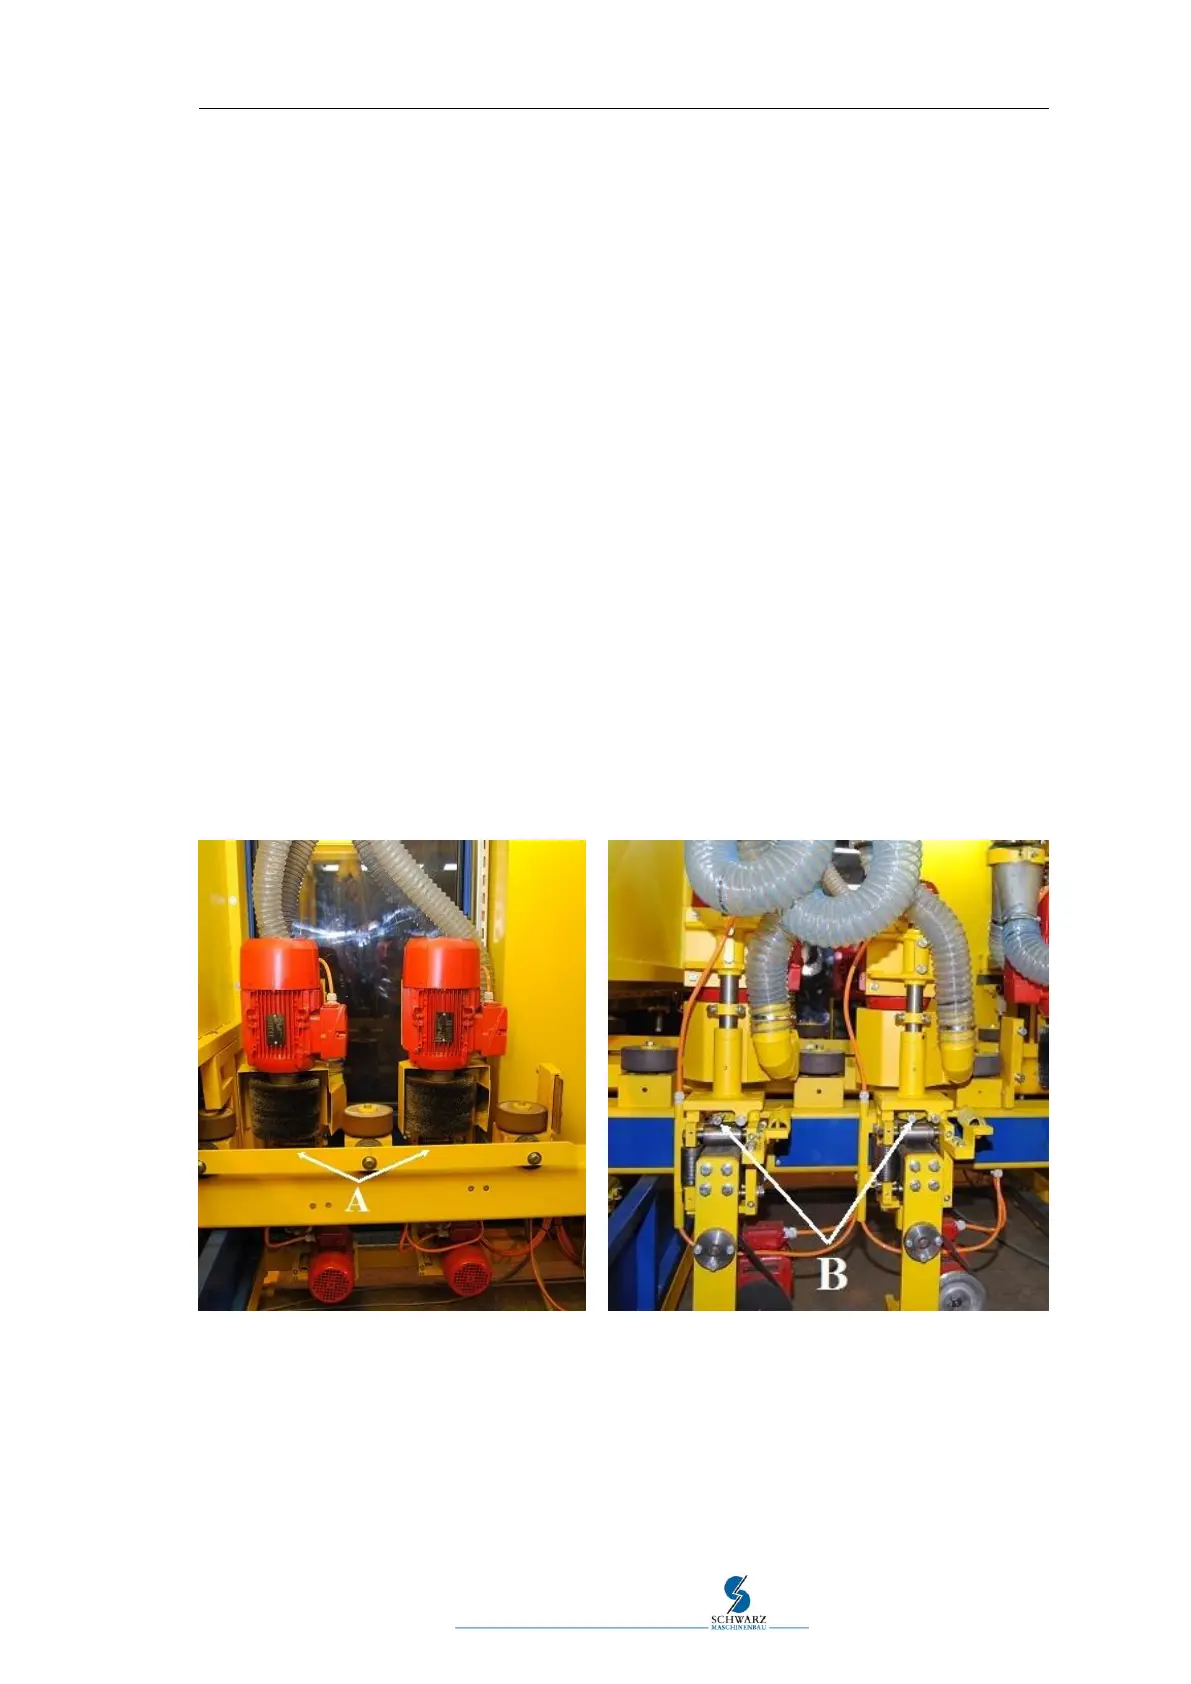
Use an open-faced wrench (SW 19) to loosen the lower arresting screws "B" at the
swivel shaft of the brush motor and swivel the entire side brush inwards (towards the
other brush).
When turning, observe the motor cables to avoid crushing them.
Tighten the arresting screw "B" again to permit secure work.
The brush package can now be removed entirely from the motor shaft by loosening the
hexagon socket screw "A" (from the bottom in the brush shaft).
If the brush shaft cannot be removed easily, turn in the removal device
(Item no.021 205) and remove the brush shafts with it.
Now clamp the brush shaft in the clamp (lower retention nut up)
Use an open-faced wrench (item no.021 202) to loosen the lower retention nut
(left side brush = counterclockwise)
(right side brush = clockwise)
Replace worn brushes by new brushes.
After attachment of the new brushes, tighten the retention nut.
Install brush shaft and secure again with hexagon socket screw "A".
Swivel in the side brush again. It should be about 5 degrees in running direction back-
wards so that the spring effect of the swivel device is warranted.
Tighten the arresting screw "B" again.
Activate the machine and perform a test run.
Figure 6.2 Changing the side brush