Page 34 of 58
3.5.3 Fitting the Condenser to substage variant
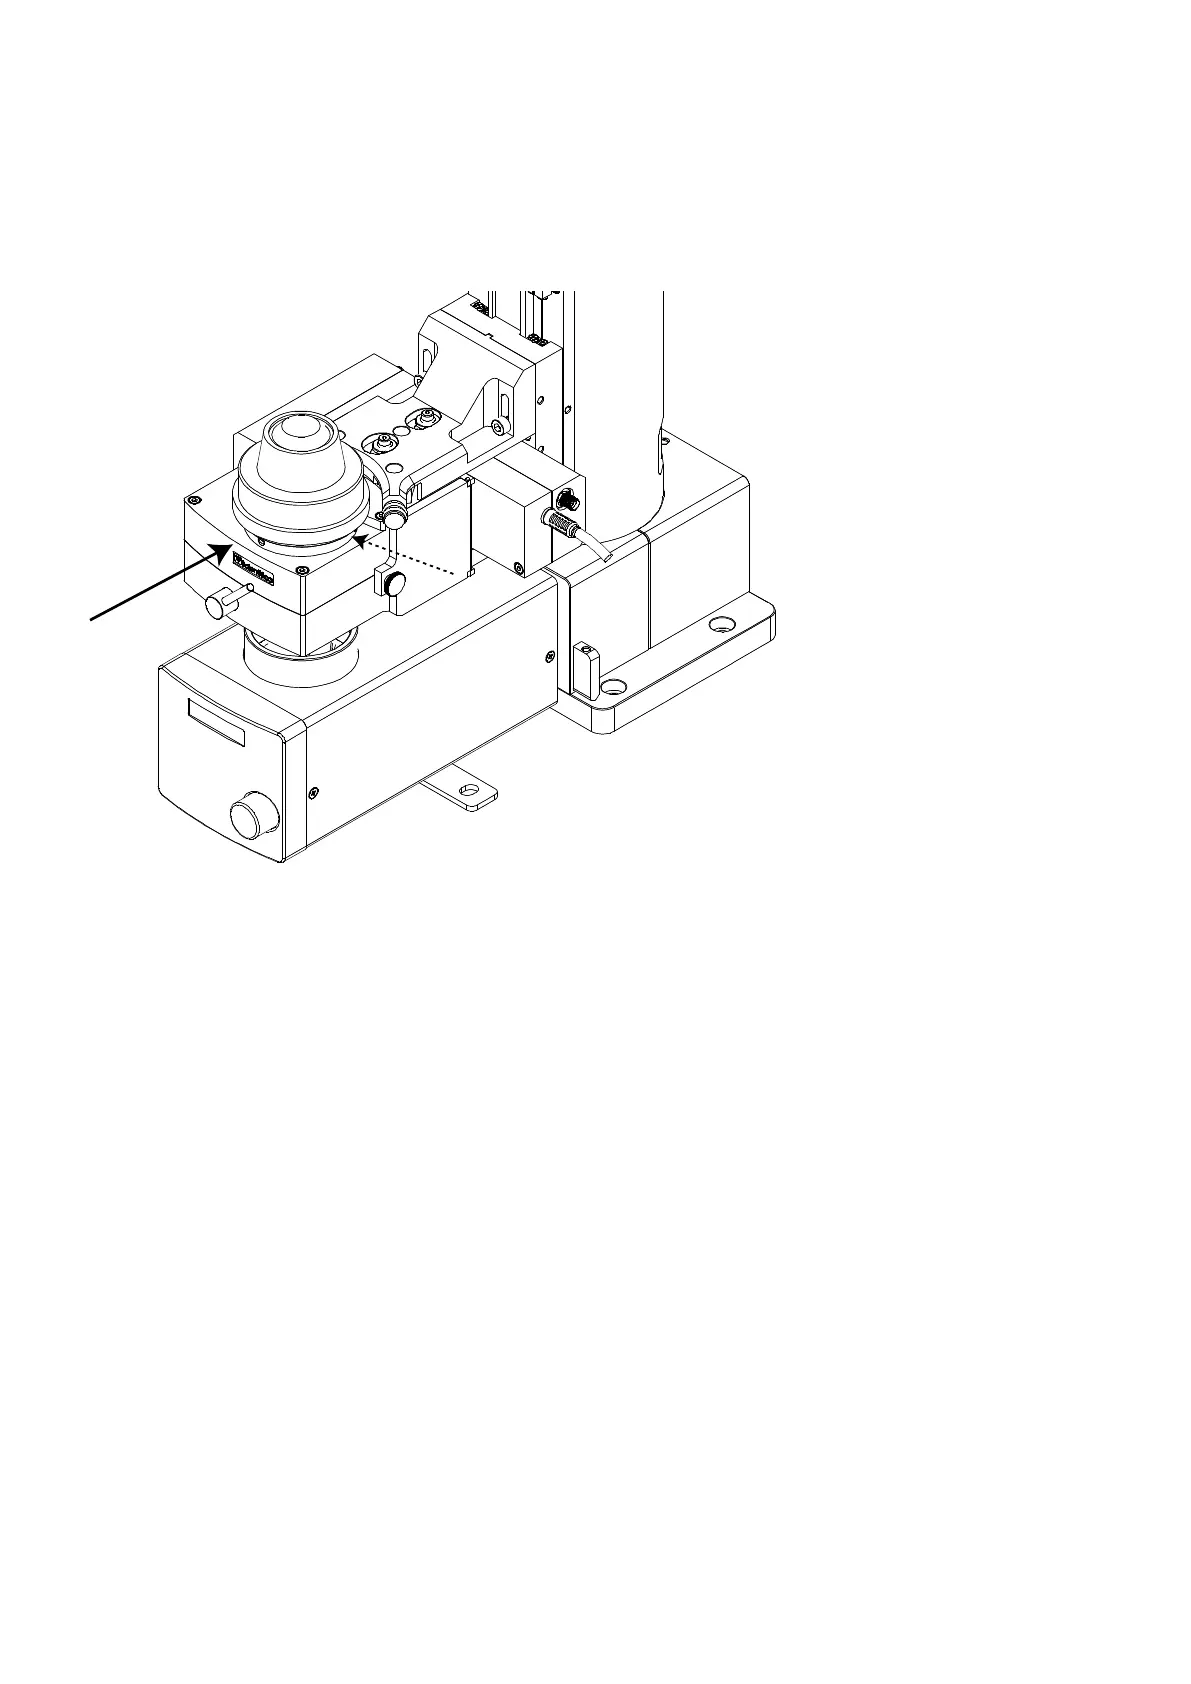
Figure W: Substage detection module fitted onto the SliceScope with the condenser in its mount. Dotted arrow
indicating screw to secure condenser in place.
Using a small hex driver, un-screw the three soft-tip retaining screws until the plastic tips are flush with
the internal bore of the adapter plate.
Orient the condenser so that the aperture adjusting ring and scale faces the front of the optical block
and gently but firmly push it down onto the adapter plate so that the O-ring seals on the internal surface
of the condenser conical mount (at the base).
o If any resistance is felt, or the condenser fails to seat into the adapter plates, try loosening one
or more of the three soft-tipped set-screws slightly. Do not unscrew them so far that they come
out of their holes!
Tighten the three adjustment screws until positive contact is felt with the condenser’s mounting cone.
Do not over-tighten the screws or the condenser may become damaged.
Check that the condenser’s aperture adjustment ring rotates freely around its full travel. Set the
condenser’s aperture to maximum before using the system for imaging.
The U-AAC is an oil-immersion condenser: a suitable immersion medium must be used on top
of the condenser to make good optical contact with the underside of the sample bath. The base
of the sample batch must be clean. Fluorescence collection efficiency will be impaired if these
precautions are not observed.