Do you have a question about the Sel SEL-351S and is the answer not in the manual?
Details the different SEL-351S relay models, their rear-panel connection types, output contact types, and I/O capabilities.
Illustrates various applications of SEL-351S relays throughout the power system, including transmission line protection and reclosing.
Details the physical inputs, outputs, and communication ports, including extra I/O boards and front-panel target LEDs.
Explains the different communication connection types, including metallic and optical cable connections for data and time synchronization.
Provides comprehensive technical specifications including terminal connections, voltage/current inputs, output contacts, frequency tracking, and environmental tests.
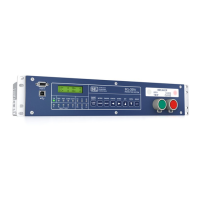
Explains the options for rack-mount and panel-mount installations, including dimensions and mounting procedures for both versions.
Provides examples of different relay configurations, illustrating connections for conventional terminal blocks or plug-in connectors.
Details how to customize front-panel labels for target LEDs, breaker LEDs, and operator controls, including blank slide-in label sets.
Covers required equipment and general connection information for plug-in connectors and screw-terminal blocks, including CT and potential transformer inputs.
Provides step-by-step instructions for accessing and modifying circuit board jumpers and replacing the clock battery on the relay main board.
Explains the operation of optoisolated inputs IN101–IN106 and IN201–IN208, including their configurations for AC or DC control signals.
Describes how to configure and operate local control switches, their correspondence to Relay Word bits, and different switch types (ON/OFF, OFF/MOMENTARY).
Explains how remote control switches operate via the serial communications port, their three positions (ON, OFF, MOMENTARY), and their use in SELOGIC control equations.
Details the latch control switch feature, which retains state even when power is lost, and how to use SETn and RSTn settings to control latch bits.
Explains the relay's six independent setting groups and how to select the active setting group using SELOGIC control equation settings, serial port commands, or front-panel pushbuttons.
Details the sixteen available SELOGIC control equation variables/timers, their setting ranges, and their use in creating custom protection and control schemes.
Explains the operation of output contacts OUT101–OUT107 and ALARM, including how Relay Word bits and SELOGIC control equation settings control them.
Describes how the rotating default display on the front-panel replaces indicating panel lights and provides information such as breaker status and reclosing relay status.
Explains how the breaker monitor helps schedule circuit breaker maintenance by tracking close/open operations and comparing them to manufacturer-provided limits.
Details how the DC battery monitor alarms for under- or overvoltage conditions and displays voltage dips during tripping or closing operations.
Explains the two types of demand metering (Thermal and Rolling) and the values they measure, including currents, voltages, power, and frequency.
Describes how the SEL-351S updates and stores energy values, functioning like electromechanical meters, and how to view or reset this information.
Explains how the maximum/minimum metering function reflects normal load variations and how to view or reset these values using serial port commands or the front-panel METER pushbutton.
Details how the relay applies thresholds to voltage and current metering quantities to force readings to zero when near zero, preventing erroneous energy accumulation.
Explains the synchrophasor measurement capabilities, including connection to an IRIG-B time source and availability via MET PM ASCII command.
Describes how the relay adds records to the load profile buffer at specified intervals, containing timestamp, analog quantities, and checksum.
Explains how to access and modify Relay, Global, and Port settings using the front-panel {SET} pushbutton and refers to Figure 11.3 for communications.
Details how to change settings using serial port commands (SET n m s TERSE) and explains the editing keystrokes and how the relay checks entries for validity.
Describes the curve timing for time-overcurrent elements, conforming to IEEE Standard Inverse-Time Characteristic Equations, and provides equations for U.S. and IEC curves.
Explains that Relay Word bits are used in SELOGIC control equation settings and provides a comprehensive list of these bits and their definitions.
Provides explanations for settings that do not have reference information elsewhere, including identifier labels, current transformer ratios, CT sizing, and voltage input configuration.
Contains definitions and input ranges for all settings in the relay, with references to other sections for additional information.
Shows diagrams of EIA-232 serial communications cables connecting the SEL-351S to other devices, including pinout functions.
Explains the hardware and software protocols supported by the SEL-351S, including EIA-232, MIRRORED BITS, DNP3, Fast Meter, Compressed ASCII, and Fast SER.
Details the automatic messages the relay sends for specific conditions like power up, event triggers, group switches, and self-test warnings/failures.
Explains the different access levels (0, 1, B, 2) and the commands available at each level, including password requirements.
Provides an alphabetical list of all serial port commands, their descriptions, and corresponding front-panel pushbutton equivalents.
Explains the serial port commands in detail, including access levels, password requirements, and examples of command usage and responses.
Explains the dual functions of the front-panel pushbuttons (primary/secondary) and how to navigate through metering screens and select functions.
Details three front-panel primary functions that do not have serial port command equivalents: reclosing relay shot counter, local control, and modified rotating display.
Describes the functions of various operator control pushbuttons like {GROUND ENABLED}, {RECLOSE ENABLED}, {REMOTE ENABLED}, {ALTERNATE SETTINGS}, {LOCK}, {AUX 1}, {AUX 2}, {CLOSE}, and {TRIP}.
Explains how the relay generates standard event reports by fixed and programmable conditions, including current, voltage, and element states.
Details how the SER report records changes of state for elements, storing the latest 512 rows in nonvolatile memory for analysis.
Provides an example of a standard 15-cycle event report, explaining how current column data relates to sampled waveforms and RMS values.
Shows an example SER report and explains the numbered comments that correspond to event report triggering conditions and relay settings.
Describes the SSI report which records date, time, current, voltage, and VSSI element status during voltage disturbances.
Divides protective relay testing into acceptance, commissioning, and maintenance, outlining goals and what to test for each category.
Details test features provided by the relay, including METER, EVENT, SER, TARGET, and PULSE commands, and describes the low-level test interface.
Explains the various self-tests performed by the relay, corrective actions for out-of-tolerance conditions, and how to view status messages.
Provides procedures for inspecting the relay and troubleshooting common issues like dark front-panel LEDs, LCD display problems, and lack of response to commands or faults.
States that the SEL-351S is factory-calibrated and advises contacting the factory if calibration is suspected to be out of order.
Provides contact information for Schweitzer Engineering Laboratories, Inc. for questions or comments regarding SEL products and services.
Explains how to determine the firmware version in the relay and lists firmware revision history with descriptions of changes and manual date codes.
Provides an overview of the firmware upgrade process for SEL-300 series relays, including the sequence of steps.
Details the steps for upgrading relay firmware, including required equipment and optional software.
Lists the necessary equipment for performing a firmware upgrade, such as a personal computer, terminal emulation software, and serial cable.
Lists optional items that assist in managing relay settings and understanding firmware upgrade procedures, such as SEL-5010 Relay Assistant software.
Outlines the step-by-step procedure for upgrading firmware, starting with preparing the relay and establishing a terminal connection.
Details the steps to prepare the relay for firmware upgrade, including removing it from service and applying power.
Guides the user through establishing serial communications parameters and connecting a serial cable to the computer and relay.
Explains how to copy the firmware file to the relay, including selecting the protocol and entering the user name and password.
Provides steps to establish a Telnet connection to the relay for verifying firmware transfer, including using the IP address and port.
Guides the user on how to verify the firmware transfer by issuing the STA command and checking for warnings or failures.
Explains the SEL Distributed Port Switch Protocol (LMD), its suitability for low-cost, low-speed port switching applications, and its basic operation.
Details the settings for activating the LMD protocol, including PROTO, SPEED, ADDR, and SETTLE parameters.
Explains how the relay operates with the LMD protocol, including message handling, echo, and connection termination.
Introduces the relay's two data streams (ASCII and binary) and the messages used for configuration, fast metering, and fast operate commands.
Lists the binary and ASCII message formats used for configuration, including request-to-relay and response-from-relay data.
Provides definitions for the data fields within the A5C0, A5C1, A5C2/A5C3, and A5D1 messages, explaining their purpose and format.
Explains the general format of Compressed ASCII commands, including header, data, and checksum fields, and defines various format designators.
Shows the specific compressed ASCII configuration message format sent by the SEL-351S relay, detailing the data values and checksum.
Describes how to display status data in Compressed ASCII format using the CSTATUS command and the expected relay response.
Explains how to display history data in Compressed ASCII format using the CHISTORY command and the relay's response format.
Details how to display event reports in Compressed ASCII format using the CEVENT command, including optional parameters and the relay's response.
Explains that negative-sequence instantaneous elements should not trip directly and recommends using definite-time elements with at least 1.5 cycles of time delay.
Offers coordination guidelines and an example for coordinating negative-sequence overcurrent elements with downstream devices, assuming a radial system.
Explains how to use SELOGIC control equations, combining relay protection and control elements with logic operators to create custom schemes.
Explains that Relay Word bits are used in SELOGIC control equation settings and provides a comprehensive list of these bits and their definitions.
Details the logic operators used in SELOGIC control equations, similar to Boolean algebra logic, and their processing order.
Explains the use of parentheses in SELOGIC control equation settings to process logic within them first, noting that nesting is not supported.
Explains that SEL-351S supports DNP3 L2 Slave protocol for accessing various data and features, with standard and extended modes of operation.
Details the port settings for Standard and Extended Mode DNP operation, including SPEED, DNPADR, and Class settings.
Summarizes main options for retrieving data via DNP connection (Polled Static, Polled Report-by-Exception, Unsolicited Report-by-Exception, Quiescent) and related settings.
Summarizes the device profile as specified in the DNP3 Subset Definitions document, including vendor name, device name, and supported objects.
Describes the default object map supported by the SEL-351S firmware version R108, detailing DNP object types, indices, and descriptions.
Explains how analog and binary input points can be remapped via the DNP command, and how the order of indices determines the reported value.
Introduces MIRRORED BITS protocol for relay-to-relay communications, highlighting advantages like minimal expense and increased speed.
Details settings for MIRRORED BITS protocol, including SPEED, RTSCTS, RBADPU, CBADPU, RXID, TXID, and RXDFLT.
Explains message transmission, decoding, integrity checks, synchronization, loopback testing, and channel monitoring for MIRRORED BITS communications.
Introduces the SEL-351S Fast SER protocol, explaining its use for unsolicited binary messages and how it utilizes separate data streams.
Provides guidance on setting SER triggers and explains the nonvolatile memory limitations to prevent EEPROM self-test failure.
Outlines the command sequence for enabling unsolicited binary Fast SER messaging and acknowledges received messages.
Explains the function codes used in Fast SER messages, including enable (01) and disable (02) unsolicited data transfer.
Describes ACSELERATOR QuickSet software, its capabilities, and the system requirements for installation.
Lists the hardware and software requirements for installing ACSELERATOR QuickSet, including CPU, OS, disk space, and communications.
Provides step-by-step instructions for installing ACSELERATOR QuickSet from a CD-ROM, including closing other applications and setting up the terminal emulation.
Explains how to start the ACSELERATOR QuickSet software by double-clicking the icon or navigating through the Start menu.
Introduces SEL Synchrophasors, their capabilities with IRIG-B time sources, and their possible uses in power system analysis and protection.
Details how the SEL-351S measures voltages and currents at one-second intervals using an IRIG-B time source and provides synchrophasor values in ASCII format.
Explains how instrumentation transformers and cables can shift measured signals and how VCOMP and ICOMP settings are used to correct phasor angles.
Describes SEL Fast Message Unsolicited Write protocol for synchrophasor data transport, including message transmission and decoding.
Details settings for Synchrophasors, including EPMU, PMID, PHDATAV, VCOMP, PHDATAI, ICOMP, and TS_TYPE.
| Operating Temperature | -40°C to +85°C |
|---|---|
| Frequency | 50/60 Hz |
| Current Rating | 5 A |
| Communication Protocols | DNP3, Modbus |
| Dimensions | 5.5 x 5.5 x 5.5 inches |
| Mounting | Panel or DIN rail |
| Protection Functions | Overcurrent |
| Outputs | 4 |
| Enclosure | Metal |
| Inputs | Analog and digital inputs |