2.9
Date Code 20080103 Instruction Manual SEL-351S Relay
Installation
User-Configurable Label Option for the Front Panel
User-Configurable Label Option for the Front Panel
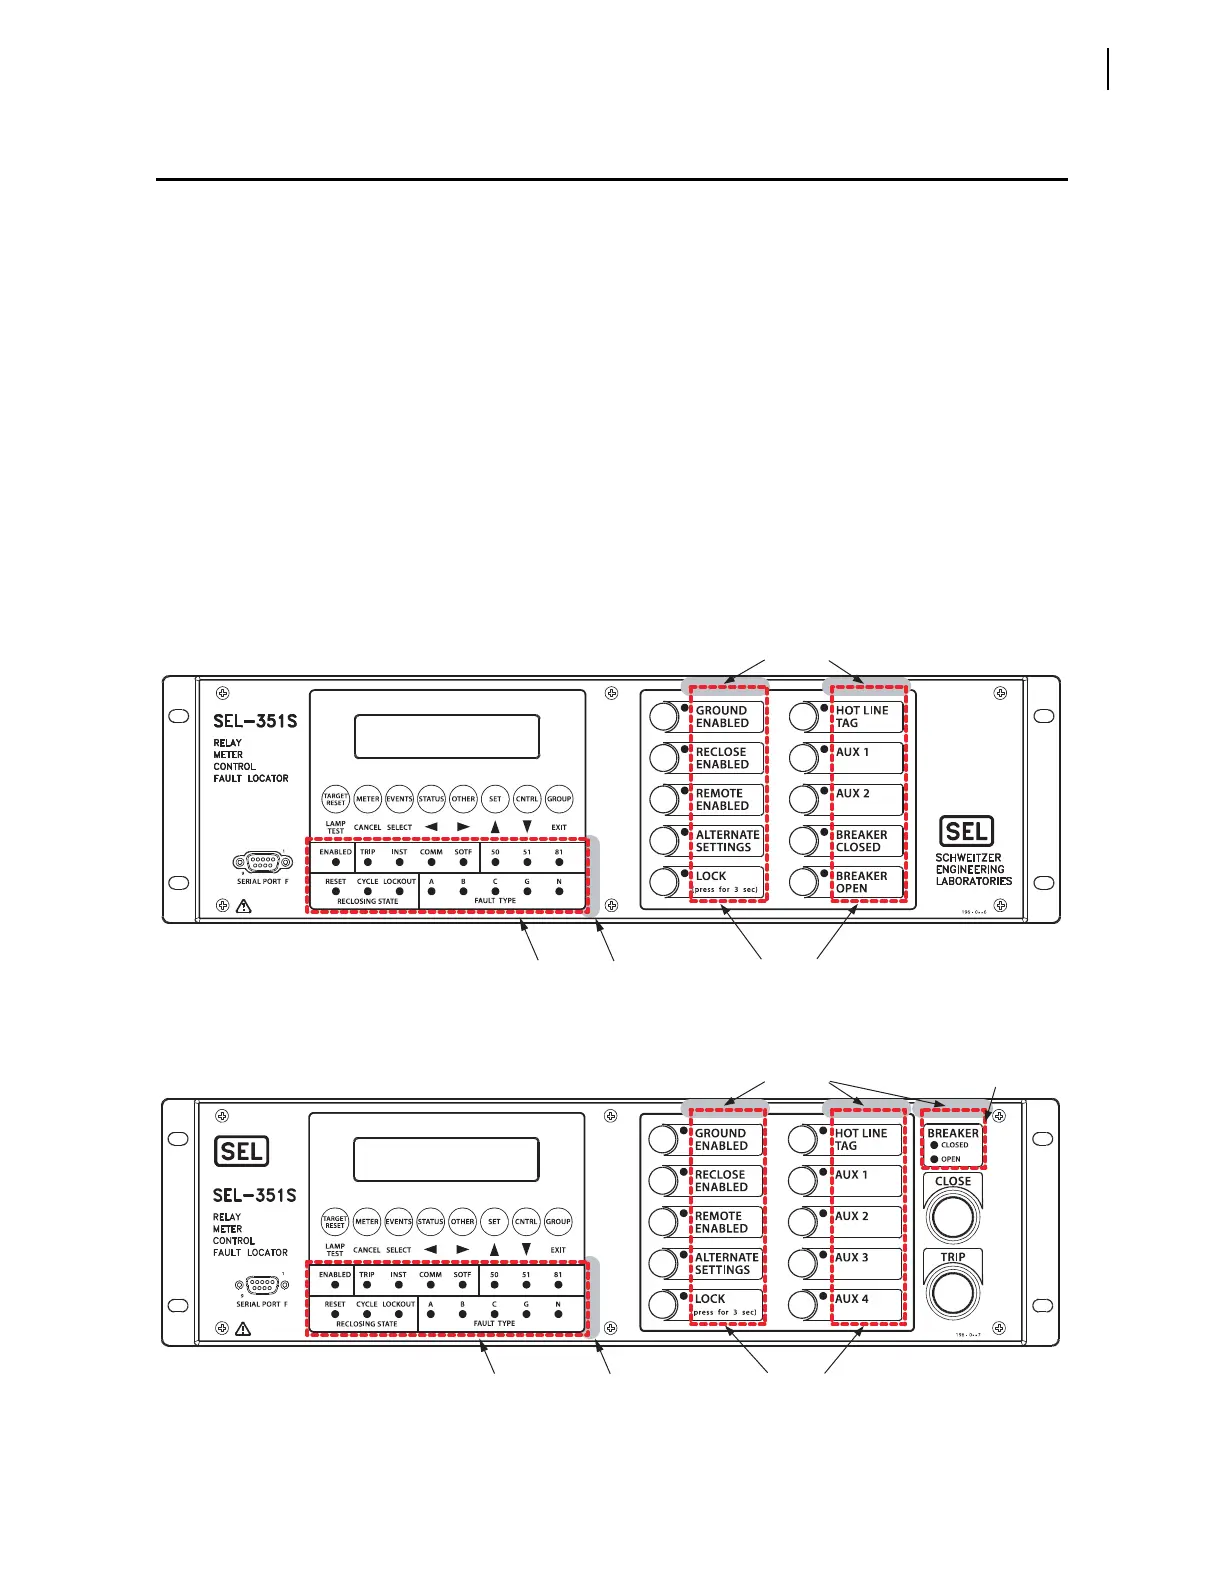
SEL-351S relays with front-panel user-configurable labels have three (or four,
depending on the model) pockets for slide-in labels: one for the target LED
label, one for the breaker LEDs (for models with auxiliary {TRIP}/{CLOSE}
pushbuttons), and two for the operator-control labels. Relays are shipped with
default labels installed, as shown in Figure 2.7 and Figure 2.9. The front-panel
pocket areas and openings for the SEL-351S (Horizontal) With User-
Configurable Default Labels are indicated in Figure 2.7. The front-panel
pocket areas and openings for the SEL-351S (Vertical) With User-
Configurable Default Labels are indicated in Figure 2.9. Part numbers
0351Sxxx4/6/B designate relay models with user-configurable labels.
Dashed lines indicate the pocket areas. The operator-control slide-in labels
and front-panel pockets are keyed for left and right placement. Vertical and
horizontal relays have different blank slide-in label sets. See Figure 2.8 and
Figure 2.10 for a view of the blank slide-in label sets for the horizontal and
vertical units. Blank breaker LED labels are included in all sets, and should be
discarded if the 351S model does not have auxiliary {TRIP}/{CLOSE}
pushbuttons.
Figure 2.7 SEL-351S (Horizontal) With User-Configurable Default Labels
i1519A
Operator
Control
Labels
Opening
I1404.AI
z
Target
LED
Label
Default View Without Auxiliary {TRIP}/{CLOSE} Pushbuttons
Default View With Auxiliary {TRIP}/{CLOSE} Pushbuttons
Target
LED
Label
Opening
Opening
Opening
Breaker
LED
Label
Operator
Control
Labels
 Loading...