Using the “Conference Manager” software
86 | ADN Digital Conference System
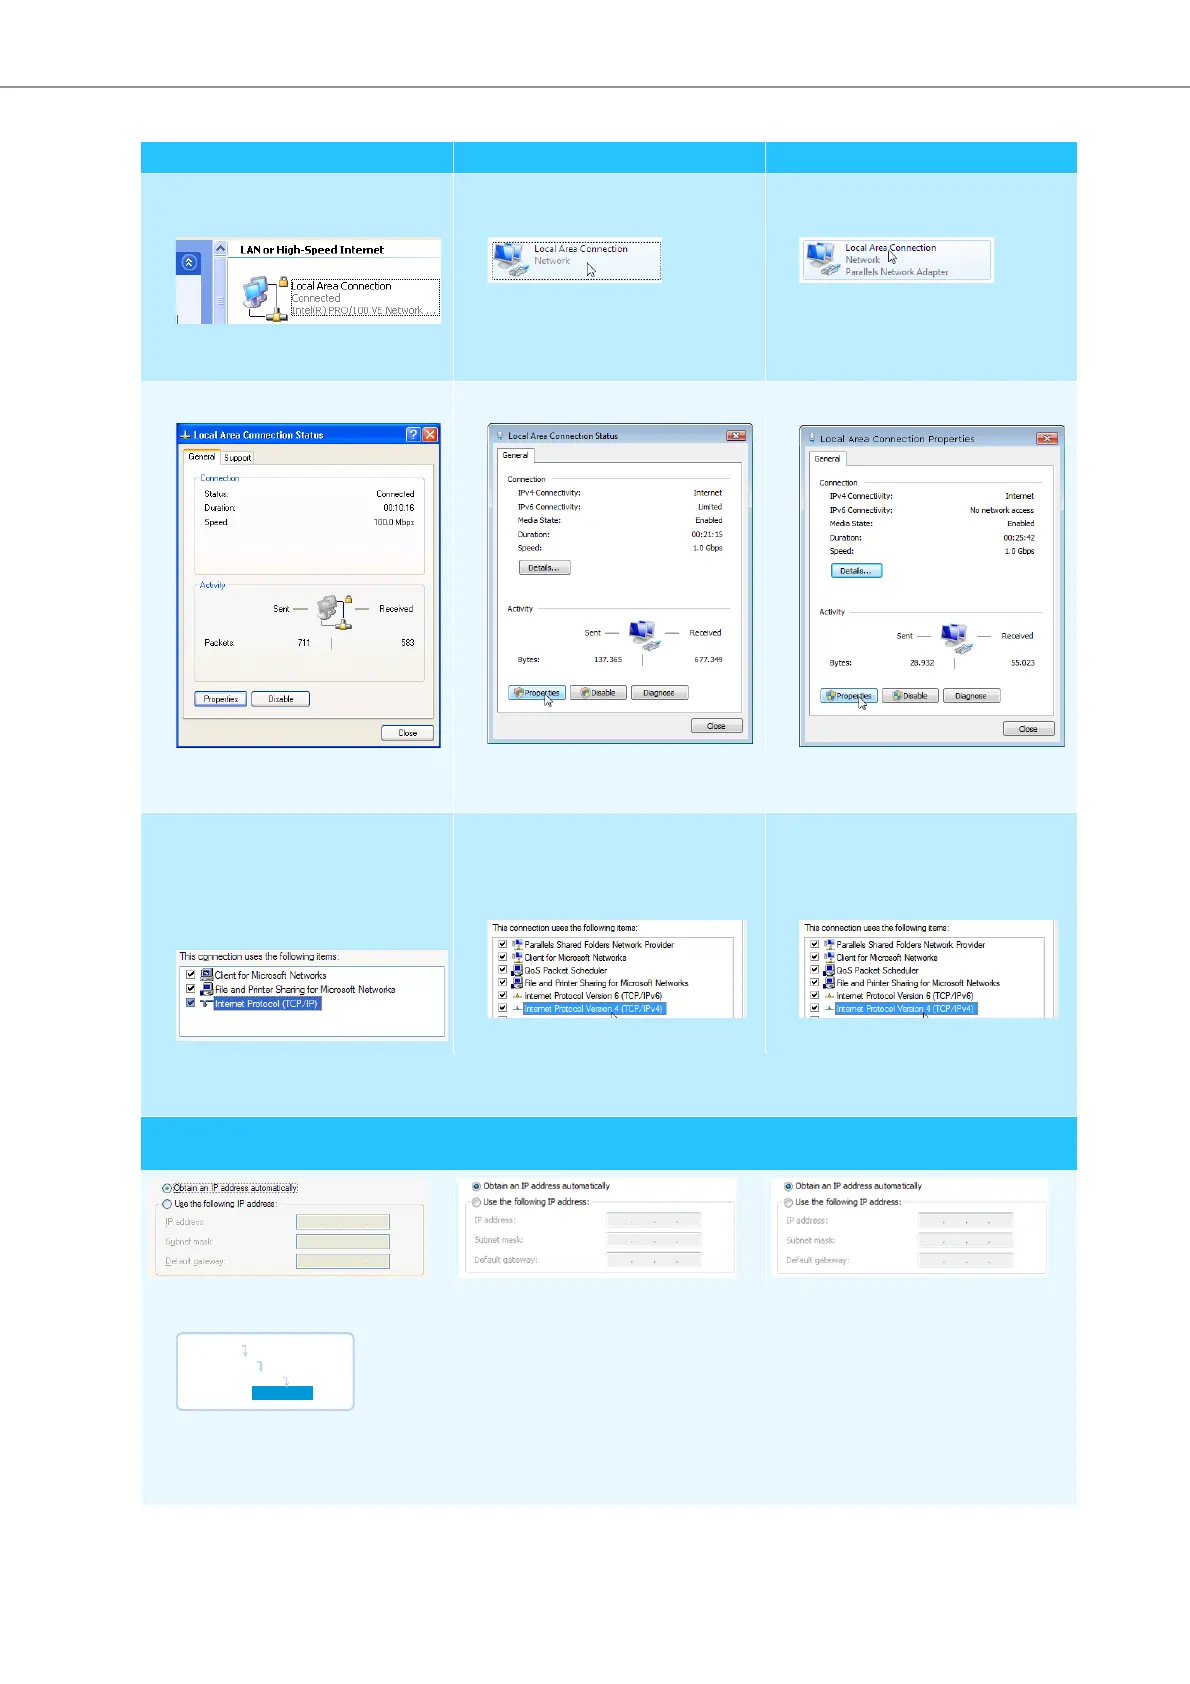
왘 Double-click “Local Area Connec-
tion”.
The “Local Area Connection Status”
window appears.
왘 Double-click “Local Area Connec-
tion”.
The “Local Area Connection Status”
window appears.
왘 Double-click “Local Area Connec-
tion”.
The “Local Area Connection Proper-
ties” window appears.
왘 Click the “Properties” button.
The “Local Area Connection Proper-
ties” window appears.
왘 Click the “Properties” button.
The “Local Area Connection Proper-
ties” window appears.
왘 Click the “Properties” button.
The “Local Area Connection Proper-
ties” window appears.
왘 In the “This connection uses the fol-
lowing items” box, scroll to the
bottom.
왘 Double-click “Internet Protocol
(TCP/IP)”.
왘 In the “This connection uses the fol-
lowing items” box, double-click
“Internet Protocol Version 4 (TCP/
IPv4)”.
왘 In the “This connection uses the
following items” box, double-click
“Internet Protocol Version 4 (TCP/
IPv4)”.
The “Internet Protocol (TCP/IP) Properties” window appears.
Here you can see whether the Windows PC is assigned a static or dynamic IP address. Adjust your central unit as follows:
a) The Windows PC is assigned a dynamic IP address in the network
Settings to be adjusted via the central unit (see page 70):
왘 On the central unit, call up the “IP Mode” menu item.
왘 Select “Dynamic IP”.
The central unit is automatically integrated in the network and no further steps have to be taken.
Windows XP Windows Vista Windows 7
Main Menu
Settings
Network
IP Mode