Attach a safety tether between the building structure and one of the tie-off points on the back panel of the microphone. This safety measure prevents the microphone
from falling in an emergency situation. Make sure there is no tension on the safety tether to ensure the microphone is resting properly in the ceiling grid.
Important: Follow local regulations when attaching the safety tether.
Suspension Mounting
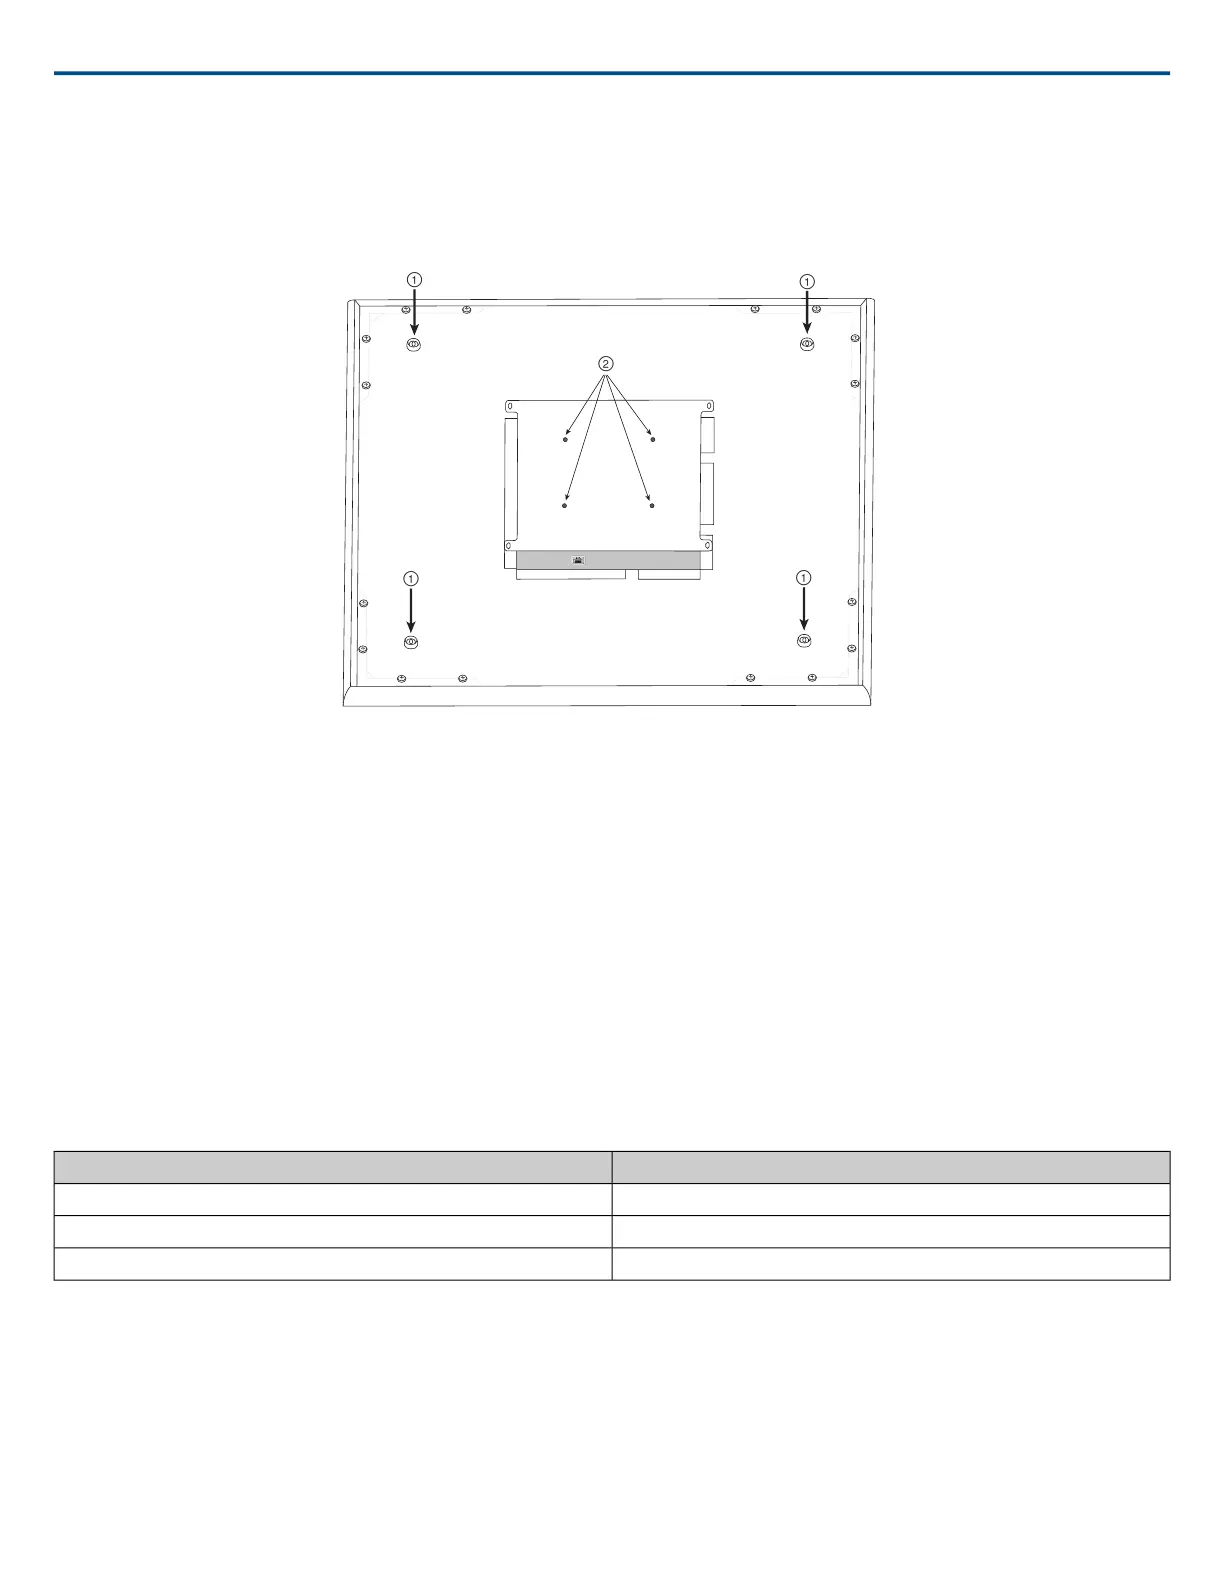
① Wire Suspension Hanging Points (4 mm hole size)
② VESA Mounting Holes
4-point Wire Suspension
Secure the microphone to the ceiling using braided metal cable or other high-strength wire. Use the 4 integrated hanging points on the back of the microphone
to securely attach the cable. The hole size in the hanging points is 4 mm (0.15 in).
VESA Standardized Mounting
The rear plate on the microphone has 4 threaded holes for attaching the microphone to a VESA mounting device. The mounting holes follow the VESA MIS-D
standard:
• Screw specification: M4 thread (Microphone threaded hole depth = 9.15 mm)
• Hole spacing: 100 mm (square)
Cable Management
To keep the Ethernet cable out of view, use the appropriate method based on the installation type.
Cable SolutionInstallation
Run the cable above the ceiling gridCeiling tile
Guide the cable through the pole to run it above the ceiling gridVESA (pole mounting)
Use cable ties to attach the CAT5 cable along one of the hanging wires4-point wire suspension
Note: If using conduit to contain the cable, the optional junction box accessory (model A910-JB) mounts directly to the rear panel of the microphone.
Painting Components
The grille and frame of the array microphone can be painted to blend in with room design. Some basic disassembly is required for painting.
Step 1: Removing the Frame and Grille
1. Remove the screws that hold the main assembly on the frame (6 screws per side). There are washers between these screws and the rear panel.
Important: Do not remove the screws that are farthest in the corner and recessed into the panel (see graphic).
2. Carefully lift the assembly out of the frame.
Shure IncorporatedMXA910 Ceiling Array Microphone
2017/10/1820/57
 Loading...