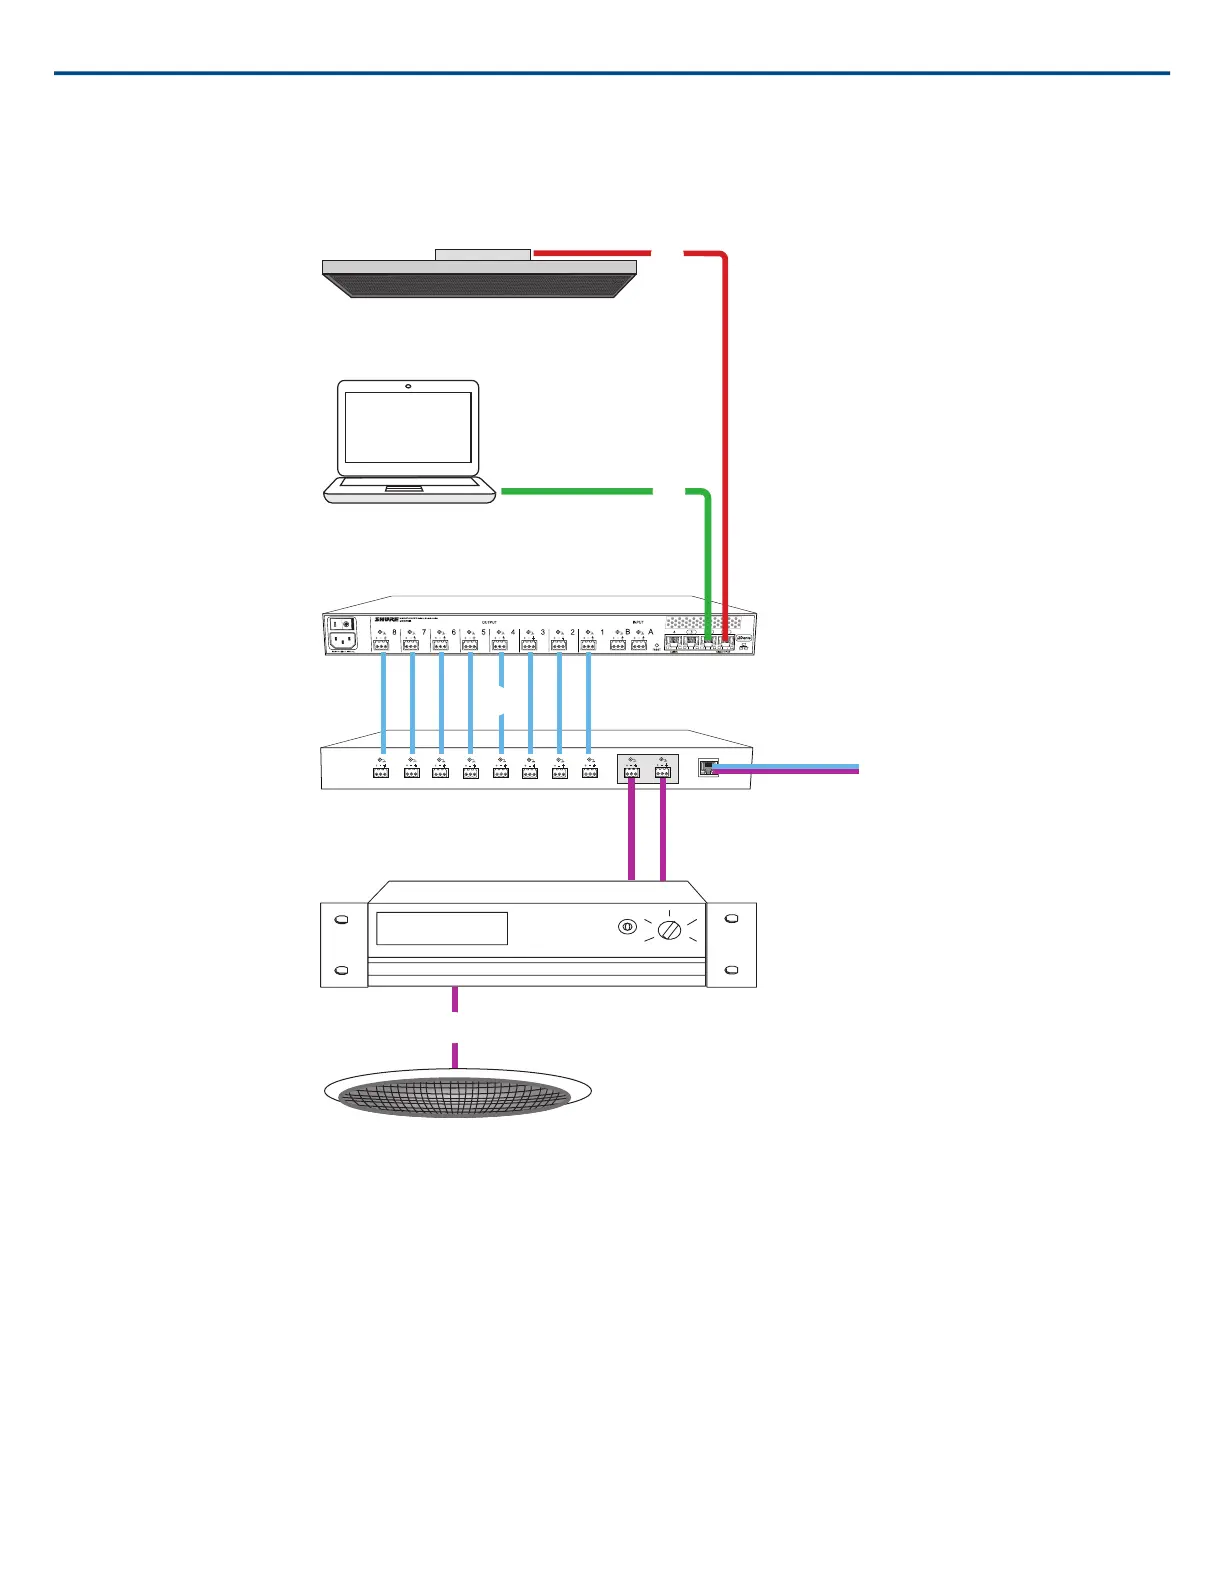
Telephone Conference with Shure MXW Network Interface
Ceiling array microphone
Software control
MXW Audio Network Interface
Audio processor
Amplifier
Ceiling speaker
① Array microphone to Shure MXWANI
Connect the microphone output to port 1 on the MXWANI with a network cable. Port 1 provides the necessary Power over Ethernet (PoE).
② Computer to Shure MWXANI
Connect a computer to the ANI on port 2 or 3 with a network cable to provide control of the array microphone and other networked components.
③ Shure ANI analog outputs to audio processor
Step 1: Route signals with Dante™ Controller software
Route the channels from the microphone (Dante transmitter) to the MXWANI channels (Dante receiver). This establishes the discrete channels to deliver through
the analog outputs.
Step 2: Connect the MXWANI outputs to the processing device inputs
Block connector outputs on the MXWANI send balanced audio signals to the inputs on the processing device, which provides digital signal processing (such as
acoustic echo cancellation).
④ Connection to far end
Connect the audio processor to a VOIP server or telephone line to send and receive audio between the near end and far end.
Shure IncorporatedMXA910 Ceiling Array Microphone
7/572017/10/18