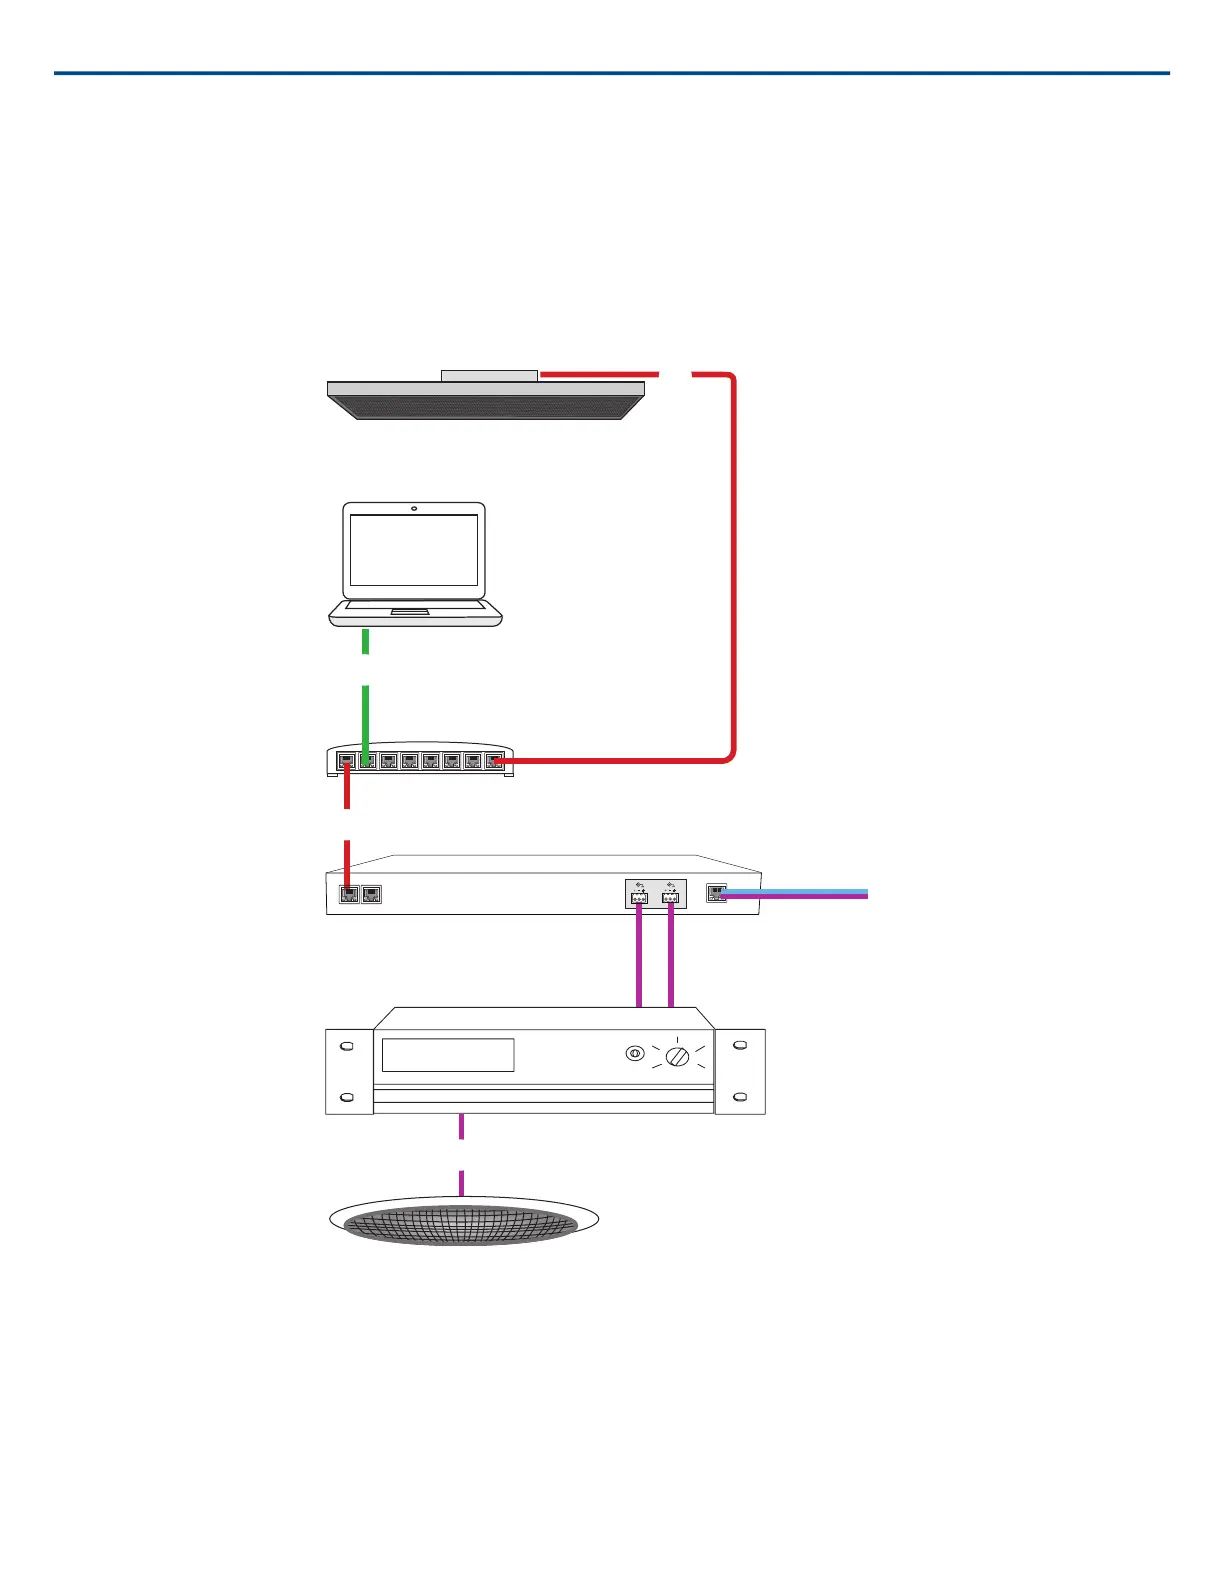
⑤ Audio from far end to amplifier
Route the far end audio through the audio processor output to an amplifier.
⑥ Amplified audio signal to loudspeakers
Connect the loudspeakers to the amplifier to hear the audio from the far end.
Telephone Conference with Dante™ -enabled Audio Processor
Ceiling array microphone
Software control
Network switch
Dante audio processor
Amplifier
Ceiling Speaker
① Array microphone to network switch
Connect the array microphone output with a network cable to any port on the switch that supplies Power over Ethernet (PoE).
② Computer to network switch
Connect a computer to the network switch to provide control of the array microphone and other networked components.
③ Network switch to Dante™ audio processor
Connect the Dante™ audio processor to the network switch to provide:
• Digital signal processing (acoustic echo cancellation)
• Digital-to-analog conversion to deliver Dante™ audio over an analog (VOIP or telephone line) output.
Shure IncorporatedMXA910 Ceiling Array Microphone
2017/10/188/57