Installation
5.2 Installing the mounting rail
ET 200MP Distributed I/O System
System Manual, 01/2013, A5E03723484-01
41
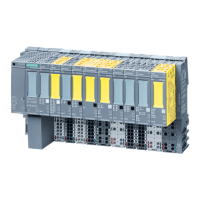
Self-assembling bus
In the self-assembling bus, all modules are lined up on the mounting rail. For this purpose
the modules are hung in the upper area, with inserted U connectors, and are pivoted
downward and fastened in the lower area by means of screws.
During the pivoting in, the modules are connected to each other with the U connector. The U
connector provides the mechanical and electrical connection between the modules.
See also
Setting up power segments (Page 36)
Power budget calculation (Page 32)
5.2 Installing the mounting rail
Introduction
The mounting rails are delivered in five lengths:
● 160 mm
● 482.6 mm (19 inches)
● 530 mm
● 830 mm
● 2000 mm
The order numbers can be found in the Accessories/spare parts (Page 113) section.
The mou
nting
rails (from 160 to 830 mm) come with two drill holes for fixing screws. Set of
screws for grounding the mounting rail is provided.
The 2000 mm mounting rail is provided for assemblies with special lengths. It has no drill
holes for fixing screws. No set of screws for grounding is enclosed with the mounting rail
(can be ordered as an accessory (Page 113)).
The specifications of the m
aximum offsets between two drill holes can be found in the table
"Dimensions for the drill holes".
Tools required
● Commercially available hacksaw
● Drill ∅ 6.5 mm
● Screwdriver
● Size 10 adjustable screw-wrench or socket wrench for grounding cable connection
● Adjustable screw-wrench, matching the selected fixing screws
● Stripping tool and crimp tool for the grounding cable
 Loading...
