Maintenance
9.2 Replacement of I/O modules and front connectors
ET 200MP Distributed I/O System
System Manual, 01/2013, A5E03723484-01
89
9.2.3 Replacing a front connector
Introduction
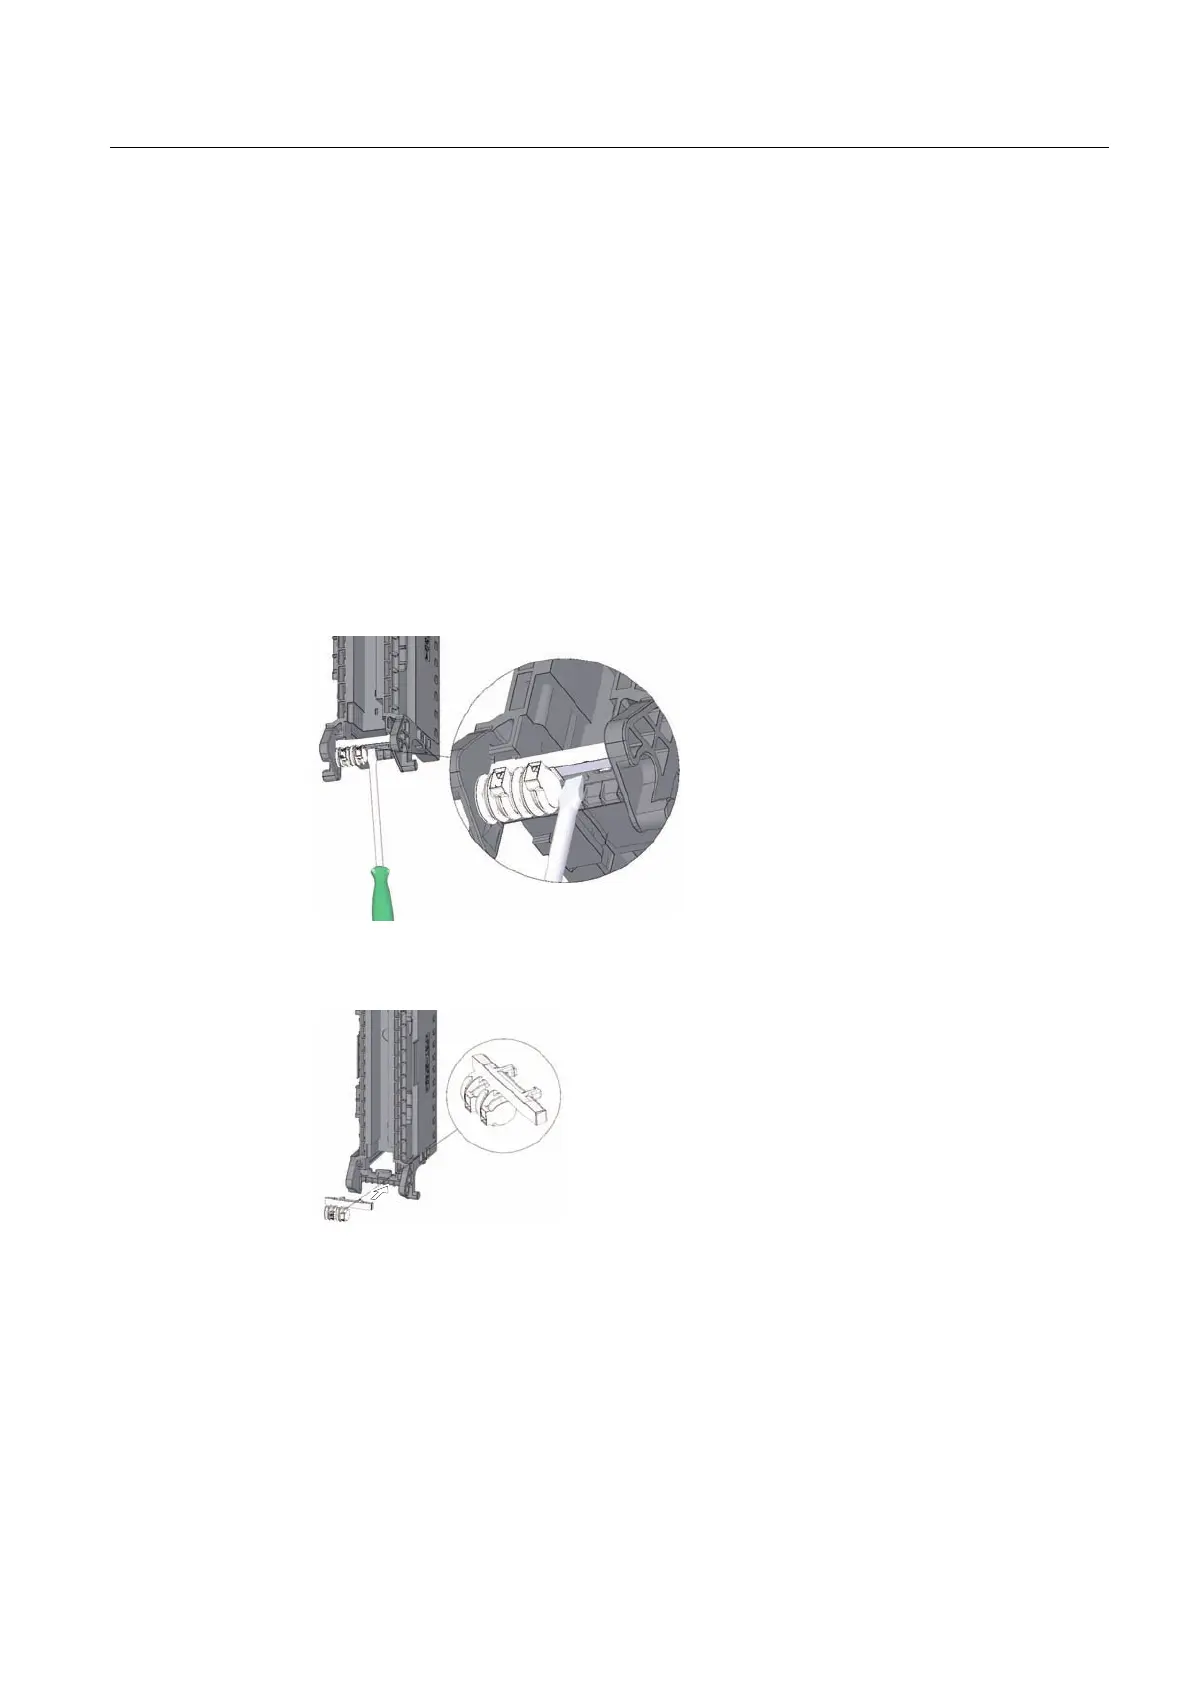
When the front connector is first inserted into the I/O module, a part of the coding element
clips onto the front connector. When you replace a defective front connector with a new front
connector, you must transfer the coding element into the new front connector.
Replacing a front connector
You have already removed the front connector from the module and loosened the wiring. If
you are using the front connector for an anolog module, you also need to remove the power
supply element and shield element. Proceed as follows to replace the front connector:
1. Carefully remove the coding element from the front connector. Take care not to damage
the coding element.
Figure 9-4 Removing the coding element from the front connector
2. Insert the removed coding element into the new front connector.
Figure 9-5 Inserting the coding element into the front connector
3. Insert the new front connector into the existing I/O module, until your hear it click into
place.
4. Wire the new front connector.

 Loading...


