EasyManuals Logo

Siemens SIMATIC HMI KTP400 Basic User Manual

Siemens SIMATIC HMI KTP400 Basic
132 pages
To Next Page IconTo Next Page
To Previous Page IconTo Previous Page
Page #26 background imageLoading...
Page #26 background image
Mounting and connecting
3.2 Mounting the HMI device
Basic Panels 2nd Generation
26 Operating Instructions, 10/2016, A5E33293231-AB
Inserting the HMI device
1.
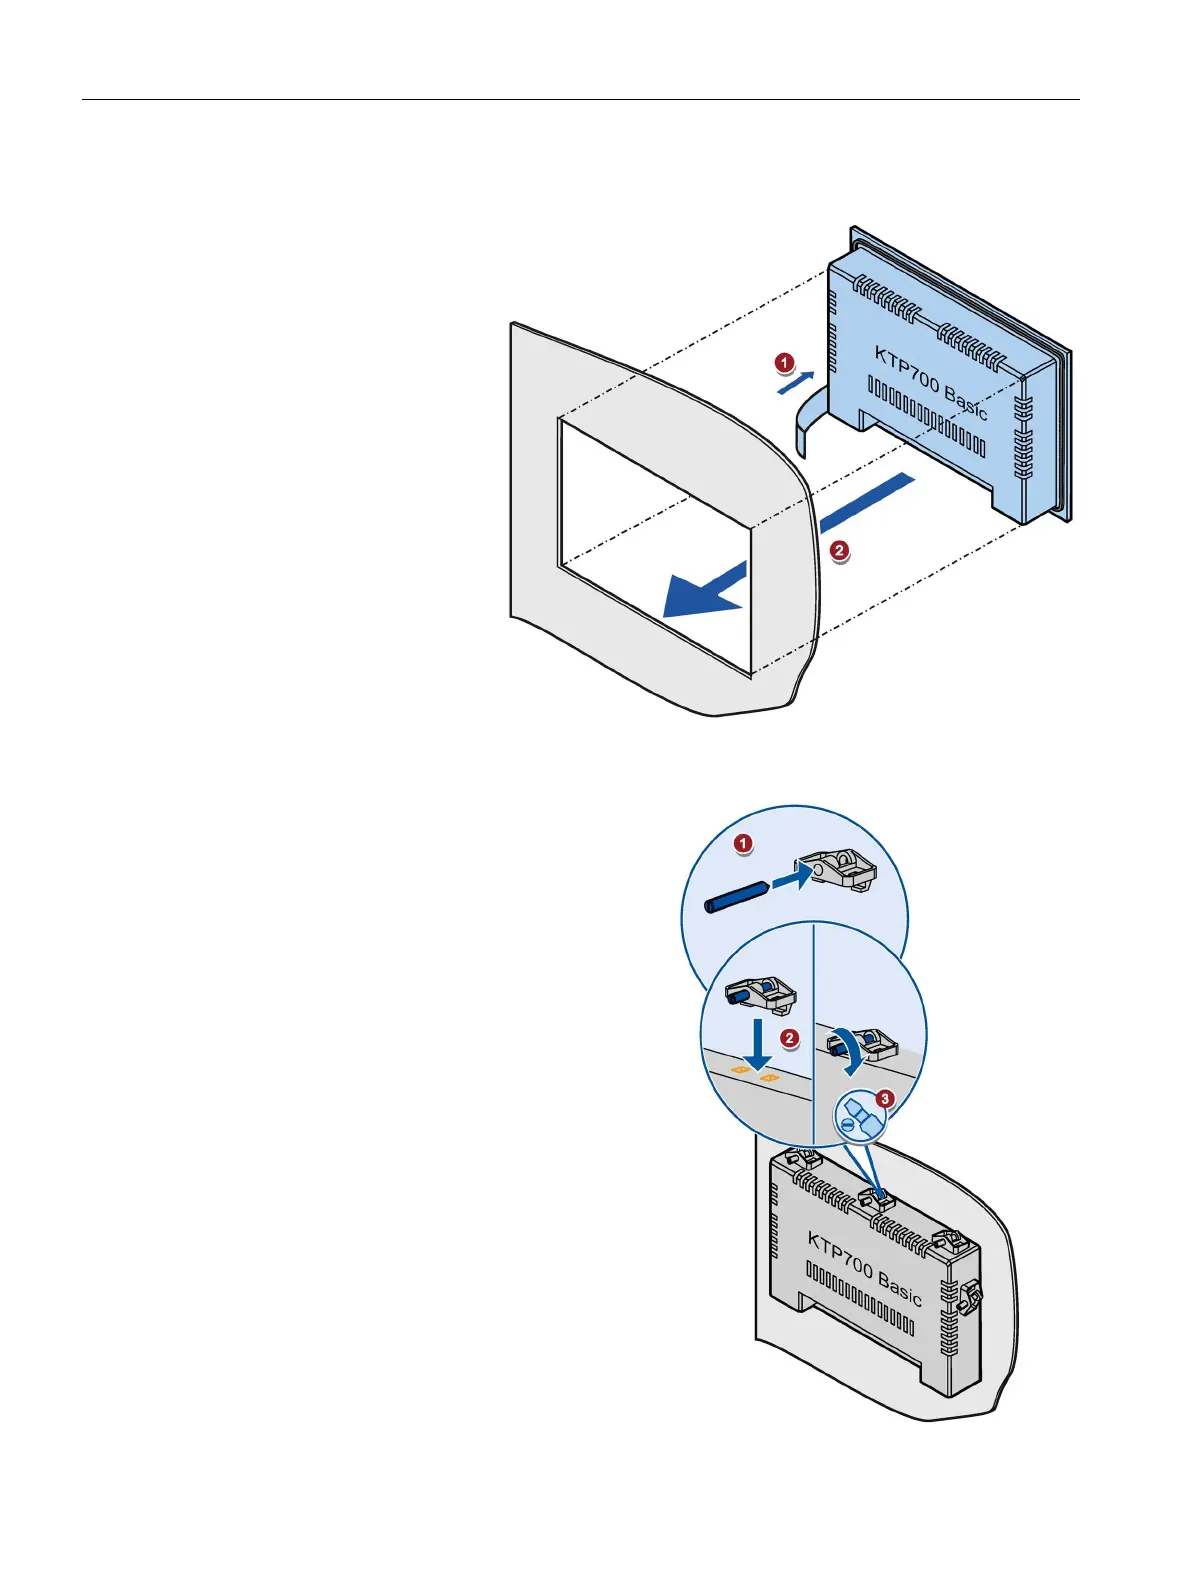
Slide the labeling strip
into the device using
the guide, if available.
2.
Insert the HMI device
into the mounting
cutout from the front.
Make sure that
protruding labeling
strips are not caught
between the mounting
cutout and HMI device.
Securing the HMI device with mounting clips
1.
If mounting clips and grub screws are
available separately in the accessory
kit, insert a grub screw into the
mounting clip bore hole and turn it
several times.
2.
Place the first mounting clip into the
corresponding cutout.
3.
Fasten the mounting clip with a size 2
screwdriver. The maximum permitted
torque is 0.2 Nm.
4.
Repeat steps 1 to 3 for all mounting
clips required to secure your HMI
device.

Table of Contents

Other manuals for Siemens SIMATIC HMI KTP400 Basic

Questions and Answers:

Question and Answer IconNeed help?

Do you have a question about the Siemens SIMATIC HMI KTP400 Basic and is the answer not in the manual?

Siemens SIMATIC HMI KTP400 Basic Specifications

General IconGeneral
Display TypeTFT LCD
Resolution480 x 272 pixels
TouchscreenYes
BacklightingLED
Color Depth16-bit
Power Supply24 V DC
MountingPanel mounting
Operating Temperature0 to 50 °C
Display Size4.3 inches
Display Colors65K colors
Power ConsumptionApprox. 3.6 W
Protection RatingIP65 (front)
Storage Temperature-20 to 70 °C
Relative Humidity10% to 90% (non-condensing)
InterfacesPROFINET

Related product manuals