10.6 Replacing the pneumatic block
Procedure
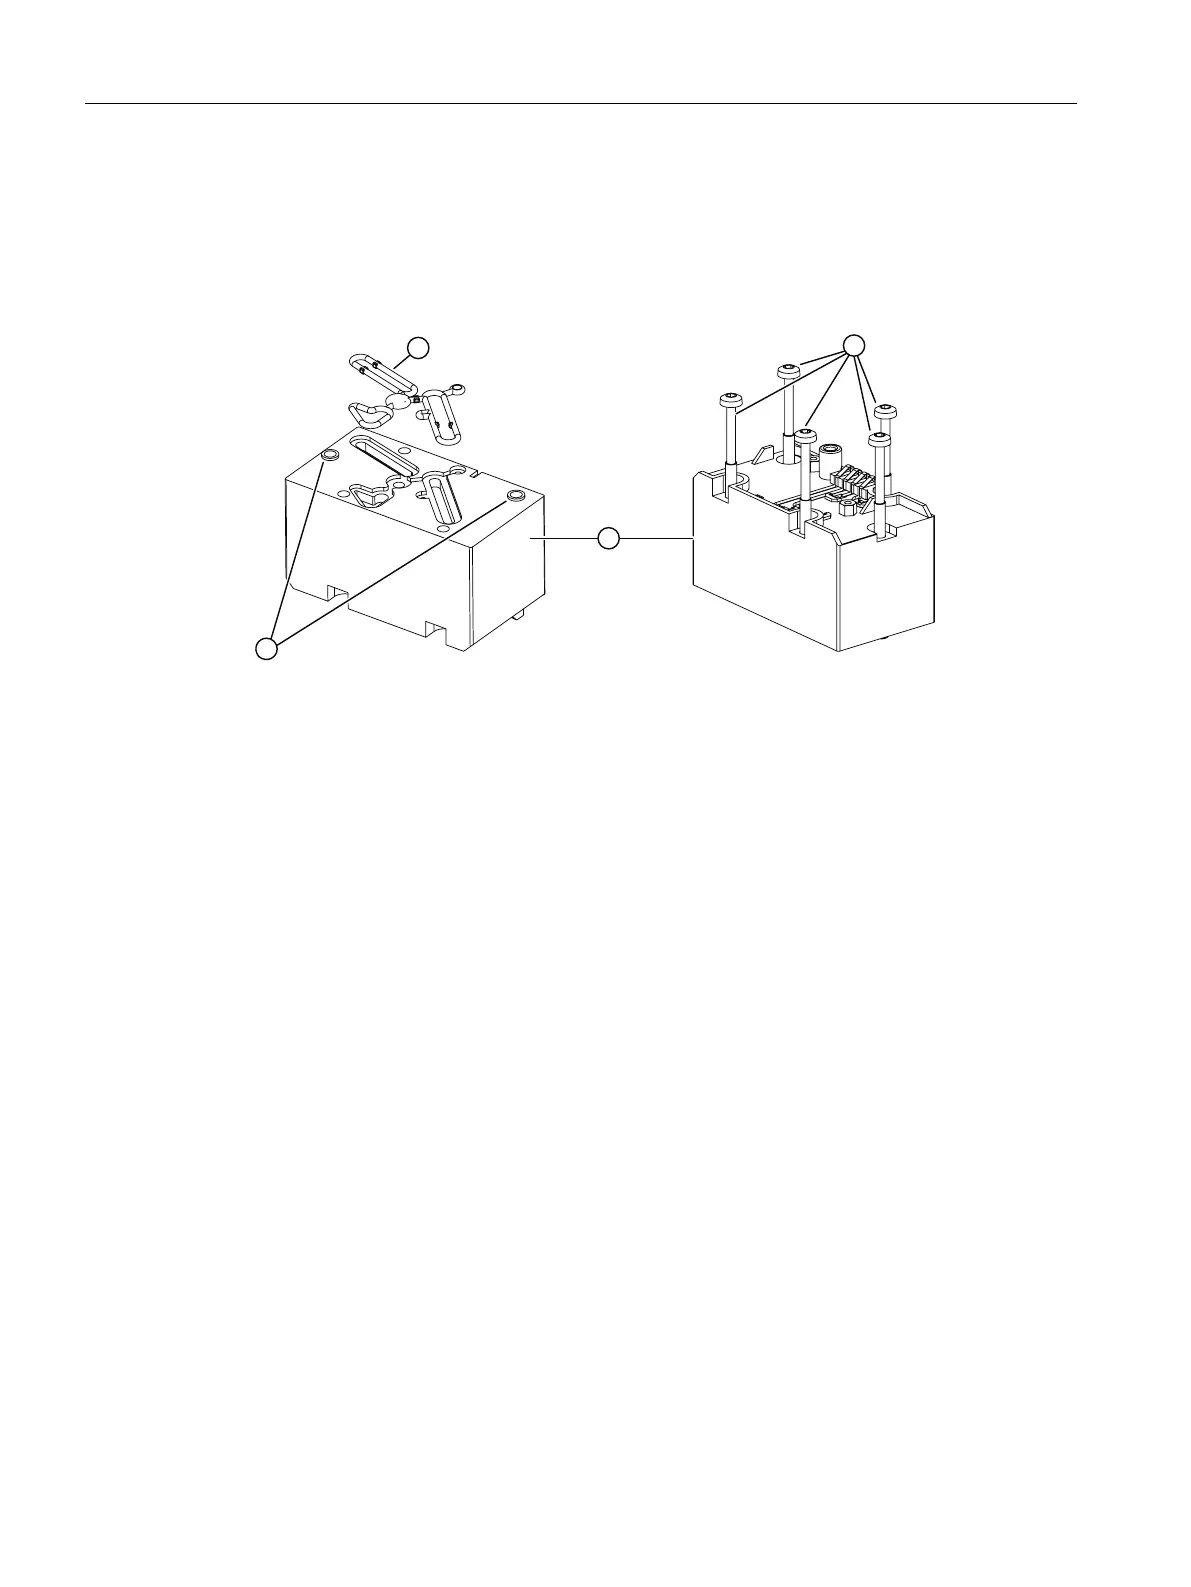
① Cord seal ③ Mounting screws
② Pneumatic block ④ Centering elements
Figure10-2 Removing the pneumatic block
Removing
1. Switch o the supply pressure PZ and depressurize the actuator.
2. Remove the electronics as described in the section "Replacing electronics (Page55)".
3. Unscrew the xing screws ③ of the pneumatic block ②.
The single-acting pneumatic block has 4 screws and the double-acting pneumatic block has
5 screws.
4. Remove the pneumatic block ② and the cord seal ①.
5. Blow any dirt o the surface on which the pneumatic block was placed.
Installation
1. Insert the new cord seal ① into the new pneumatic block ②.
2. Press the cord seal ① evenly into the groove on the pneumatic block ②.
3. Place the new pneumatic block on the base plate.
Make sure that the pneumatic block engages with the centering elements ④ on the base
plate.
4. Screw the supplied xing screws ③ into the pneumatic block.
5. Tighten the xing screws with a torque of 1.1Nm.
6. Install the electronics as described in the section "Replacing electronics (Page55)".
7. Switch on the supply pressure PZ.
8. Initialize the positioner using the "AUTO INIT (Page44)" parameter in the QUICK START [01]
menu.
Service and maintenance
10.6Replacing the pneumatic block
SIPART PS100
58 Operating Instructions, 06/2023, A5E50188938-AF
 Loading...