Initial Inspections
3-7
7SA6 Manual
C53000-G1176-C156-2
G
Open the DIGSI
®
4 application in the PC.
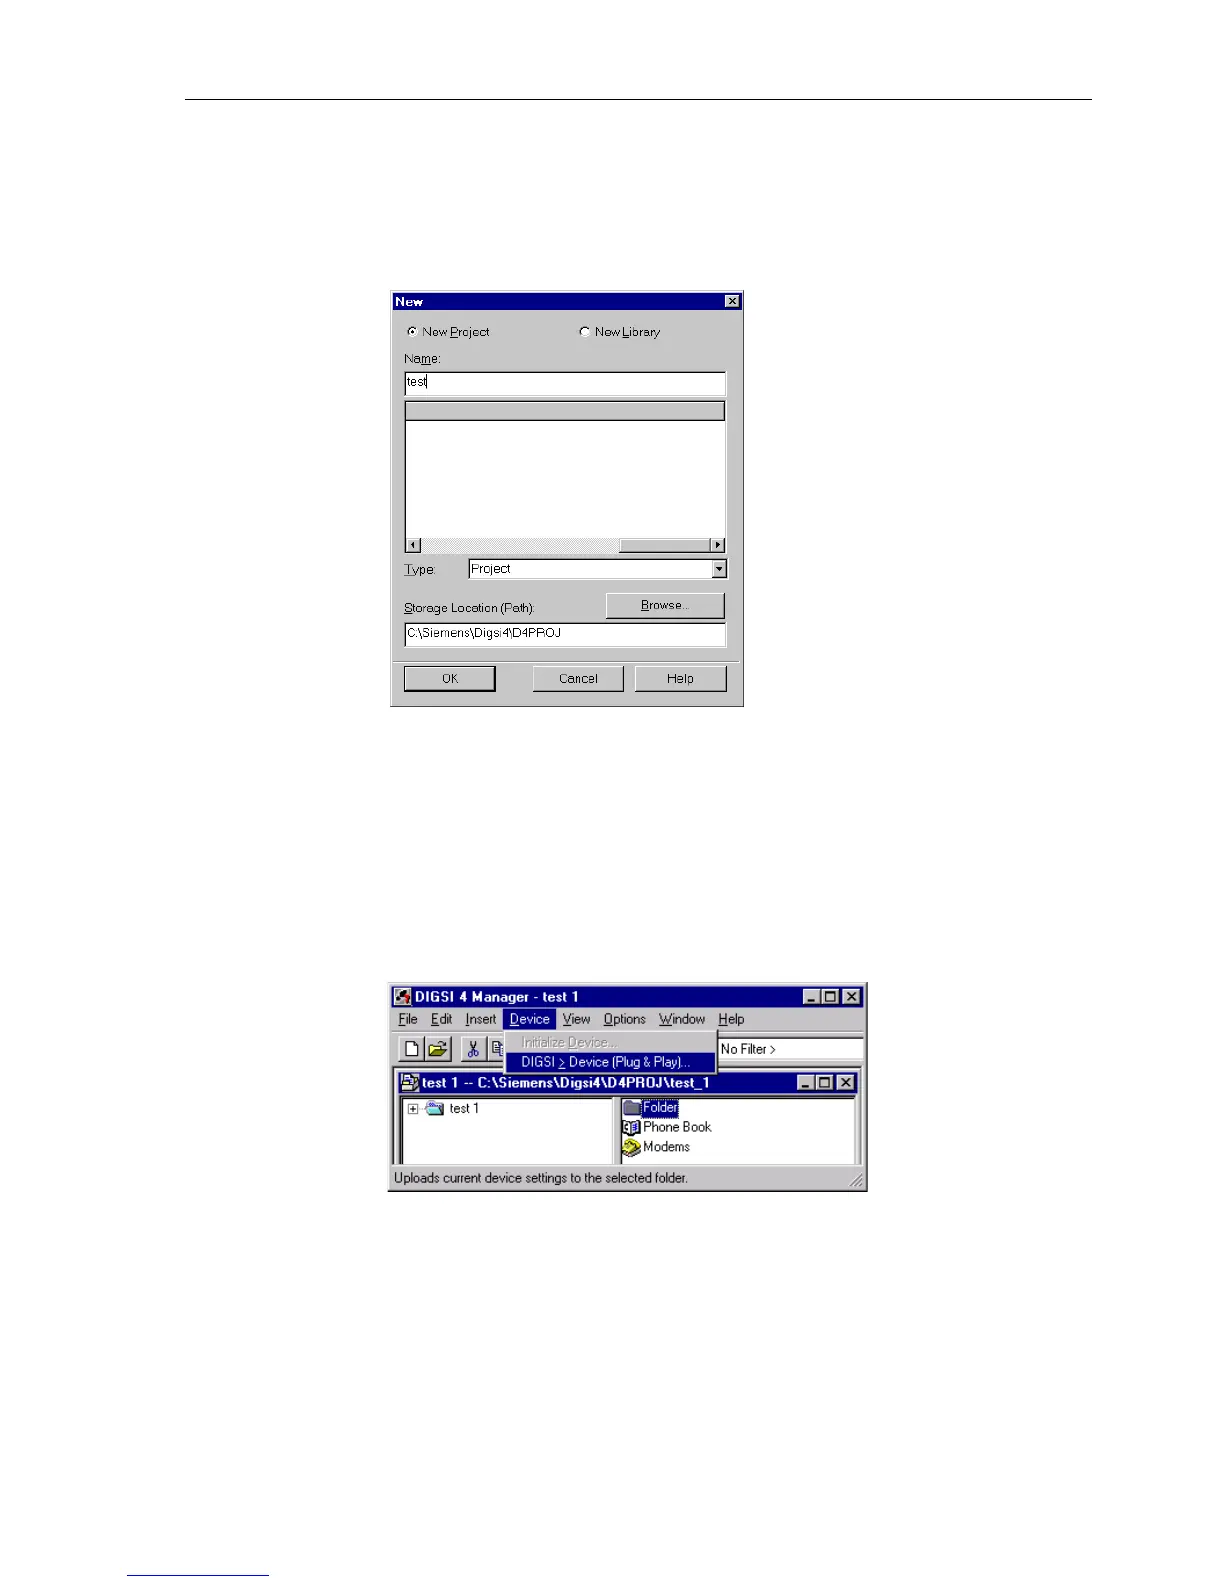
G Generate a new project by clicking on File → New in the DIGSI
®
4–Manager menu
bar.
Figure 3-4 Dialogue box to open a new project in DIGSI
®
4
G Enter a name for the new project in the Name entry field (e.g. test 1) and close the
box with OK.
G Select Folder by clicking on the item in the newly opened window. Then click in
the menu bar the item Device and select the option DIGSI > Device (Plug &
Play), as shown in Figure 3-5. The Plug & Play dialogue box opens, as shown in
Figure 3-6.
Figure 3-5 Window with selection of Plug and Play
G Enter the designation of the PC serial interface (COM 1,2, 3, or 4) and select in the
dialogue box under Frame the transfer format, to be used in making the connection.
G Click on OK.DIGSI
®
4 automatically determines the type of device present and
reads the settings needed for communication (transfer format, transfer speed)
through the interface.

 Loading...


