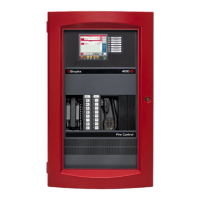
2-9
The important aspects of mounting the cabinet are:
Access for the operator;
Height of displays and controls;
Free space for door opening;
Cable entry for field wiring.
Refer to AS 1670.1 for the height requirement and minimum access requirements for the
cabinet.
In general, 18U – 28U cabinets will need to be wall mounted. Mounting holes and cabinet
dimensions are shown in drawing 1919-22.
Door opening left/right should be specified with the order. The cabinets are symmetrical,
top to bottom, so door opening can be swapped by removing the equipment, rotating the
cabinet 180, then re-fitting the equipment.
FIPs are ordered from the factory with bays and cards fitted as per the panel order
spreadsheet.
There are two formats used for bay mounting.
In the earlier format, used with the 4U LCD user interface door, the bays are mounted to
the front of the cabinet, with fold-down display doors fitted to the cabinets, and a 9U
dress panel fastened in front of each bay.
In the current format, used with the InfoAlarm graphic LCD user interface, the bays are
mounted to the rear of the cabinet. The InfoAlarm and Zone LED displays are mounted
on hinged doors mounted to the front of the cabinet. This allows the number of bays and
number of display doors to be independently chosen, and allows better internal access for
field wiring.
Additional mounting bays may be ordered to fit to an existing cabinet.
If the cabinet uses the earlier bay mounting format, the ordering code for a new bay is
4100-KT0446 which includes the 19” rack mounting brackets and earth loom.
Attach each mounting bracket to the two studs in the top and bottom of the front of each
bayside plate as shown in Figure 2-6.
Fit M6 cage nuts to the appropriate 19”rack holes, then attach the bay using M6
countersunk screws.
Step 1. Mounting Cabinets (4100ES)
Overview
Step 2. Mounting Card Bays to Cabinets (4100ES)
Overview
Front Mounting Bays
 Loading...


