30
Adding an ASE brigade transmission unit
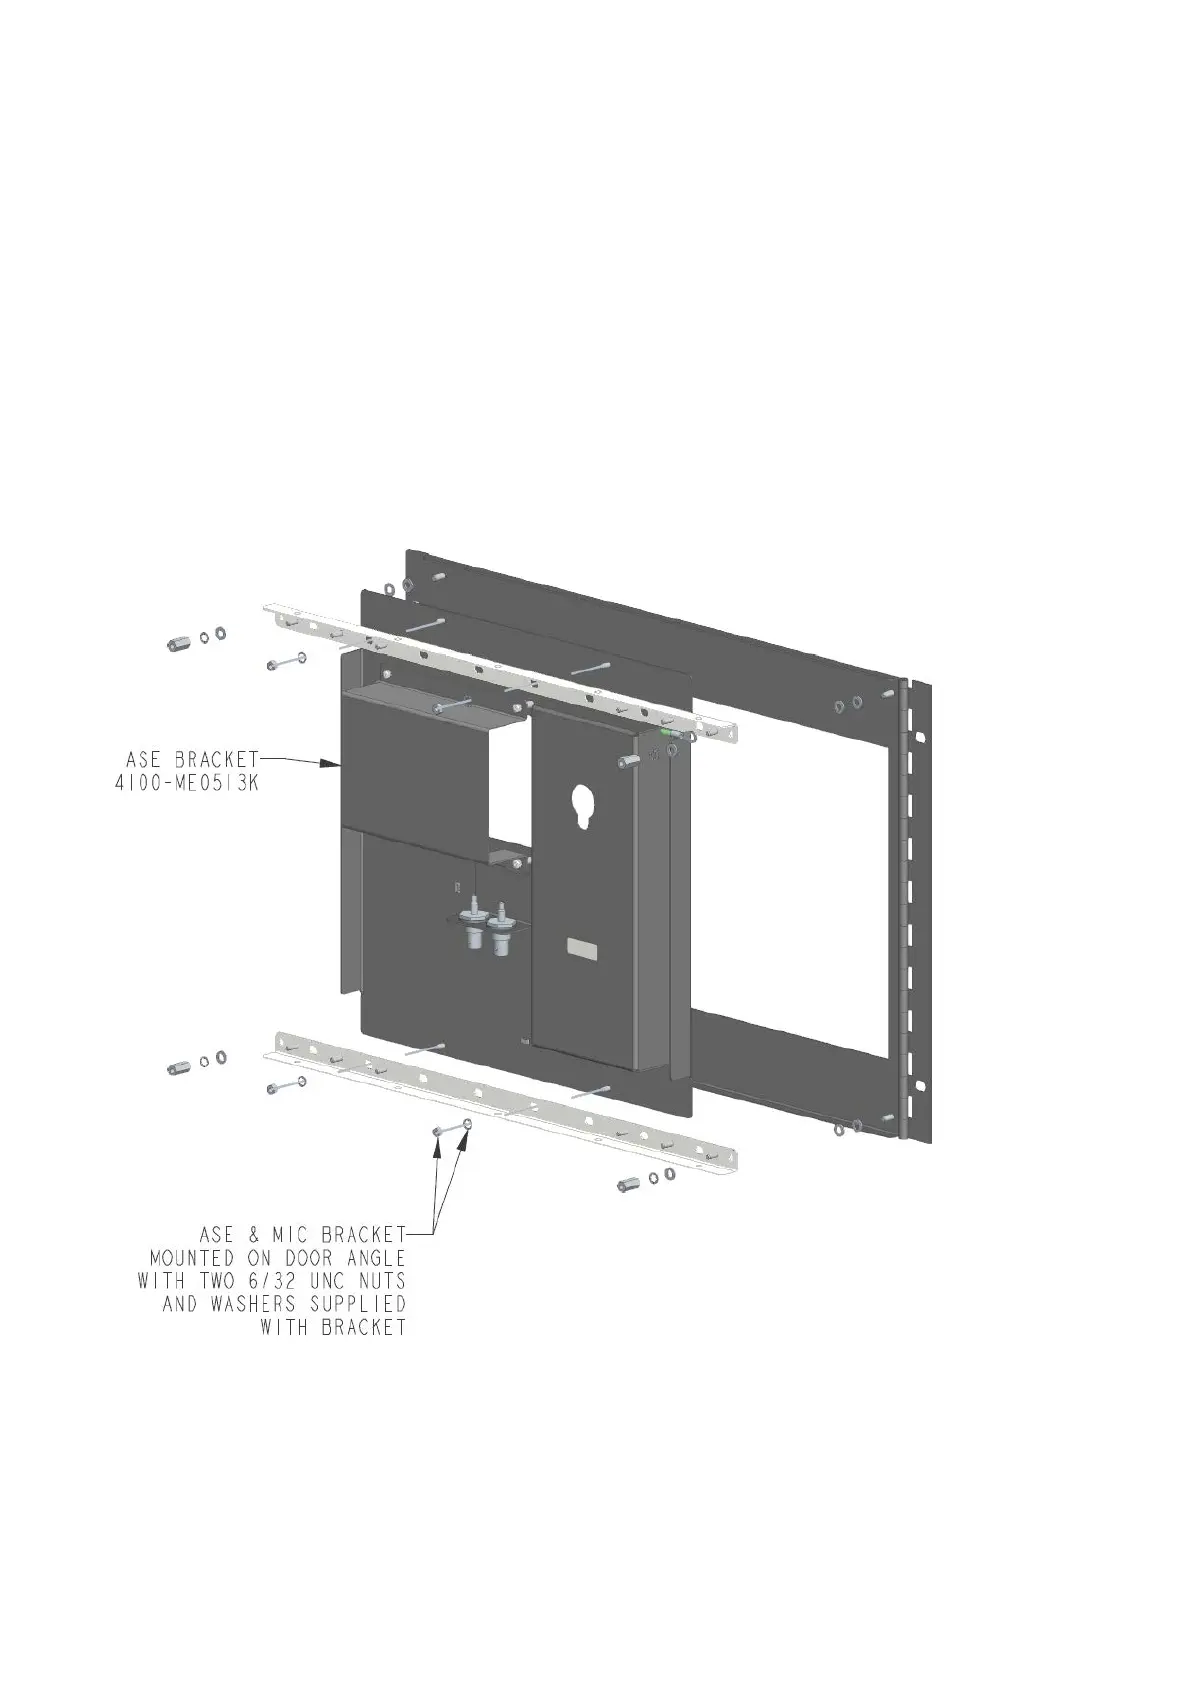
The mounting plate for the ASE and PA microphone mounts in a similar way to the individual display modules,
and must be mounted in the six right-most positions when viewed from the front. This mounting plate does not
require a 4100-1288 LED/Switch controller. Figure 16 shows mounting the bracket to the 7U display door.
For information about installing the ASE units, refer to LT0614.
Figure 16 shows the 4100-ME0513K mounting plate for Centaur ASEs. The same mounting arrangements
apply to the 4100-ME0512K for Cube ASEs or the third party WA ASE.
The 15U and 8U cabinets must use a 4100-ME0513K mounting plate, or the NTFast unit described in the
following section. The 28U and 40U cabinets can also use either the FP0935 4U Centaur ASE door or the
FP0937 4U Cube ASE door.
Figure 16. ASE mounting plate on a 7U door
Adding a NTFast brigade transmission unit
For the Northern Territory (NT) region, fit the FP1093 6U NT door. This requires either the 7U door to be
removed, or the 6U door to be fitted to an expansion cabinet, see Chapter 3, 8U and 15U Expansion Cabinets.
For information about installing and wiring, refer to the LT0624 NTFAST Installation Instructions supplied with
the 6U door, and diagram number 610 in the LT0432 4100ESi Australian Wiring Diagrams.