© Mar. 2023
114 AB16EJ Plus Maintenance Manual
CONTROL SYSTEM
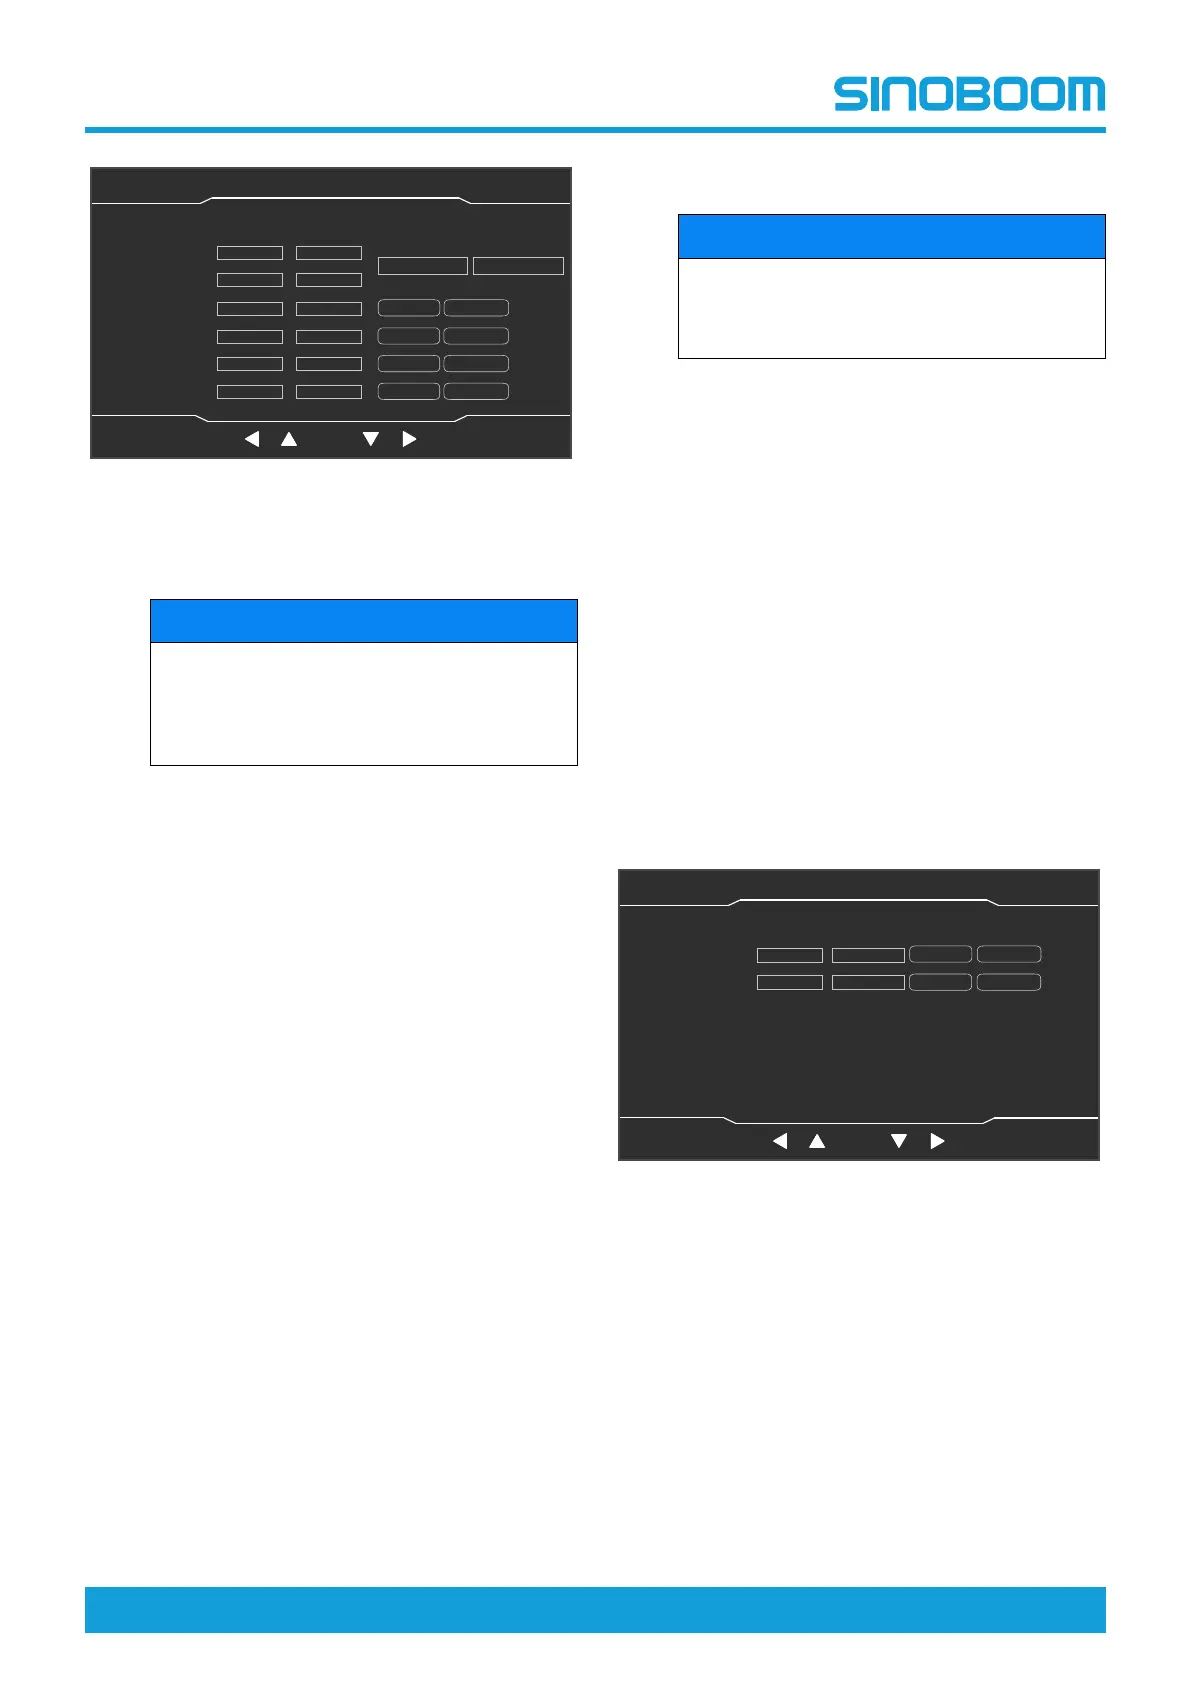
Fig 10 Machine Parameter Setting (2/7) interface
• Weight calibration
NOTICE
If the machine is equipped with a dual-channel
sensor, when pressing and holding OK button
for 3s for no-load and heavy-load calibration,
the two channels will be calibrated at the same
time.
1) Make sure that no heavy objects are placed
on the platform and that the platform is stable
without shaking.
2) Enter the Machine Parameter Setting (2/7)
interface, select the “Min Value” by pressing
the up shift key, down shift key, left shift key
and right shift key, adjust the value to 0 by
pressing the up shift key and down shift key,
press and hold the OK button for 3 seconds
to complete the no-load calibration.
3) Place a heavy object with the weight equal to
the rated load of the machine on the platform,
and ensure that the platform is stable without
shaking.
4) Select the “Max Value” by pressing the left
shift key and right shift key, adjust the value
to the weight value of the heavy object on the
platform by pressing the up shift key and
down shift key, press and hold the OK button
for 3 seconds to complete the full-load cali-
bration (the actual weight value on left side of
the display screen is equal to the weight val-
ue of loads on the platform).
5) If re-calibration is required, press the Setting
button to return to the System Setting inter-
face, then re-enter the Machine Parameter
Setting (2/7) interface, and repeat the pre-
vious steps.
6) Press the Home button to return to the Home
interface, and power off the machine as
needed.
• Sensor calibration
NOTICE
If the machine is equipped with a dual-channel
sensor, only 1 channel is needed to be se-
lected for maximum value and minimum value
calibration.
1) Enter the Machine Parameter Setting (2/7)
interface, select the position to be calibrated
by pressing the up shift key, down shift key,
left shift key and right shift key, press and
hold the OK button for 3 seconds to complete
the calibration (after successful calibration,
the actual value will be changed).
2) If re-calibration is required, press the Setting
button to return to the System Setting inter-
face, then re-enter the Machine Parameter
Setting (2/7) interface, and repeat the pre-
vious steps.
3) Press the Home button to return to the Home
interface, and power off the machine as
needed.
4. On the Machine Parameter Setting (2/7) interface,
press the Next button to enter the Machine Parame-
ter Setting (3/7) interface, which is mainly used for
sensor calibration. Perform calibration referring to
the above steps.
Fig 11 Machine Parameter Setting (3/7) interface
5. On the Machine Parameter Setting (3/7) interface,
press the Next button to enter Machine Parameter
Setting (4/7) interface.
OK
Machine Parameter Setting(2/7)
主页面 主页面 状态监控 状态监控 参数设置 参数设置
故障查询 故障查询
OK
设备状态(1/3)
主辅臂检测开关
机器处于工作状态
脚踏开关
折臂降到位开关
折臂升到位开关
主臂降到位开关
主臂升到位开关
主臂缩到位开关
后方检测开关
水平开关
Weight Value1
Weight Value2
MB Relative Angle1
MB Relative Angle2
0
0
0
Min Value
Max Value
0
Min Value
Max Value
0
Min Value Max Value
0
Min Value
Max Value
TB Relative Angle1
TB Relative Angle2
AD Value
0.00
0.00
0.00
0.00
0.00
0.00
Actual Value
Min Value:0
Max Value:0
Home Setting
Faults
Next
OK
Machine Parameter Setting(3/7)
主页面 主页面 状态监控 状态监控 参数设置 参数设置
故障查询 故障查询
OK
设备状态(1/3)
主辅臂检测开关
机器处于工作状态
脚踏开关
折臂降到位开关
折臂升到位开关
主臂降到位开关
主臂升到位开关
主臂缩到位开关
后方检测开关
水平开关
MB Absolute Angle1
MB Absolute Angle2
0
0
Min Value Max Value
Min Value Max Value
AD Value Actual Value
0.00
0.00
Home Setting
Faults
Next
 Loading...