POWER SYSTEM
TB20J Plus Maintenance Manual 61
© Feb. 2023
Replace and Drain the Fuel Pre-filter
It is recommended to drain the fuel pre-filter daily and
replace the fuel pre-filter element every 6 months or
after 500 hours of operation.
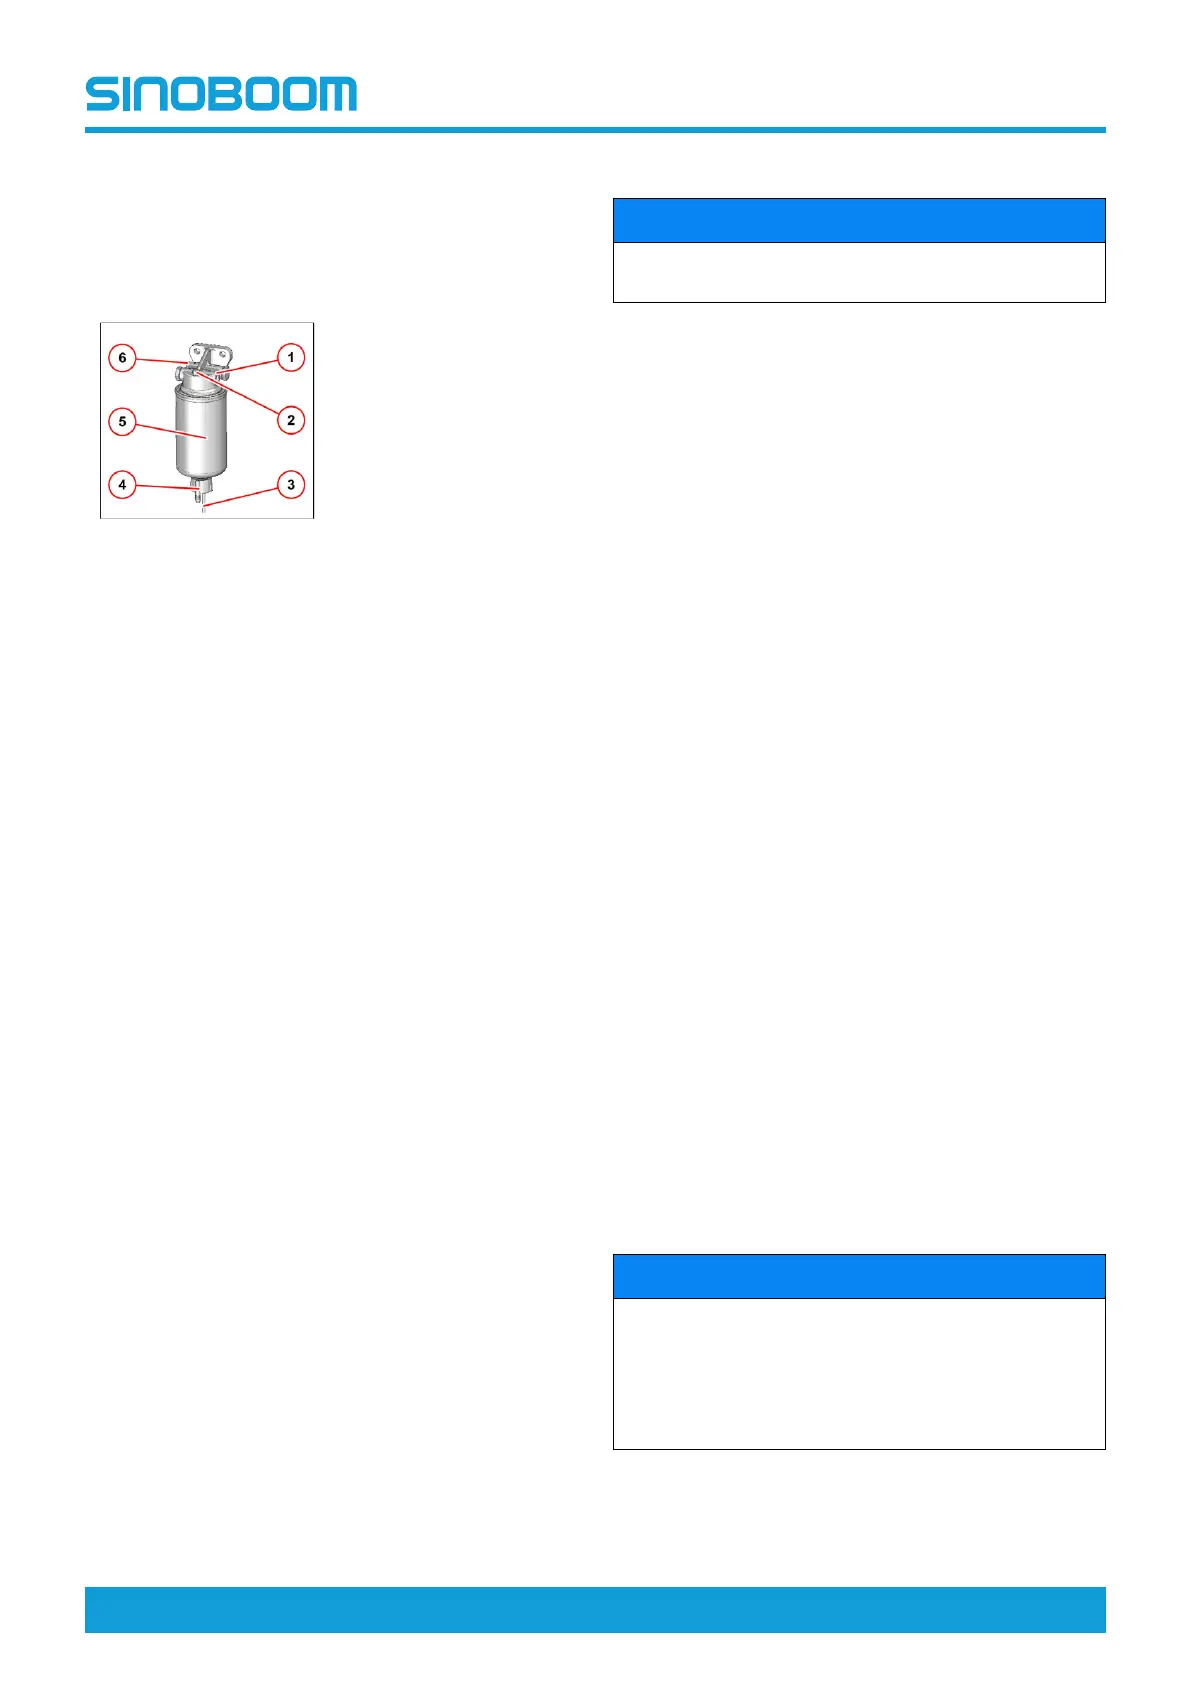
Fig 4 Fuel pre-filter
1. Fuel transfer pump
2. Venting bolt
3. Electrical connection
for level sensor
4. Drain valve
5. Filter element
6. Fuel supply from fuel
tank
Empty water tank:
1. Turn off the engine.
2. Place an appropriate oil-collecting vessel under the
drain valve.
3. Disconnect the cable harness.
4. Open the drain valve to allow the liquid to flow out
completely.
5. Mount the drain valve.
6. Connect the cable connectors.
Replace the fuel pre-filter:
1. Turn off the engine.
2. Close the fuel shut-off valve to disconnect the fuel
supply to the engine (with high-lying tank).
3. Place an appropriate oil-collecting vessel under the
drain valve.
4. Disconnect the cable harness.
5. Open the drain valve to allow all liquid to flow out.
6. Remove the filter element.
7. Clean any dirt off the sealing surface of the new filter
element and opposite side of the filter head with
clean, non-fiber cloths.
8. Apply a thin layer of oil to the sealing surface of the
new filter element.
9. Screw on the new filter by hand until the gasket is
touching, then tighten it with the torque of 17-18Nm
(12.5-13.3ft-lb).
10. Mount the drain valve.
11. Open the fuel shut-off valve to vent the fuel lines.
Vent the Fuel Lines
NOTICE
Failure to vent the fuel lines may bring damage to the
high-pressure pump of the injection system.
The fuel lines is vented through the electric fuel supply
pump.
Note: To avoid false fault messages, do not attempt to
start the fuel system while venting.
1. Ignition: Turn on the electronic fuel supply pump for
20 seconds to vent the fuel lines and build up the re-
quired fuel pressure.
2. Wait until the fuel supply pump is disconnected from
the control unit.
3. Turn off the ignition.
4. Repeat the above steps at least 4 times until the fuel
lines are fully vented.
Lubrication System
Check the Engine Oil Level
1. Turn off the engine.
2. Make sure that the machine and engine are
horizontal.
3. Remove the oil dipstick from the engine and wipe
the dipstick with non-fiber cleaning cloths.
4. Put the clean dipstick back to its original position.
5. Remove the dipstick again and check the oil level,
which should be between the FULL (HOT) mark and
LOW (COLD) mark on the dipstick.
6. If necessary, fill with correct engine oil to the FULL
(HOT) mark on the dipstick according to the Oil Re-
quirements , and do not overfill the tank.
Change the Engine Oil
It is recommended to change the engine oil every 6
months or after 500 hours of operation.
NOTICE
• Every time the engine oil is changed, the engine
oil filter must also be replaced.
• Changing the oil with the engine warmed up can
make the engine oil flow smoother and remove
more impurities.
1. Before changing the oil, warm up the engine so that
the engine oil reaches approximately 80°C (176°F),
and then turn off the engine.