65 71 165 D3639
28 D3639.201.01.02.02 10.2016
4Transport and commissioning Sirona Dental Systems GmbH
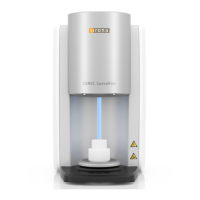
4.6Commissioning Operating Instructions CEREC SpeedFire
4.5.4 WLAN configuration
Use the USB WLAN adapter also supplied for wireless connection of the
unit to an existing network.
1. Inset the adapter into one of the existing USB slots on the control
panel.
2. Activate the WLAN configuration in the Settings menu /
"WLAN-
Settings"
by pressing
"ON"
.
3. As soon as the WLAN function is activated, available networks are
shown. Pressing on the desired network will open the network key
entry dialog automatically. Input the network key and confirm the
entry by pressing enter.
4. Press on the selected network again to open the IP address input
window.
5. Tap on the number field to change the IP address. By pressing the
relevant rows, you have the option to change the entry.
6. Before leaving the menu, confirm the entry by pressing enter.
Otherwise your changes will not be saved.
7. You can now leave the menu and configure the settings on the PC.
8. Select the network selected on the SpeedFire on the PC and adjust
the IP address accordingly where necessary.
9. You can now automatically search for the device in the CEREC
software device configuration or add it manually.
4.6
Commissioning
4.6.1 Insert the storage tray baseplate
➢ Place the baseplate also supplied into the storage area provided
above the fan.